1. The restaurant can get connected with Grab
2. Allow to recognize service charge before promotion
3. Add settings: Show QR Code of QRIS on the second screen
4. Add a feature: Allow the restaurant to issue and manage Vouchers
1.The restaurant can get connected with Grab
Purpose:
The manager can get connected with Grab to receive and handle orders quickly
Instruction steps:
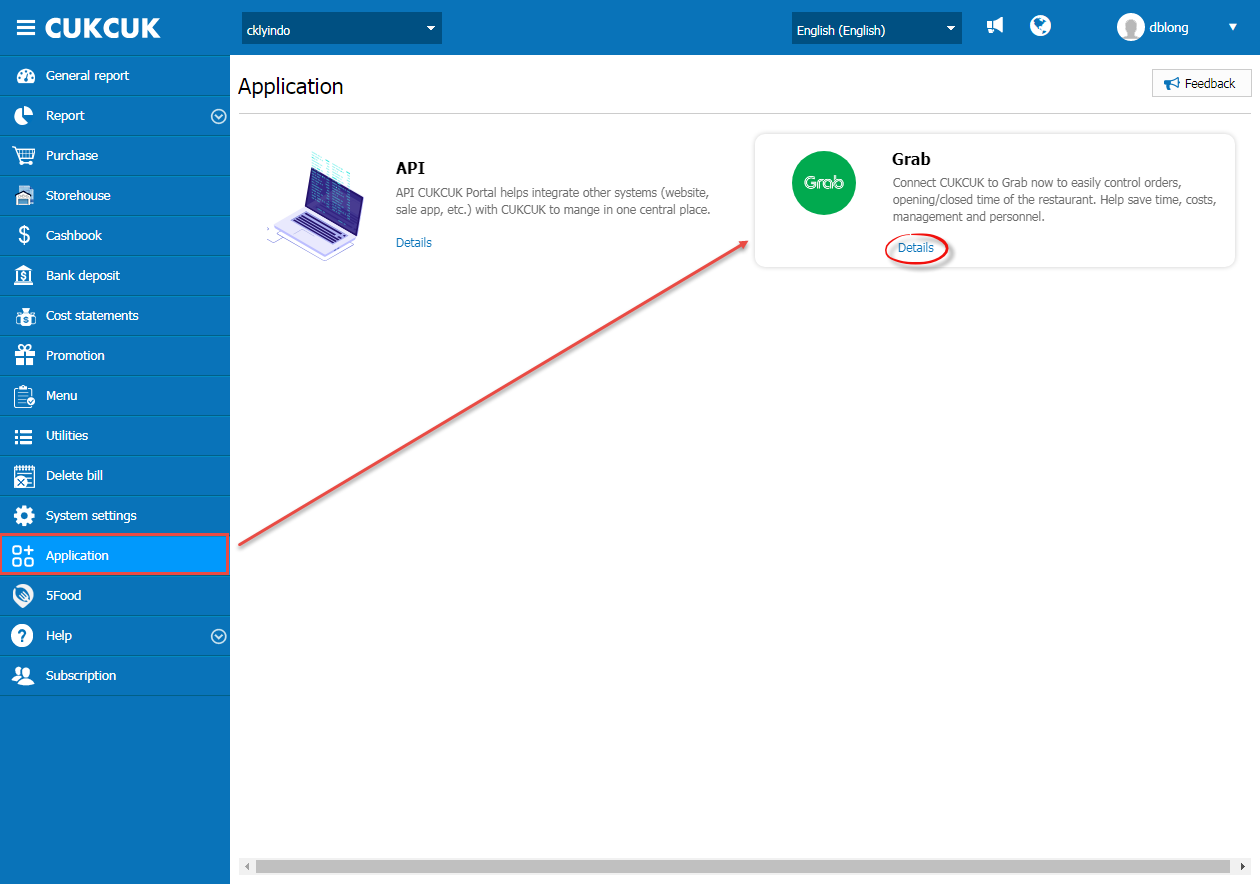
On the management page, go to Application and select Grab to log in your Grab account.
To get connected with Grab, the manager enters full information. Then click Connect.

After connecting successfully, in the first login the restaurant needs to set up general information as below:
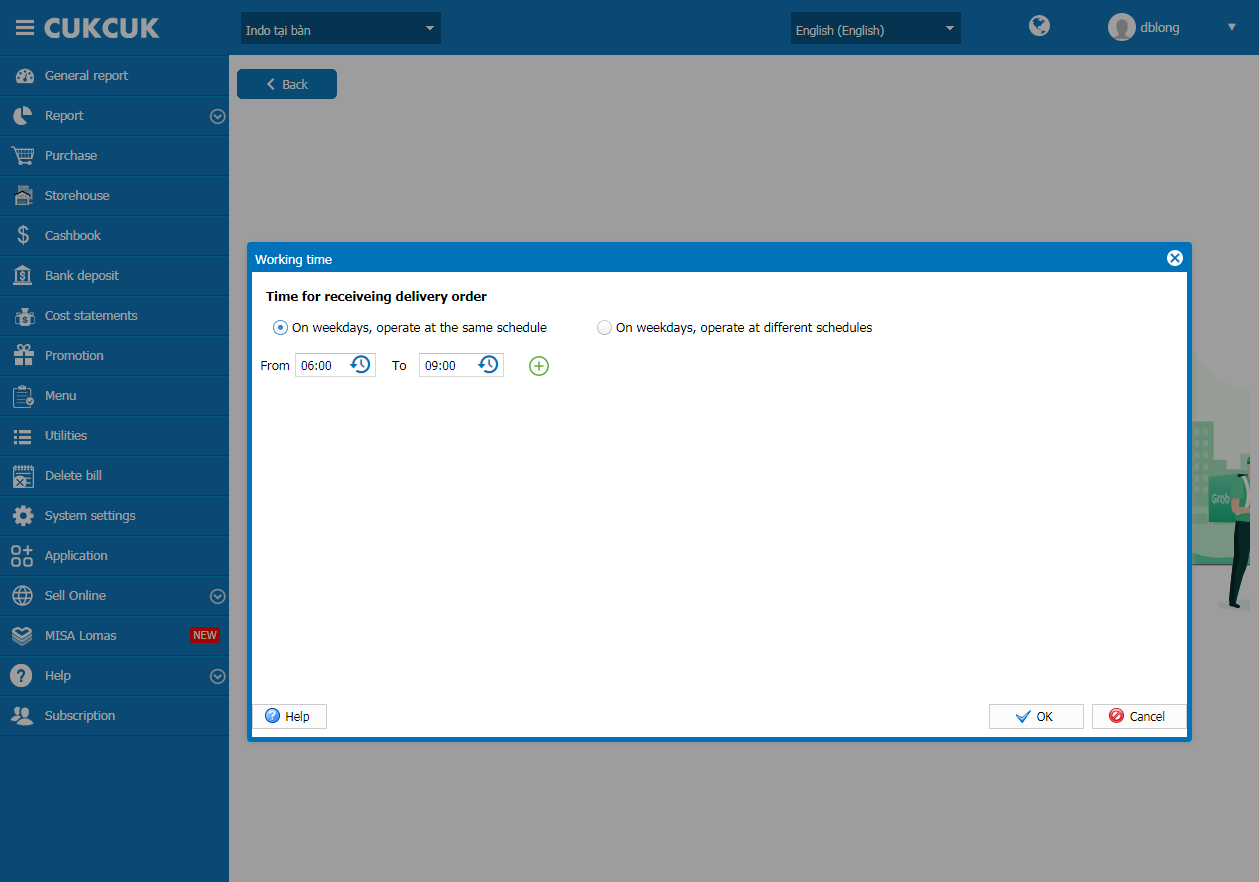
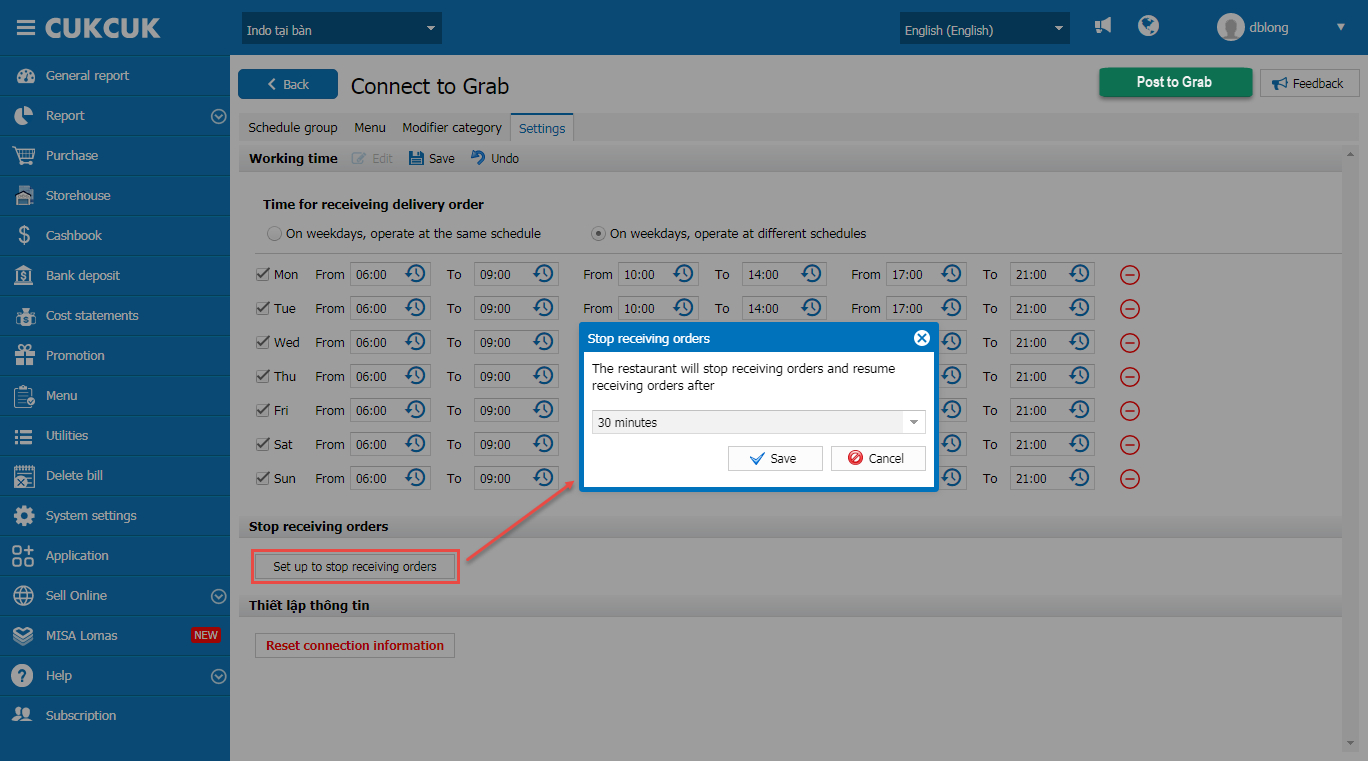
Step 1: Set up working time
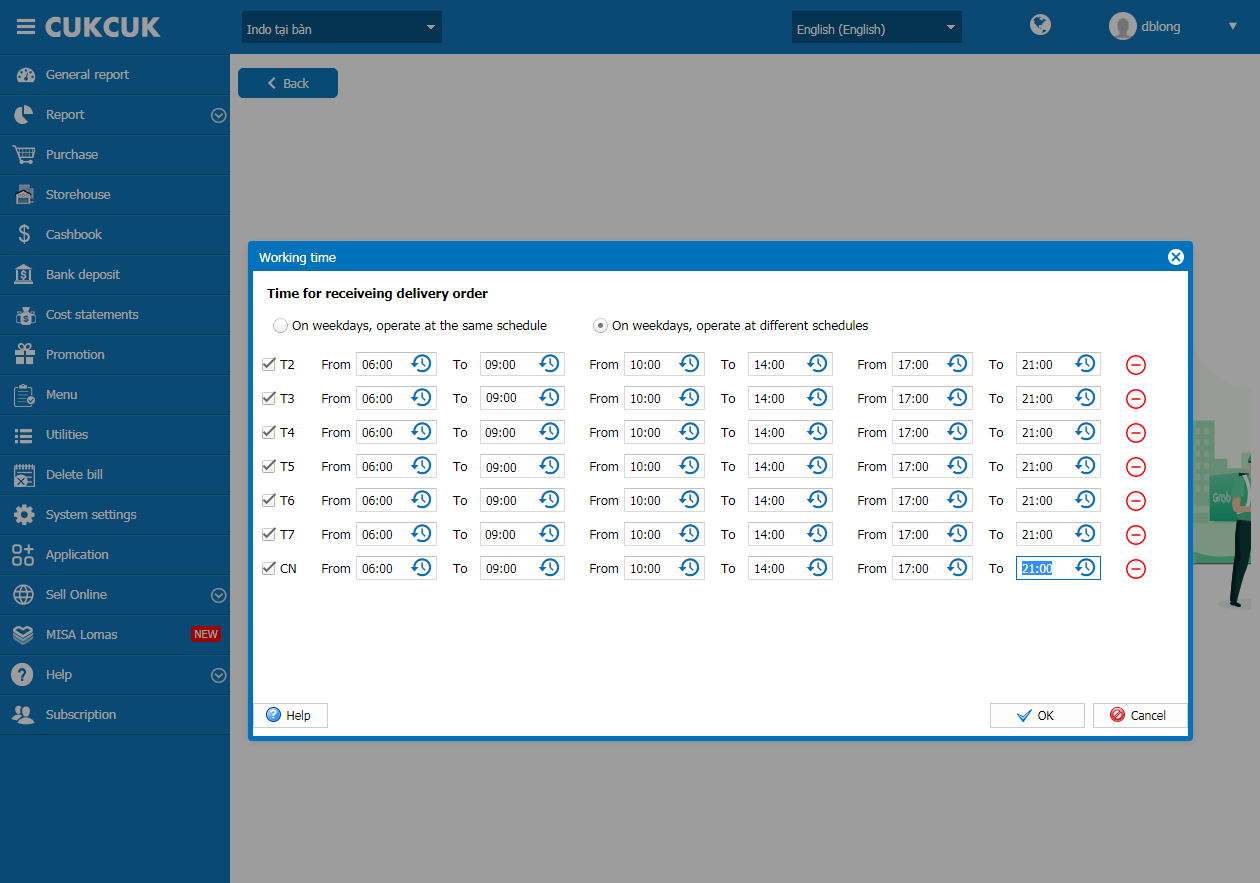
On Set up working time screen, check the time the restaurant receives delivery orders and click OK.
– Days of the week with the same schedule
– Days of the week with different schedules
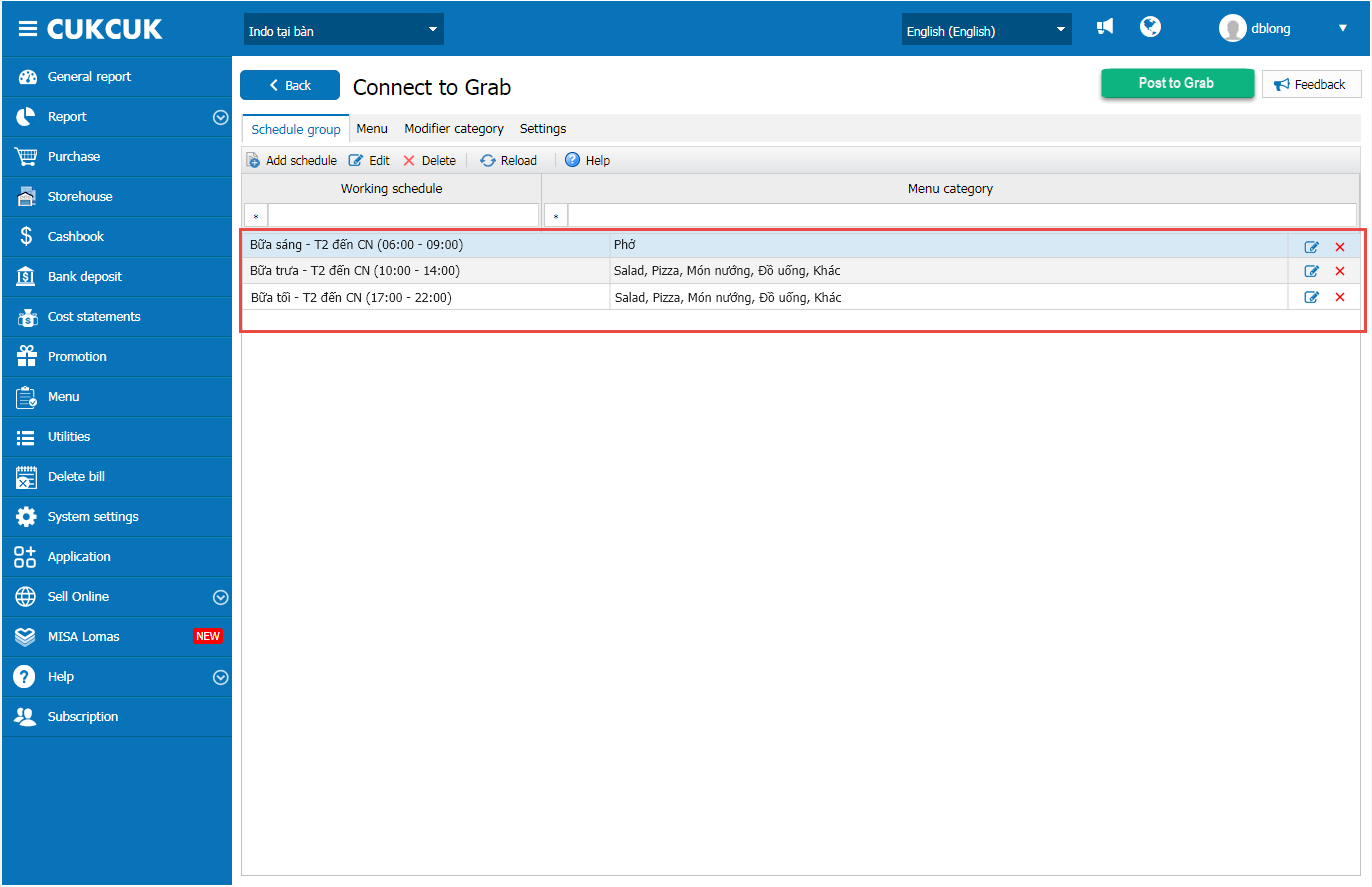
Step 2: Set up schedule group and menu categories on Grab
On Schedule group screen, select Add schedule group. The manager enters schedule name and selects active schedule.
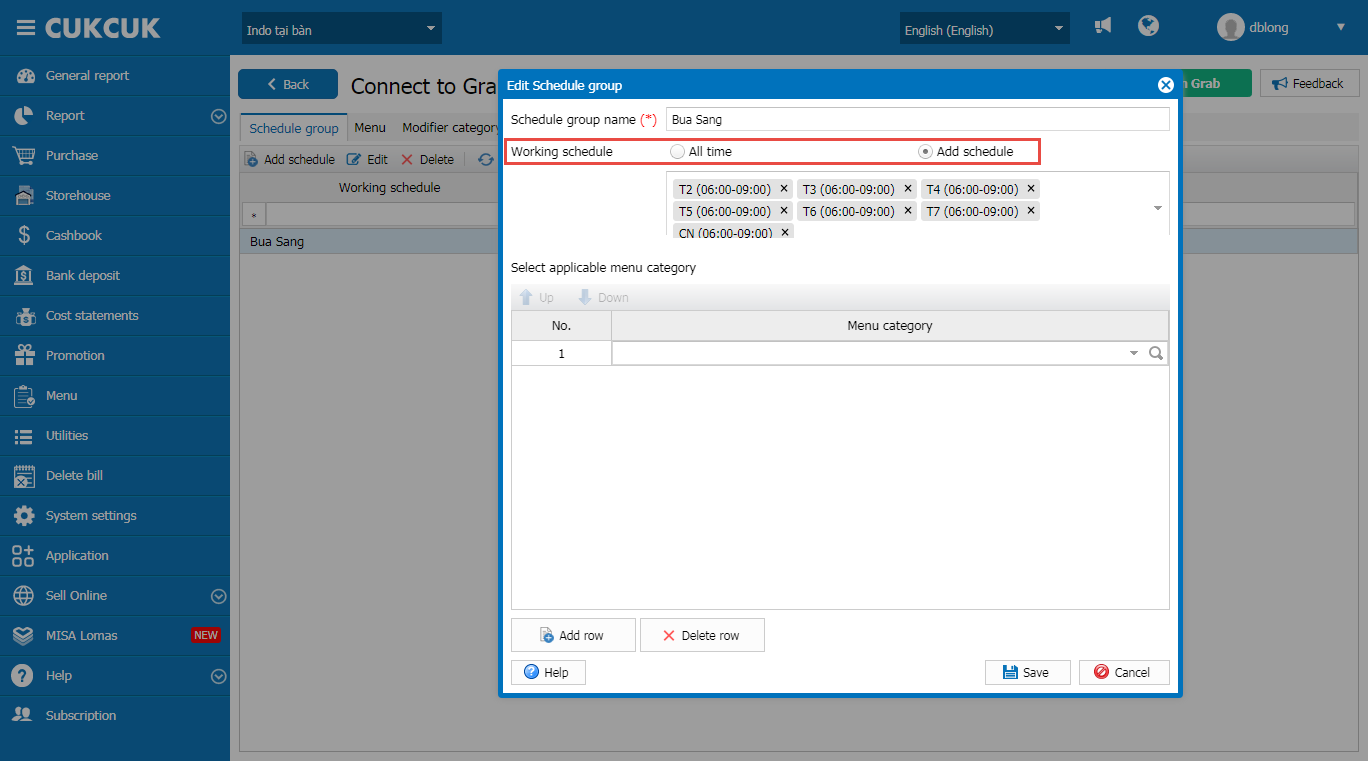
– Select menu category to sell in the schedule.

Then click Save.
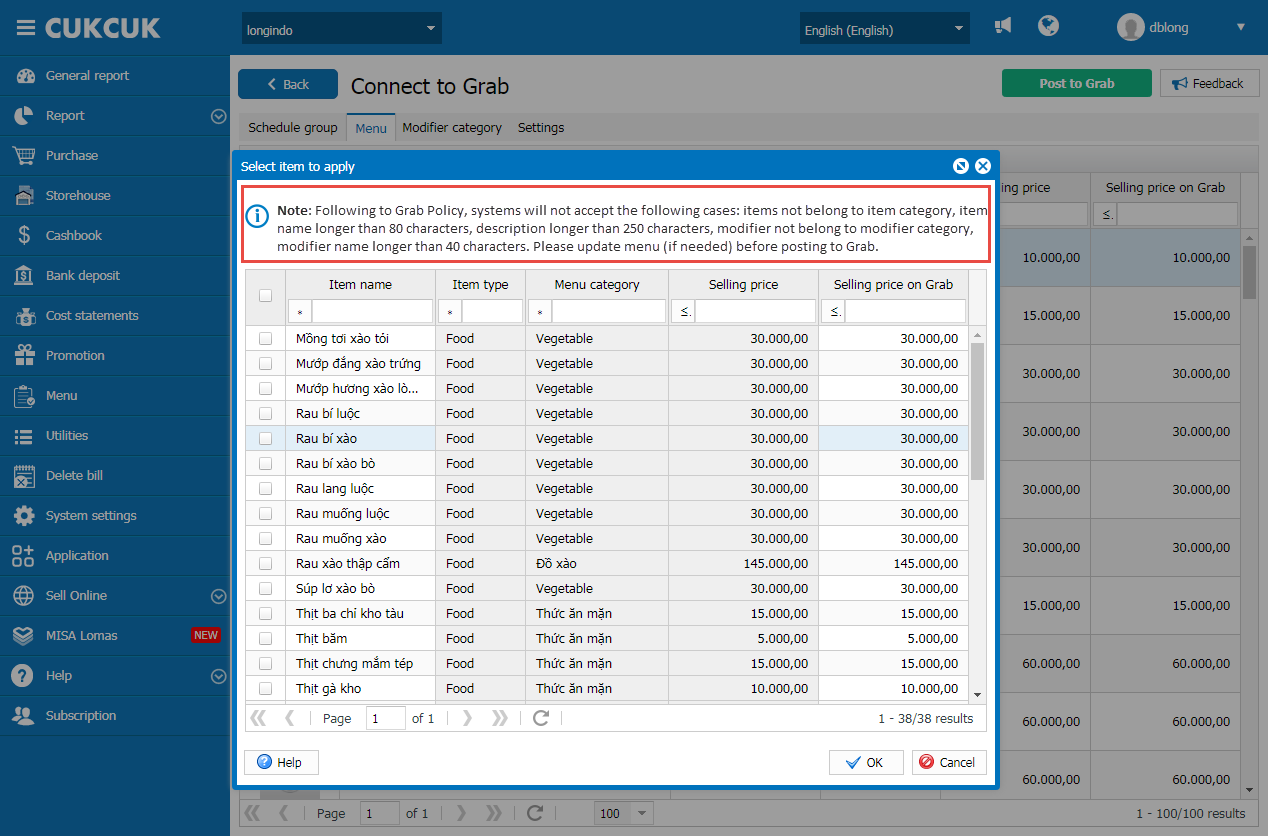
Step 3: Set up list of items to be sold on Grab
On List of items settings, select Menu/Select item, check items to be sold on Grab

Moreover, the manager can adjust price.
Note:
For invalid items, the program will show warning and do not add them to Grab.
Moreover, on Edit item screen the manager can edit or add Modifiers at the guests’ request.

Step 4: Set up modifier category
On Edit modifier category screen, the manager sets up modifier category as below:
– Required to select modifier category upon recognizing item: the manager checks Yes or No depending on the restaurant’s need.
– Maximum number of selected modifiers: If the restaurant sets up many modifier categories, the manager needs to enter exact number of modifiers.
– Status: the manager checks Active, Inactive or Hide according to the existing modifier category at the restaurant.
Then click Save to finish

Moreover, at Status column the manager can select Active or Inactive if the modifier is out of stock.

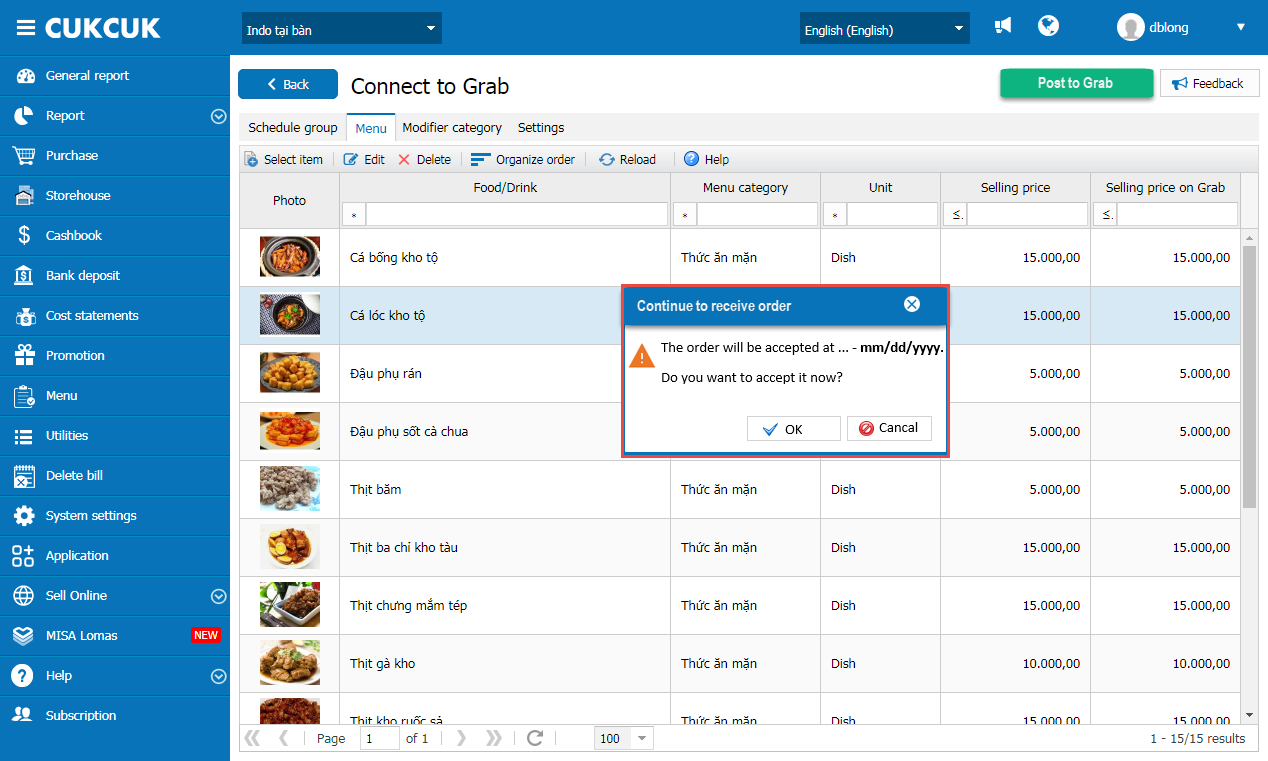
Step 5: Set up to stop receiving orders when the restaurant overloads
Click on Set up to stop receiving orders. Then click Save
When the set time ends, there will be a message The order will be accepted at … – mm/dd/yyyy. Do you want to accept it now?. According to the situation at the restaurant, the manager will click OK or Cancel.
Note:
– When there’s order on Grab, the program will synchronize to PC, Mobile/Tablet so that the cashier can easily follow up, confirm and process delivery.
– After the order is delivered, revenue is recognized to the report on the management page
– The software only supports the restaurants which have Store on Grab
– After setting up on the management page, click Post on Grab in order for the program to synchronize to the store on Grab.

2. Allow to recognize service charge before promotion
Purpose:
The cashier can apply service charge before promotion
Instruction steps:
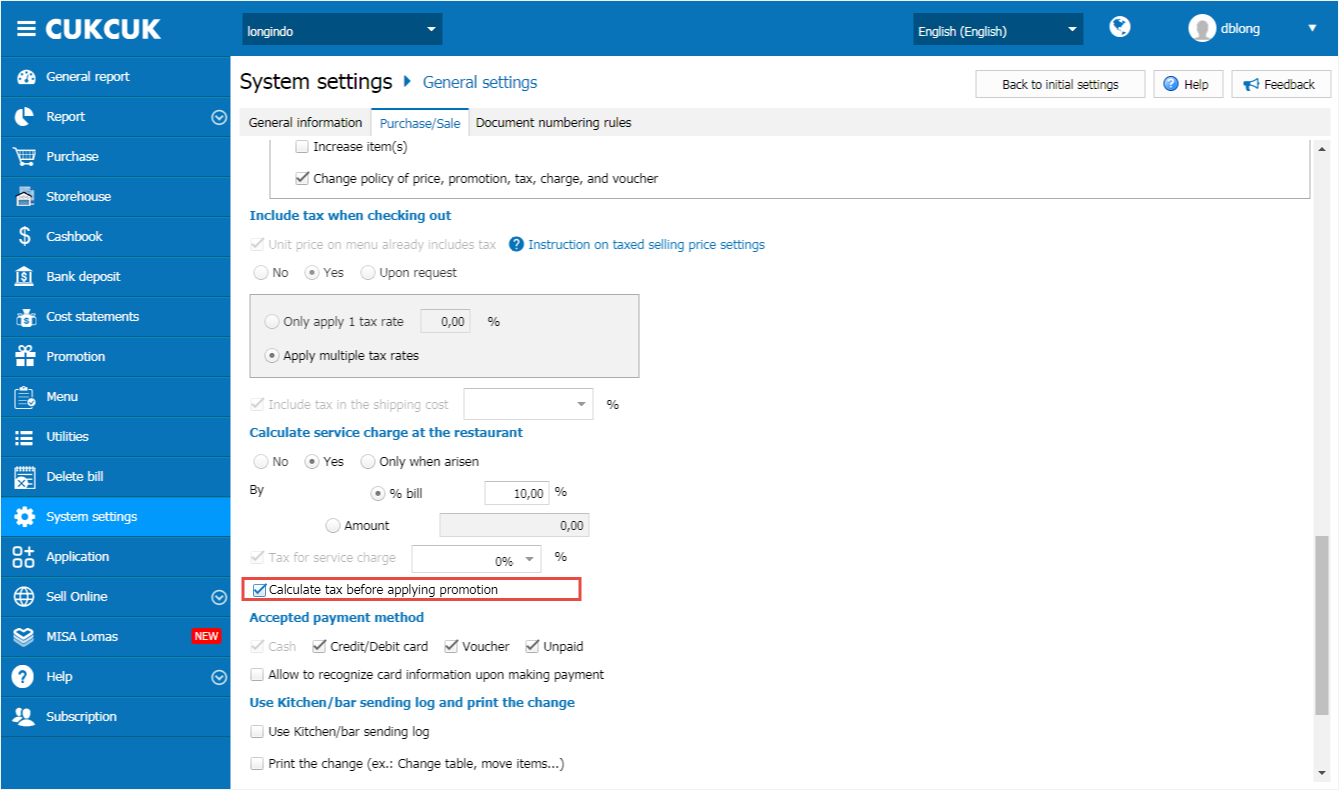
On the management page, select System settings\General settings\Purchase\Sale.
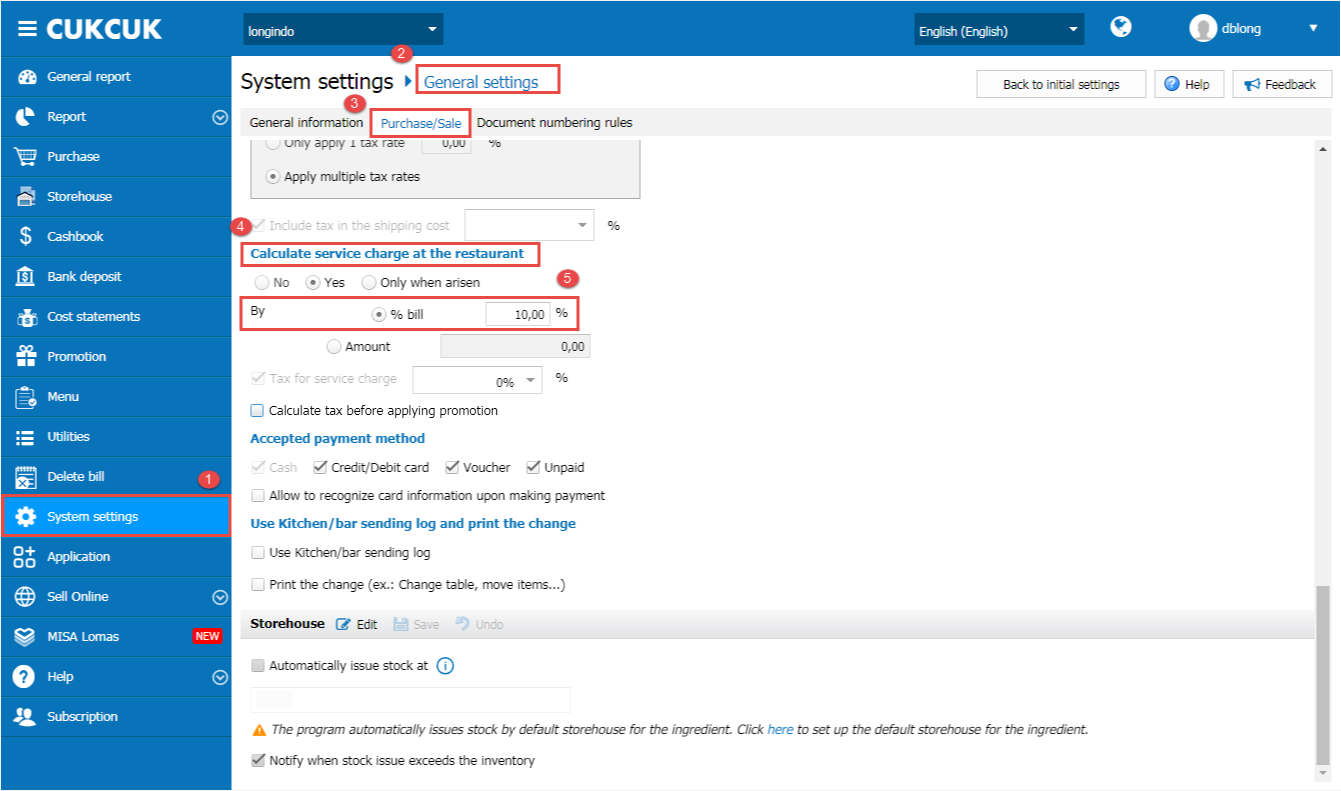
At Calculate service charge at the restaurant if the restaurant checks By % bill and Calculate service charge for the amount before promotion, the cashier can include service charge on the amount before promotion.
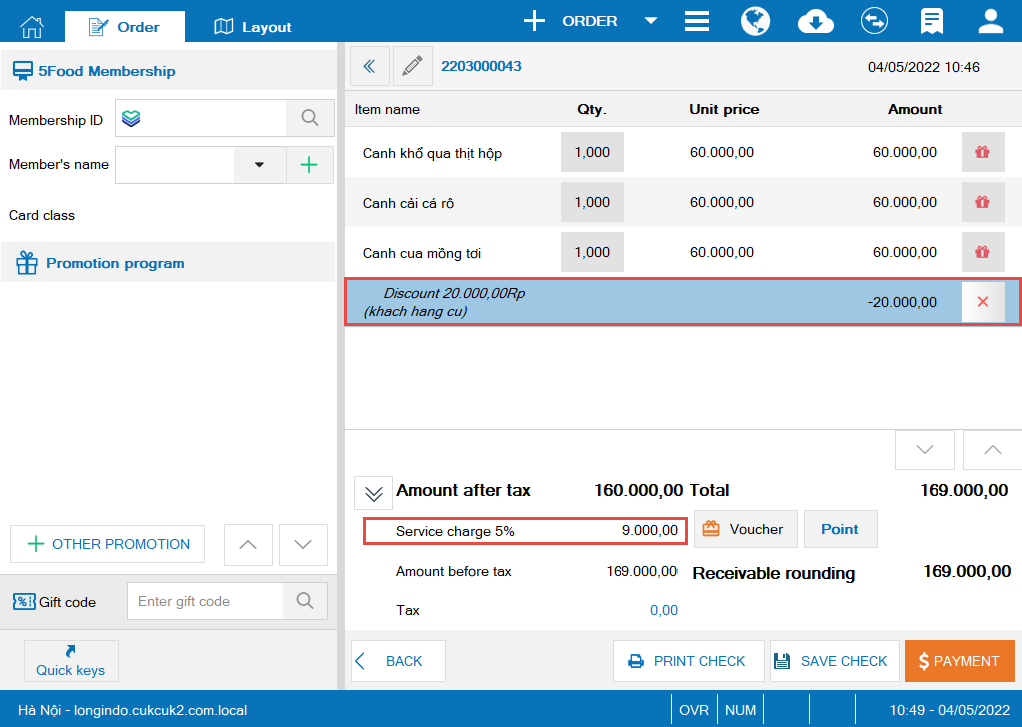
Here is check-out screen on PC.
3. Add settings: Show QR Code of QRIS on the second screen
Purpose:
Upon making payment via QRIS, the guests can scan QR Code on the second screen
Instruction steps:
On check-out screen, when the cashier selects QRIS, the program will show QR Code on the second screen.
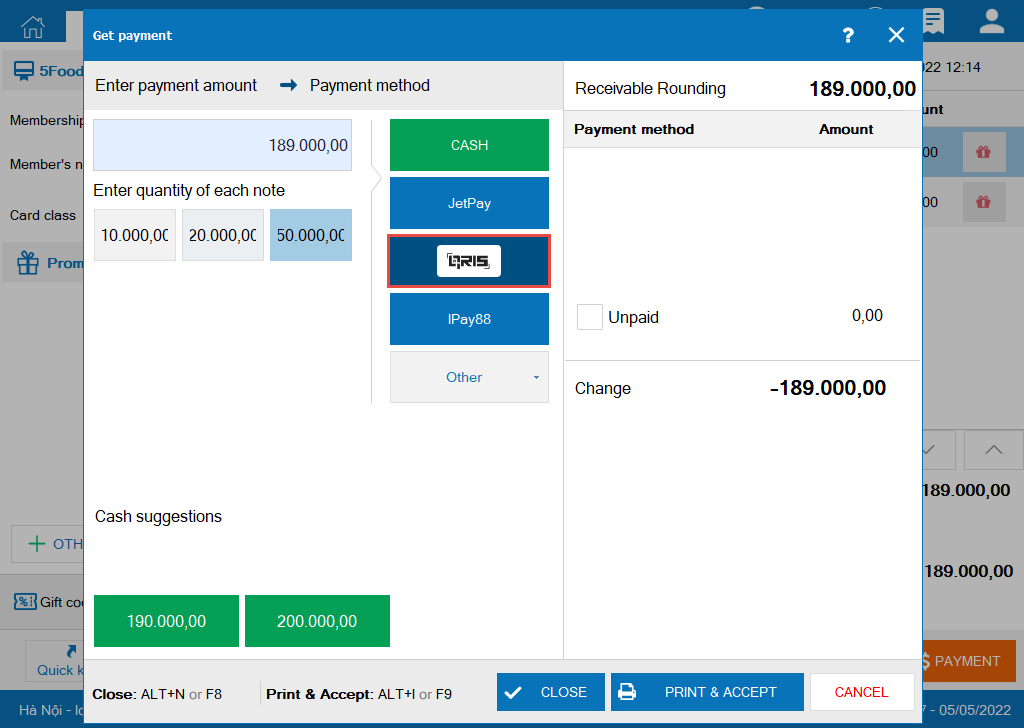
Then the guest can scan the code and make payment via QRIS.

Upon getting payment successfully, the cashier clicks Close or Print code for the guest.

4.Add a feature: Allow the restaurant to issue and manage vouchers
Purpose:
The cashier can create voucher and manage the issuance and use of vouchers at the restaurant
Instruction steps:
I. On the management page
II. On PC
III. On Mobile/Tablet
IV. On Quick-service software
Here are details of change:
I. On the management page
1.1. Follow up and manage vouchers
On the management page, on Promotion/Voucher, the software allows the manager to manage list of vouchers created by the cashier. The manager can follow up these information:

Note:
The software defaults this month, and you can edit it.
When the cashier issues vouchers on PC. After clicking OK, on the management page it will automatically generate pay-in note and default reason is “<khách hàng> bought voucher”
1.2. Set up how to search voucher ID
Go to General settings\Purchase/Sale, check the box Allow cashier to search voucher code by customer phone number and click Save.

By checking this box, on PC/Mobile/Tablet the cashier can search voucher ID with the guest’s phone number.
II. On PC
Step 1: On PC, click the icon  and select Issuing Voucher to create Voucher.
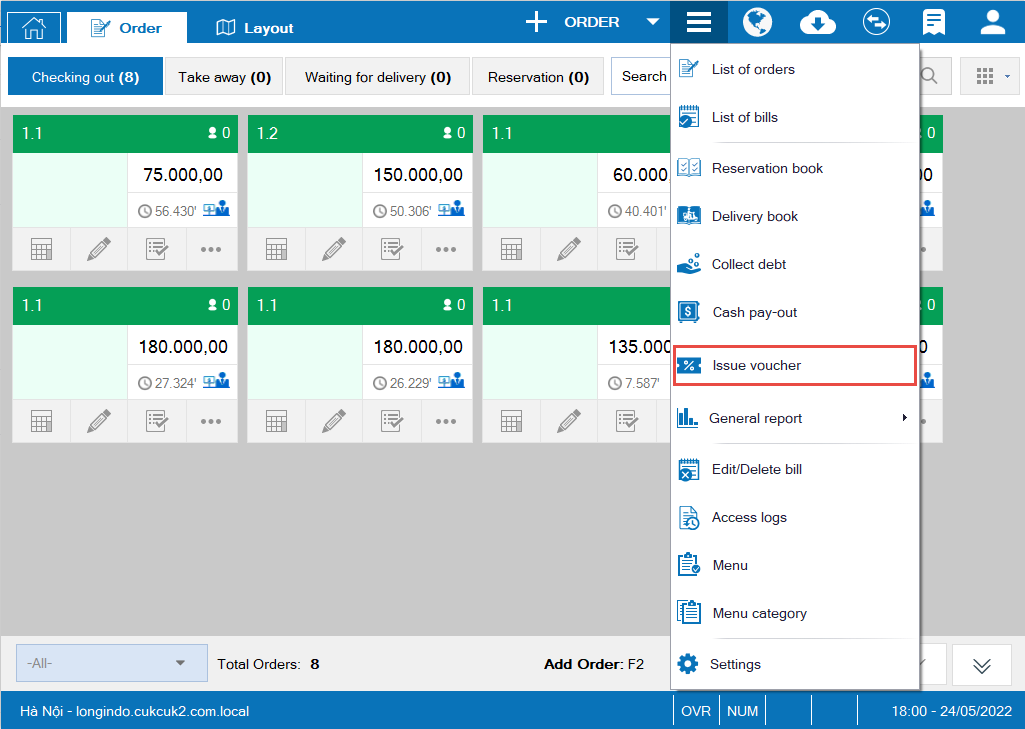
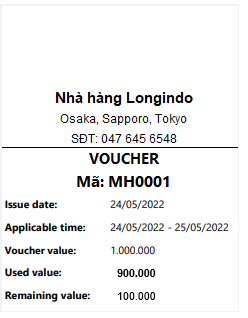
Here the cashier can enter full information. Then click OK. The program will automatically print vouchers in the applicable paper size

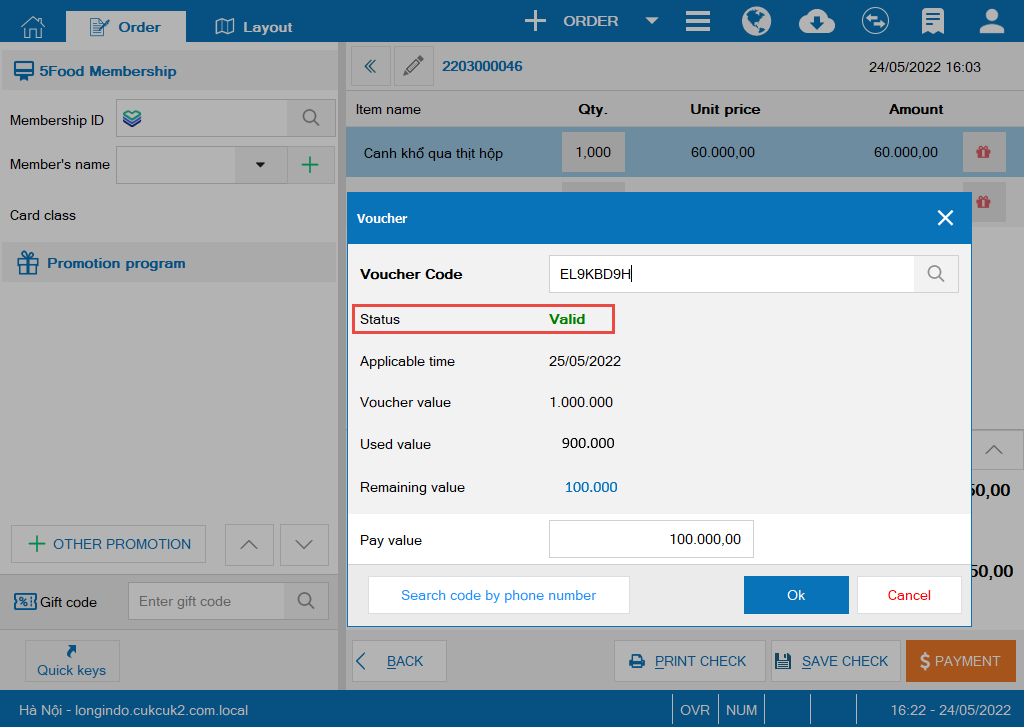
Step 2: Upon making payment
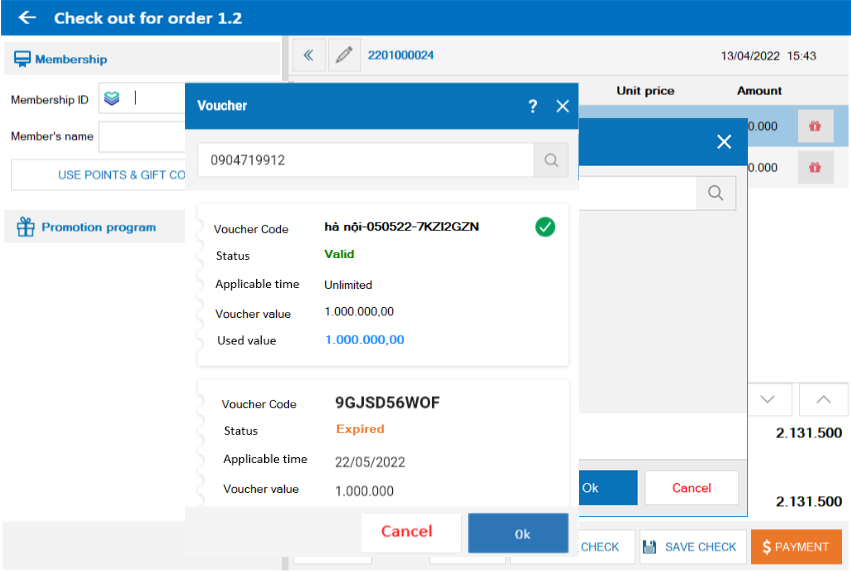
1. The cashier enters Voucher ID to get payment. If the voucher ID is entered correctly, its status will be Valid and voucher details will be shown.
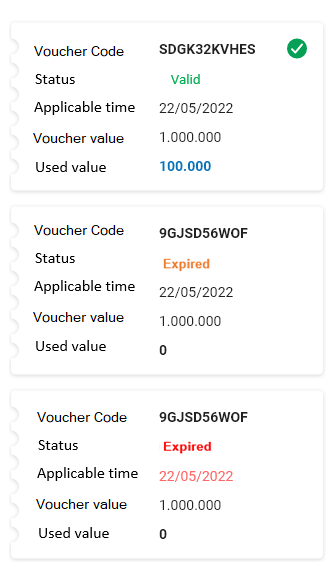
- Search voucher by phone number
If the phone number has 1 or many vouchers, the program will show list of vouchers and expiry date.
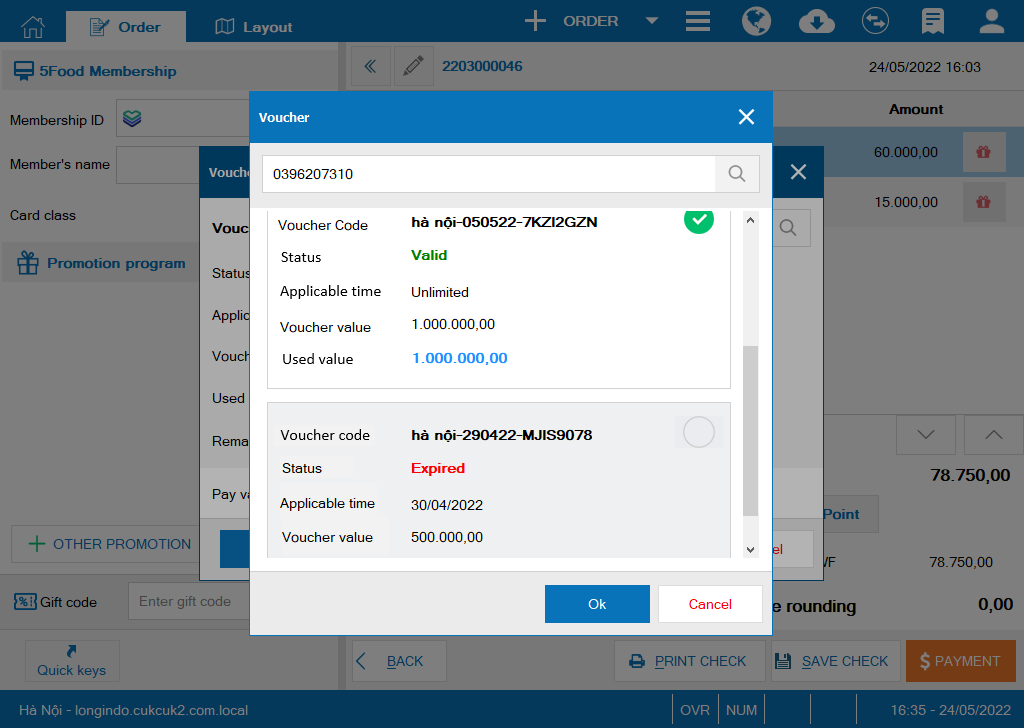
Note: For valid vouchers, the cashier can select maximum 1 voucher to apply.
- The cashier enter used value4.On the bill/check, used value will be shown in Voucher part
Note: For the bills applying voucher, when printing the bill, the program will print voucher note if the voucher is still valid
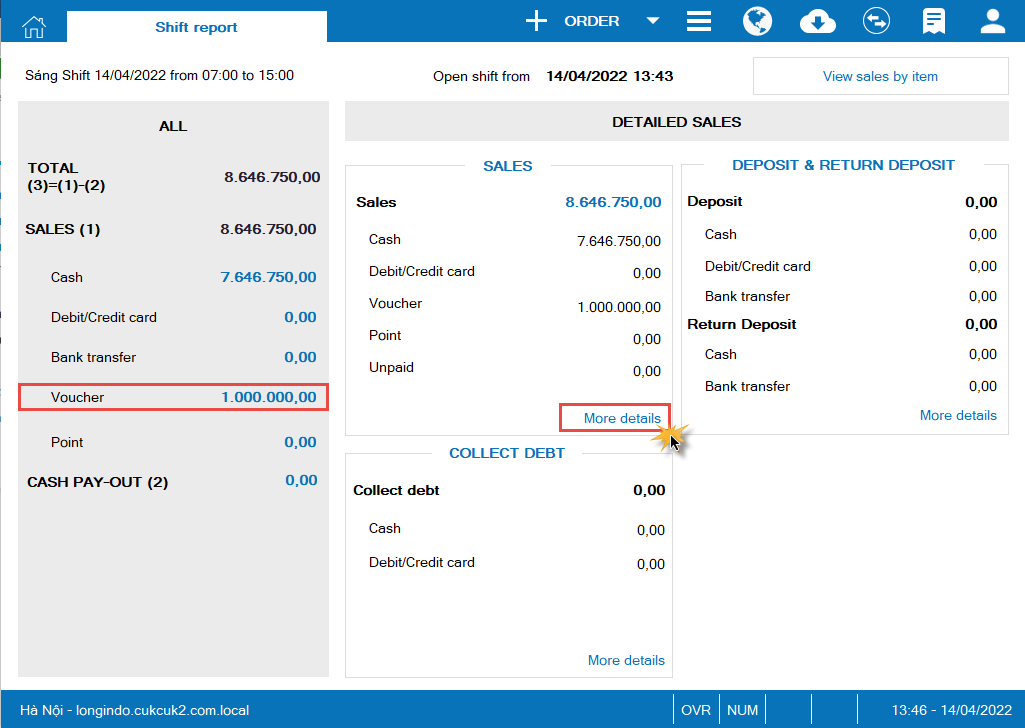
Step 3: Shift report
On PC, click the icon , select General report\Shift report. The program shows total payment by voucher.
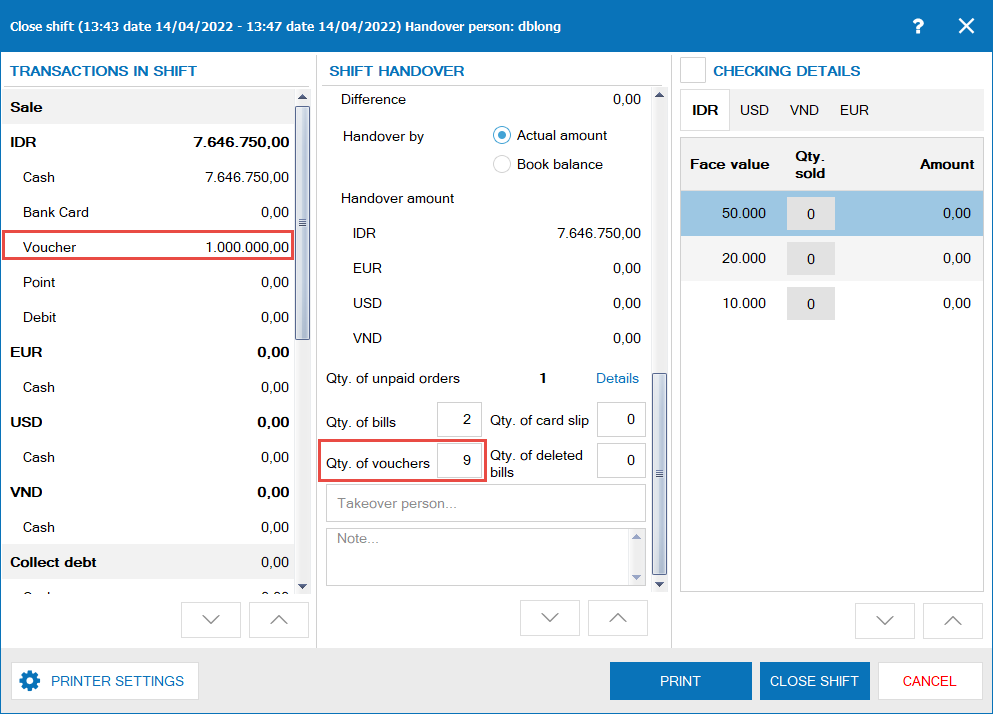
Step 4: Shift handover minutes
On Sale\Voucher: The program shows total amount paid by Voucher.
On Shift handover\Qty. of vouchers: The program shows total number of bills applying vouchers.
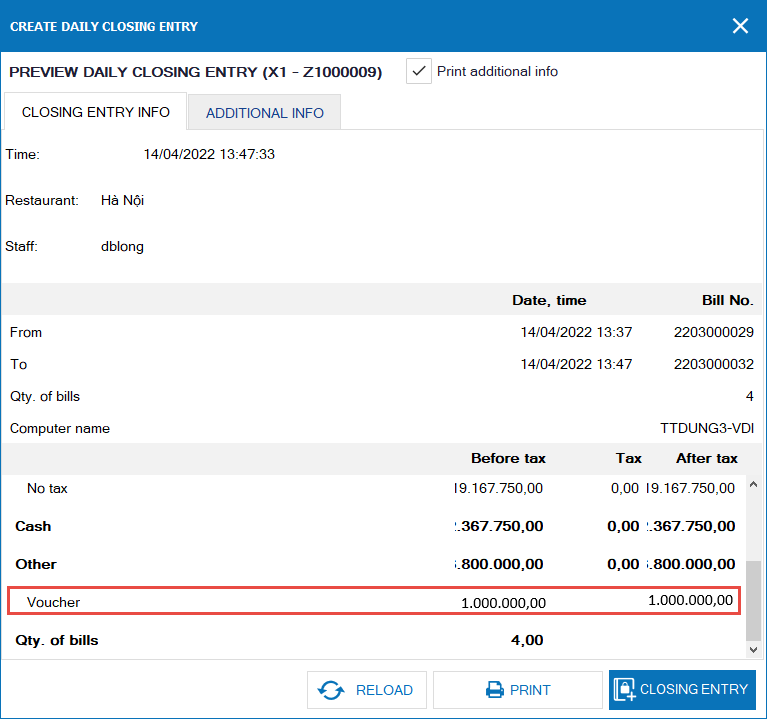
Step 5: Closing entries
Whichever method of payment the guest buys voucher with, the program will recognize that method of payment to the revenue.
- On Mobile
On Mobile, click on the icon and select Voucher.
The cashier enters voucher ID to get payment
Note: If the voucher code is wrong, its status will be invalid and the cashier needs to enter it again.
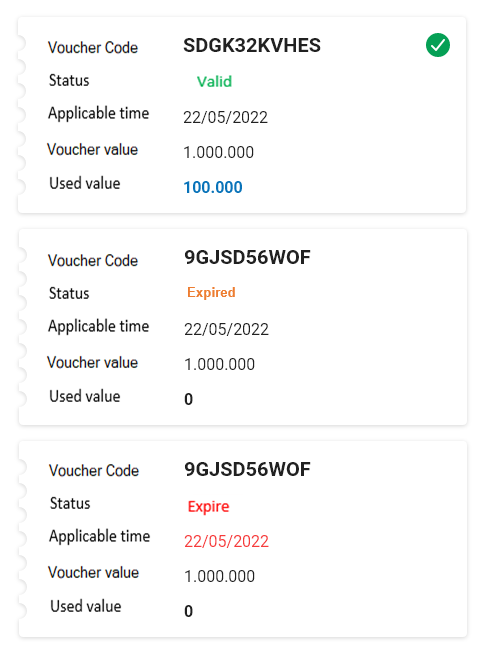
The cashier searches voucher by phone number.
If the phone number has 1 or many vouchers, the program will show a list of vouchers.

- On Tablet
Follow the same steps as on Mobile
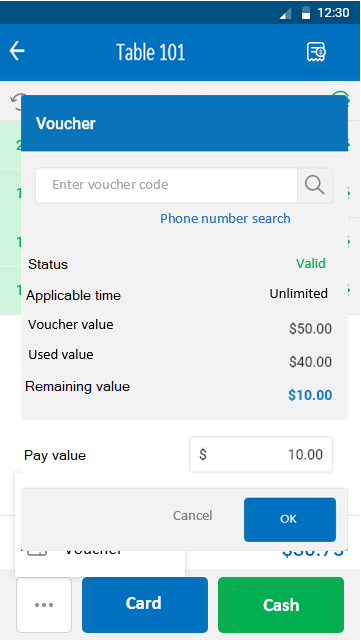
IV.On Quick-service software
Step 1: Issue bills
On Quick-service software, click on the icon and select “Issue voucher” to create Voucher. On Issue voucher screen, the cashier needs to enter full information as in the image below.
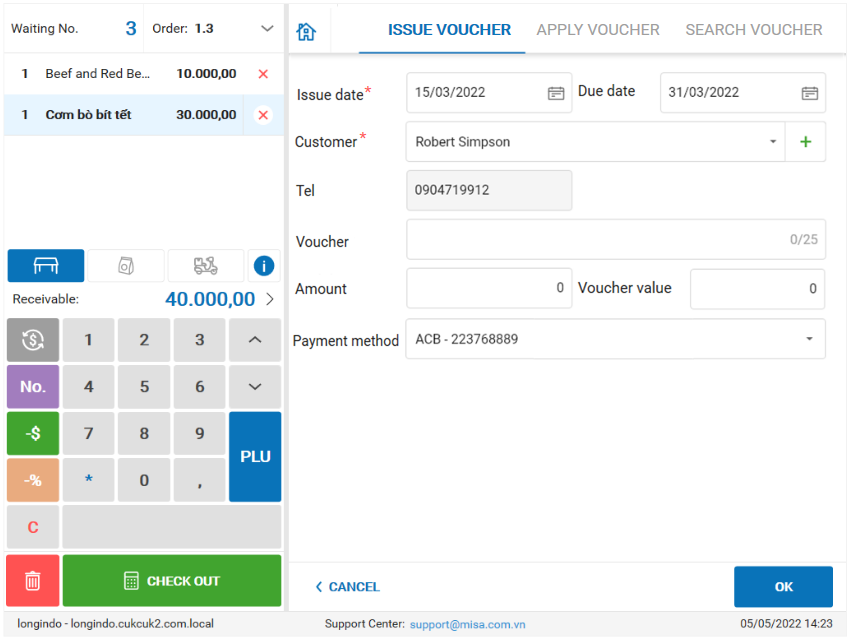
Then click “OK”.
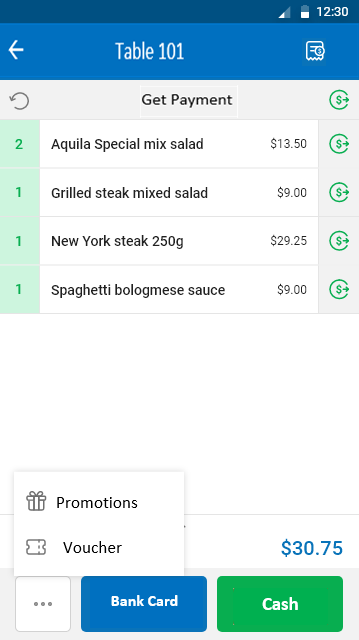
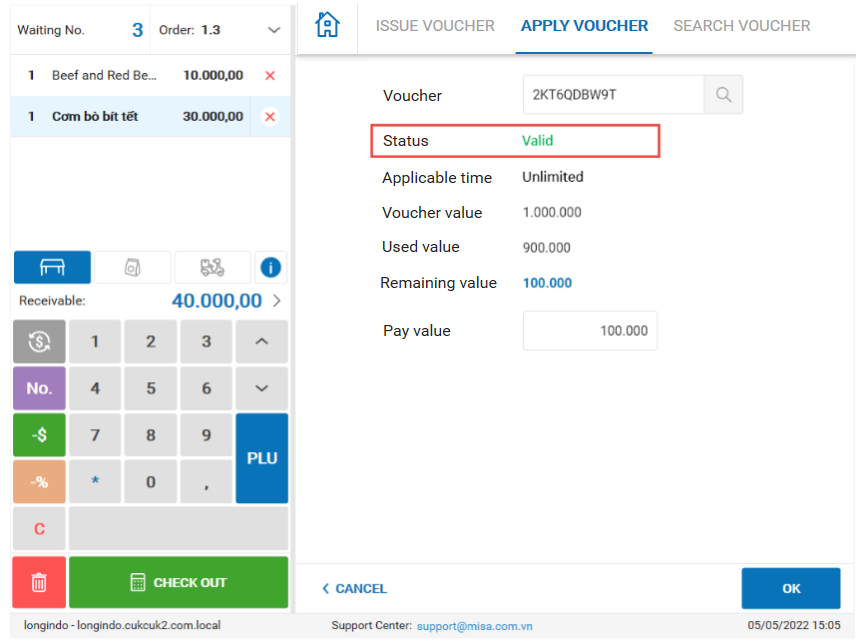
Step 2: Get payment
When the customer gives voucher, the cashier can get payment as follows:
Case 1: The cashier enters voucher ID. If it is valid, the cashier click OK to apply the voucher.
Case 2: The cashier enters phone number to search voucher. If the phone number has more than 1 vouchers, the program will show all vouchers. The cashier can select 1 valid voucher to apply and then click OK.
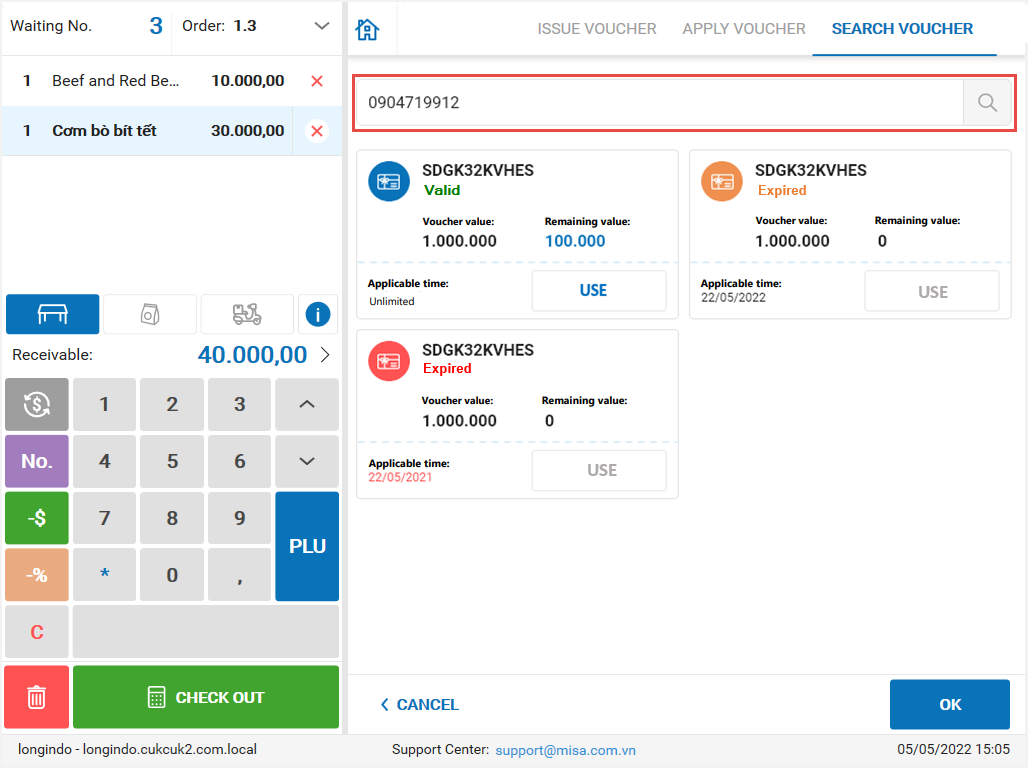
Note: For valid vouchers, the cashier can select maximum 1 code to apply.
Case 3: The cashier enters the amount to apply

Case 4: On the bill, show used value at Voucher section
Note: For the bills getting payment with voucher, when printing the bill, the program will print a new voucher if the voucher is still valid.
