2. The cashier can follow up online orders which are delivered after 2-3 days of ordering
3. Add currency symbol on voucher template
Purpose:
Currently, when setting up the menu, the program is displaying a lot of unnecessary information fields, leading to difficulties in adding items. Therefore, as of version R104, MISA CUKCUK has improved menu interface to help manage and create menus quickly and conveniently.
Instruction steps:
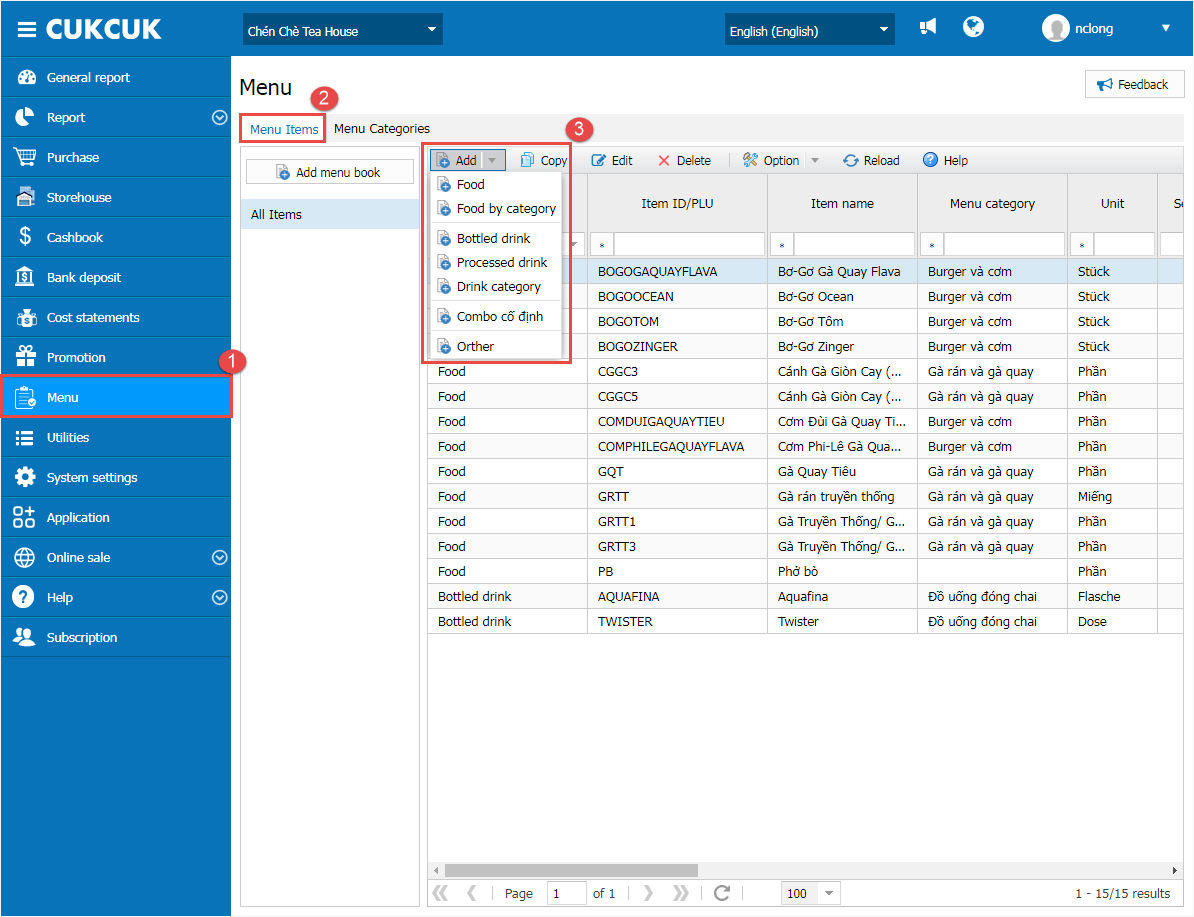
On the management page, go to Menu/Menu items and select type to add.
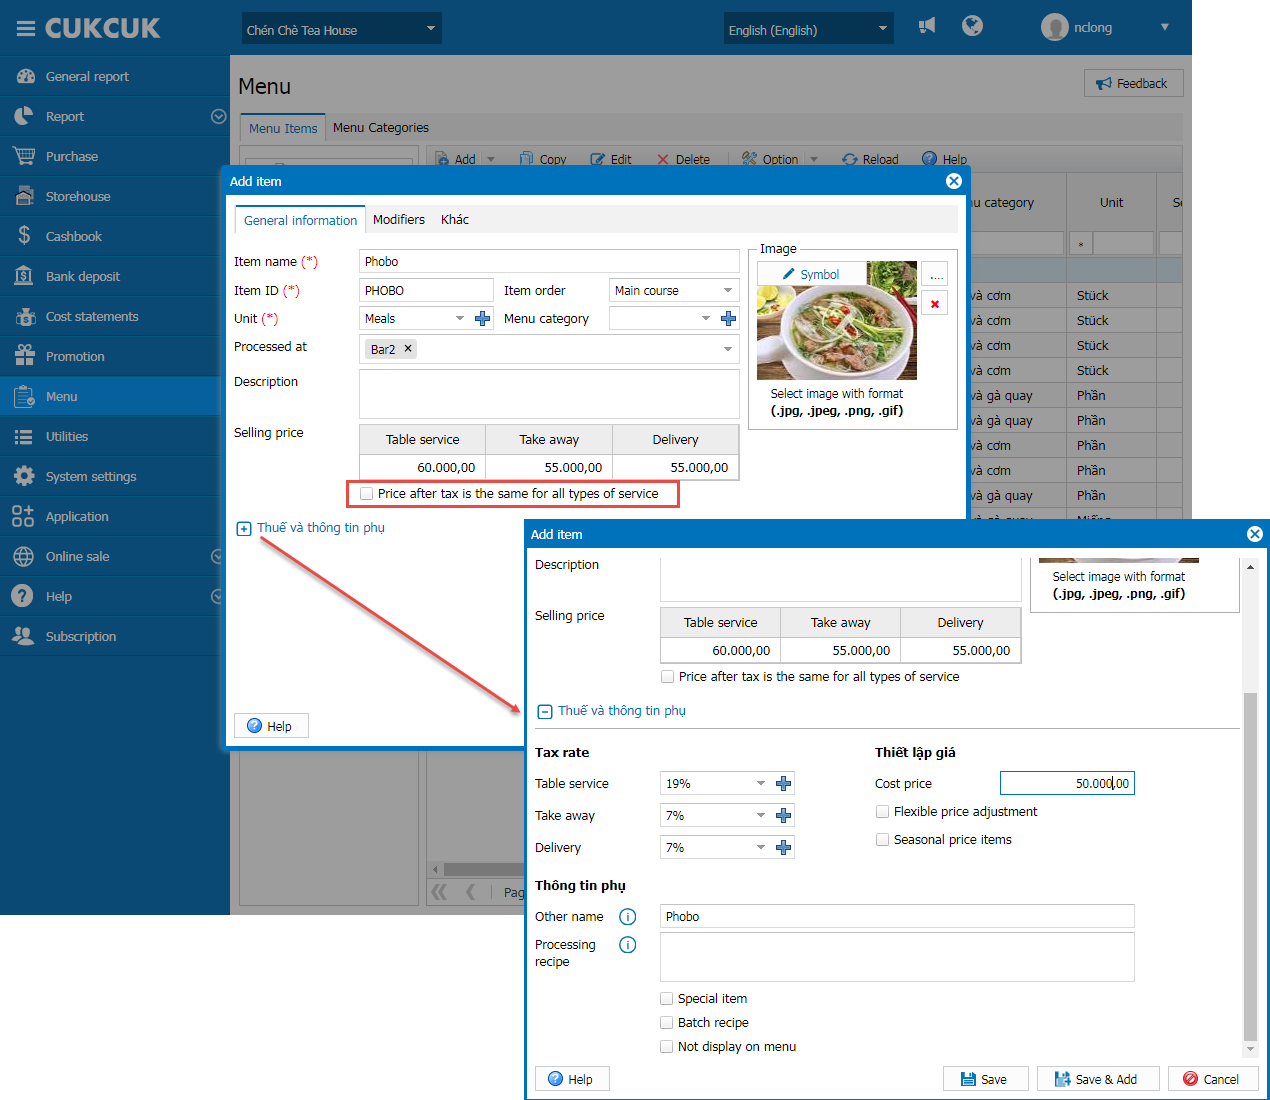
– Enter General information:
With 3 basic tax rates 0%, 7%, 19%, set up tax rates as below:
Case 1: The restaurant sets up 1 tax rate
On the program, upon adding new items the program does not show Price after tax is the same for all types of service.
Moreover, you can click on this icon![]() to add additional information of the item as below.
to add additional information of the item as below.
Then, click Save.

Case 2: The restaurant sets up multiple tax rates
Upon adding item and do not check Price after tax is the same for all types of service, it shows as in the image below.
Upon adding item and check Price after tax is the same for all types of service it shows as in the image below.

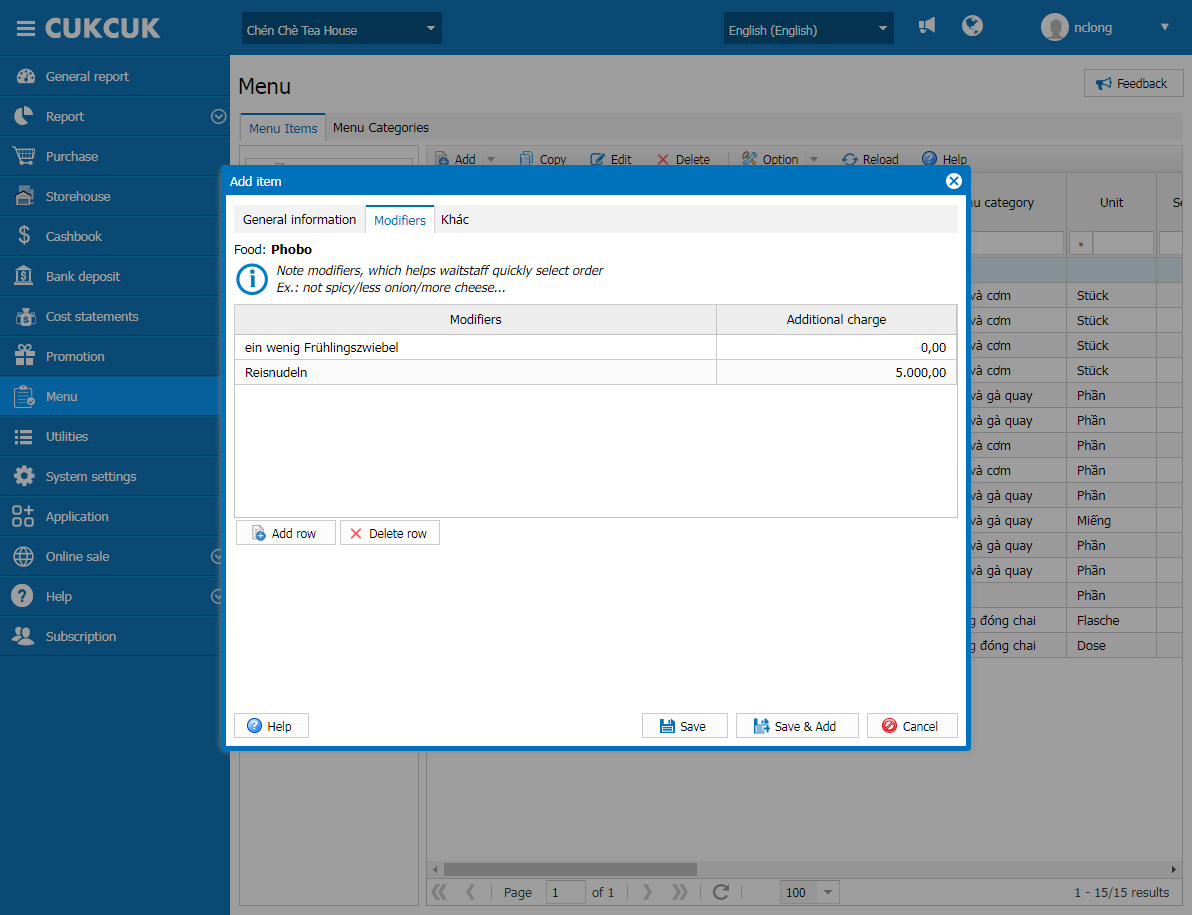
– Add Modifier
On Modifier tab, the program shows below:
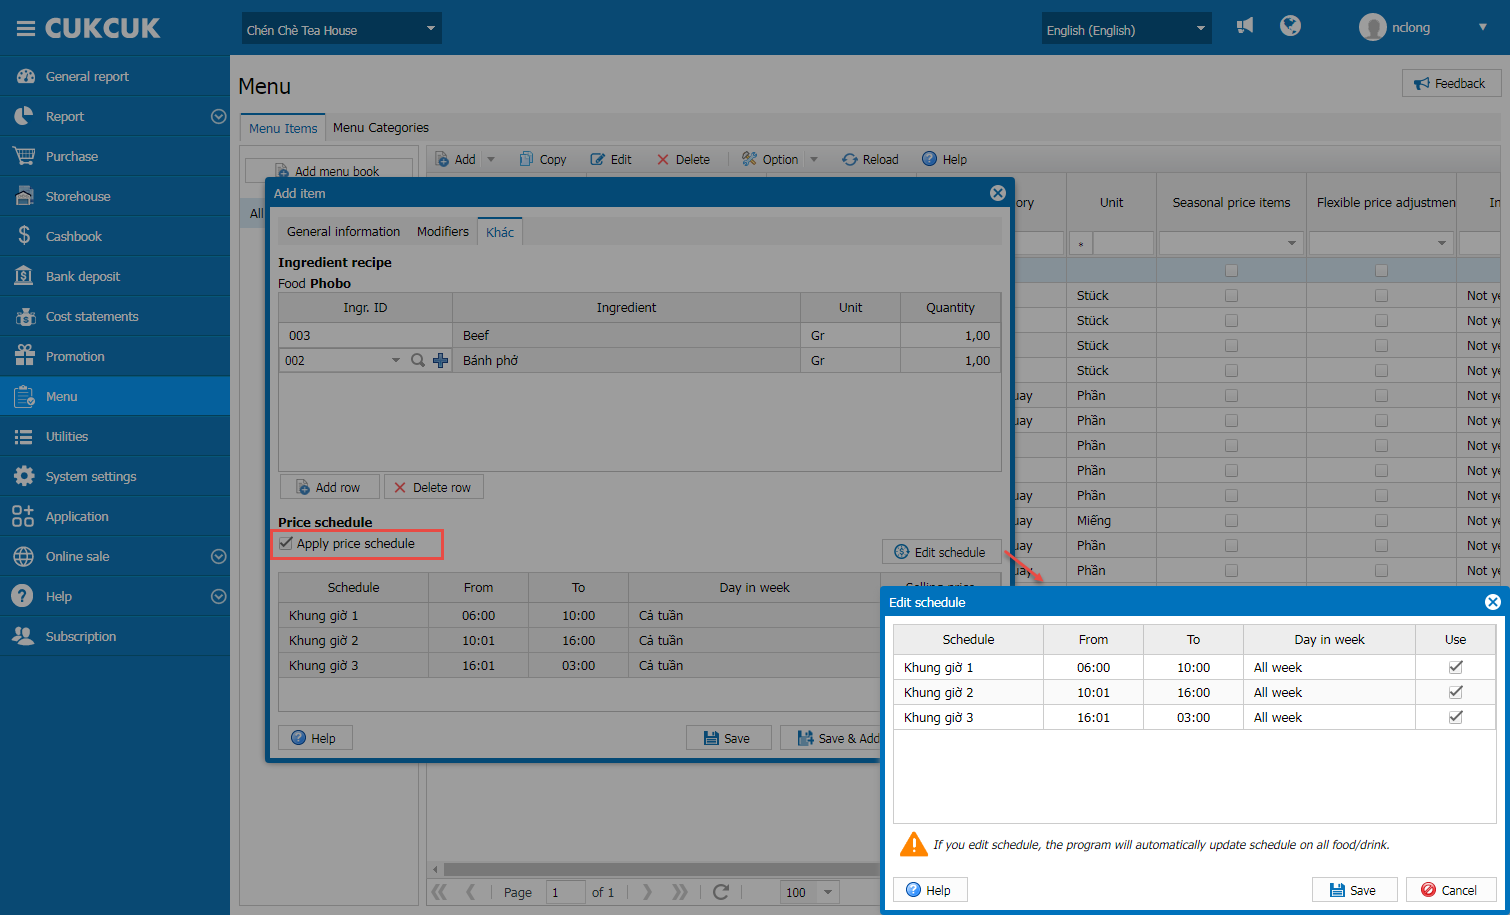
– Tab Other shows:
- Ingredient recipe
- Check Price schedule
Moreover, you can click on the icon![]() to update schedule
to update schedule
Note: Upon editing items, the program shows Inactive option.

2. The cashier can follow up online orders which are delivered after 2-3 days of ordering
Purpose:
Currently, for orders placed 2-3 days in advance on the website or by phone, the cashier has to manually manage it on an Excel file, which leads to time-consuming. Therefore, as of version R104, MISA CUKCUK has developed a feature to manage the online orders delivered 2-3 days later.
Instruction steps:
2.1.On online order page
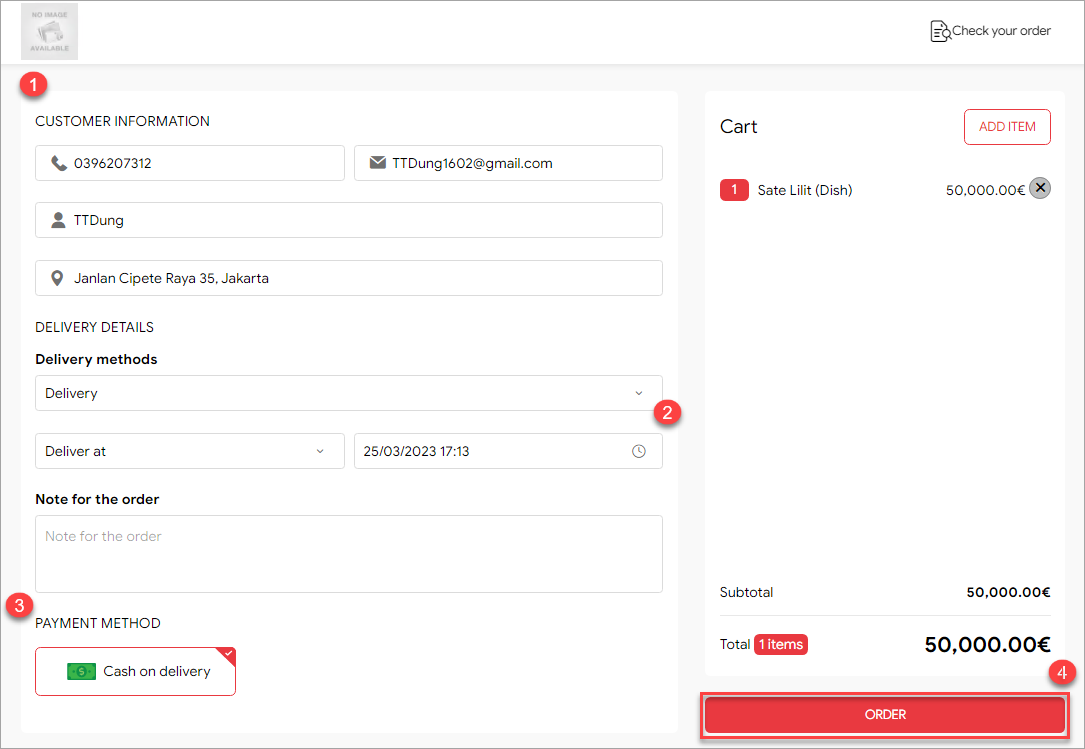
On online order page, select items and check out

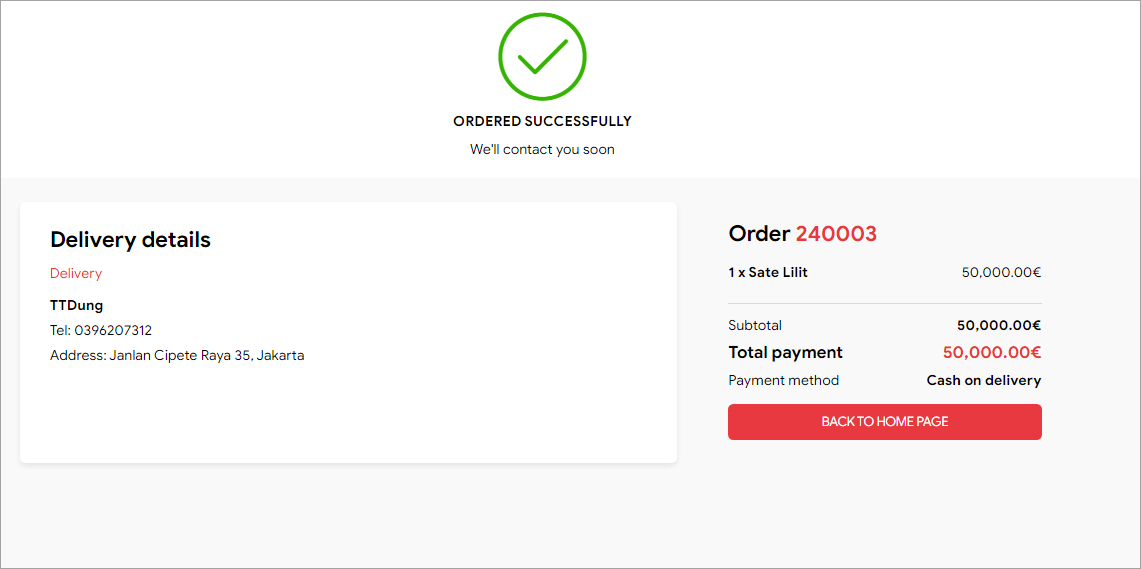
Enter delivery address and select payment method. Then click Order.
2.2. On PC/POS
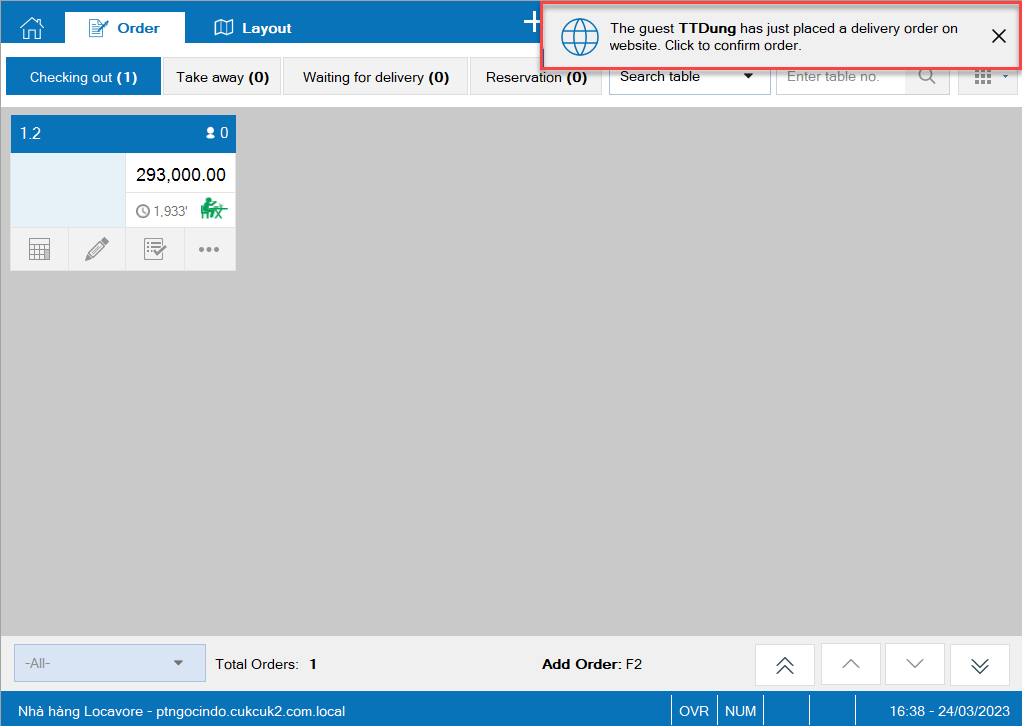
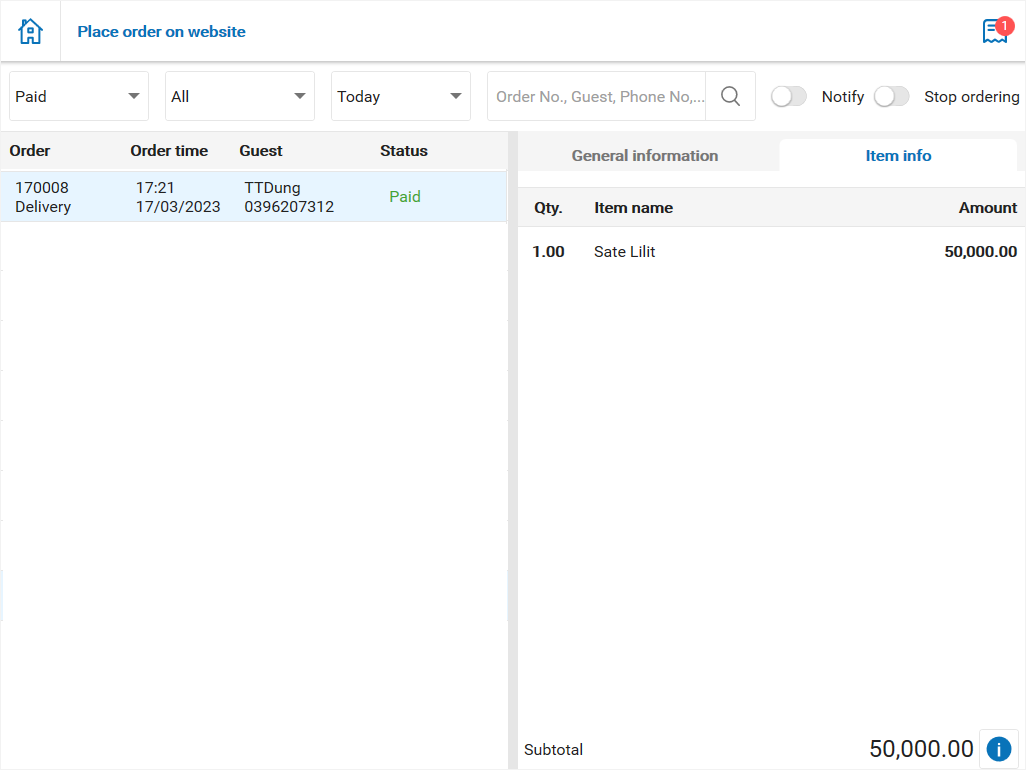
When a guest places online order, on PC/POS the cashier will receive a notification.
Click on the icon![]() Select Place order on website
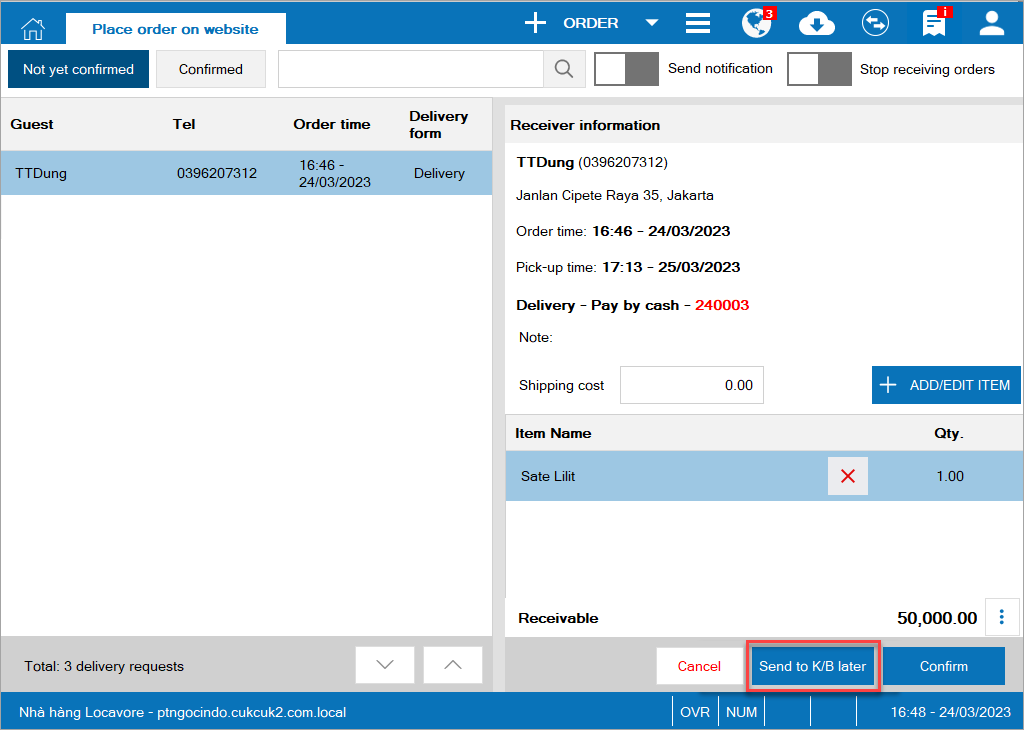
Select Place order on website

For orders delivered later, the cashier select Send to K/B later
The cashier can select notifications to show on PC/POS.
Click on the icon ![]() and select Send notification
and select Send notification
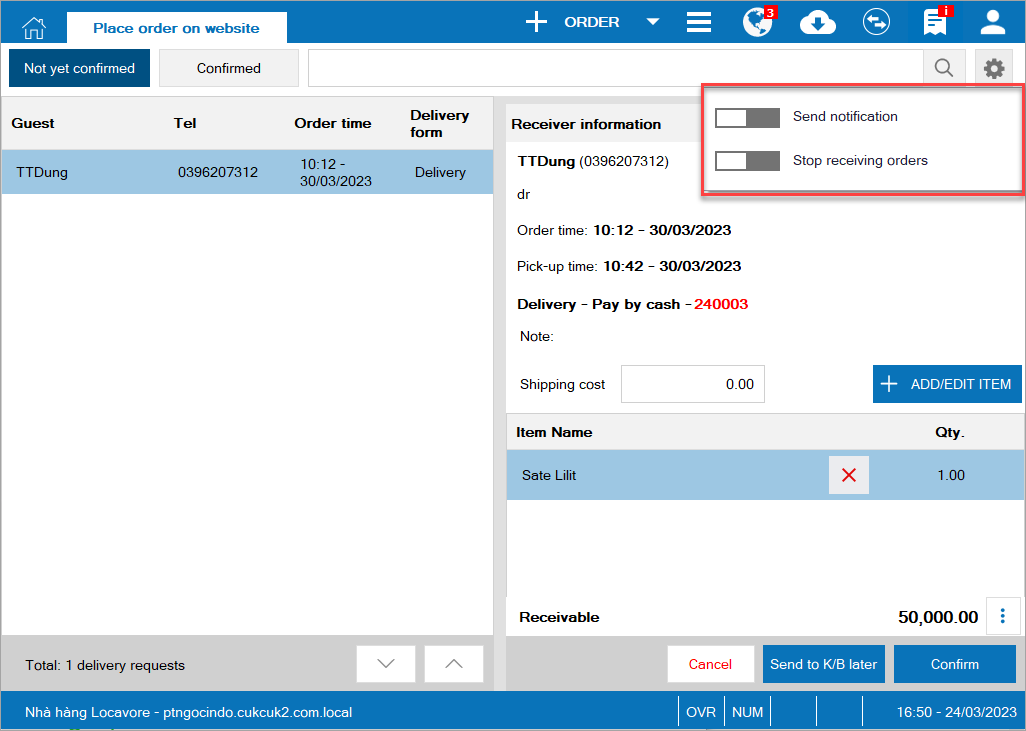

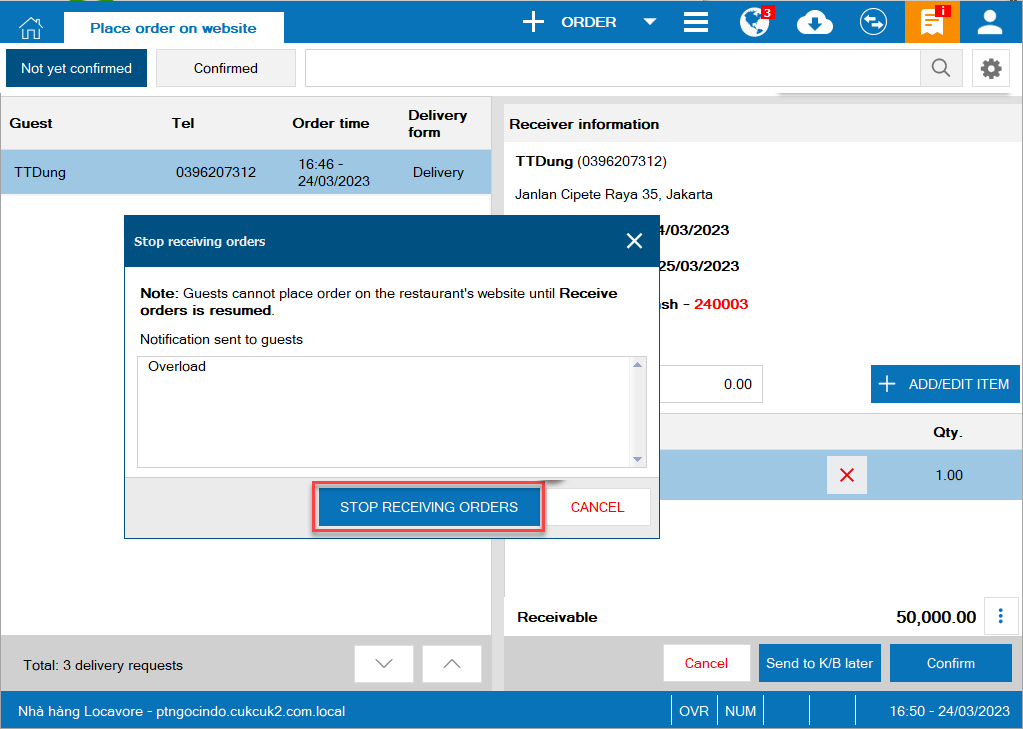
If the restaurant overloads and wants to stop receiving orders, the cashier clicks on Stop receiving orders
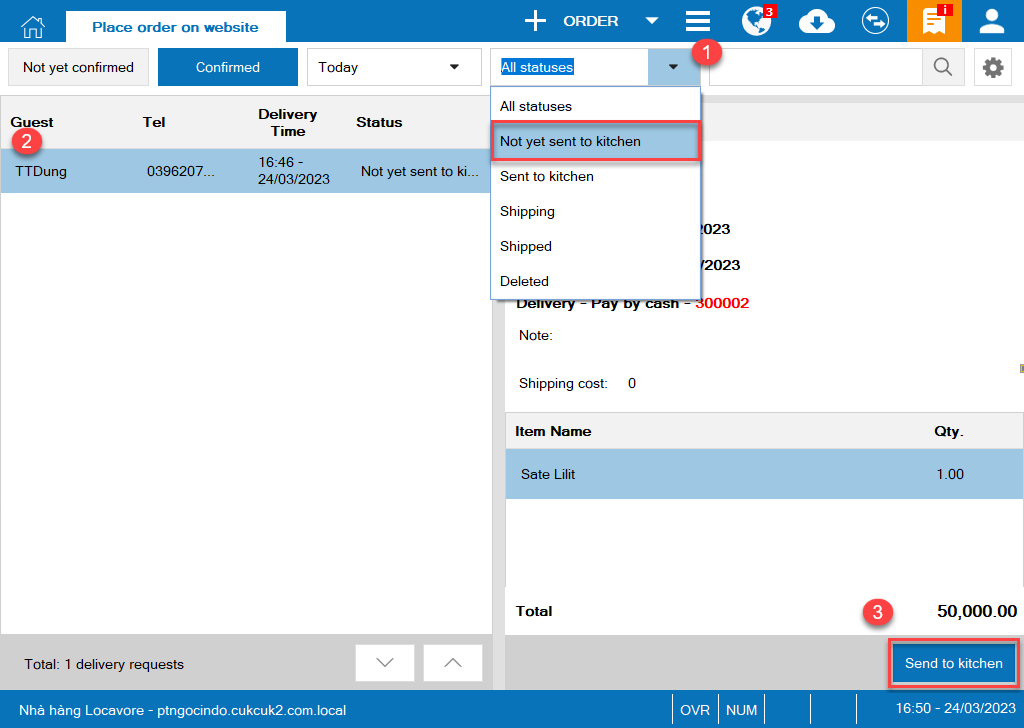
To check orders to be delivered, click on Confirmed tab
– Select Today
– Click on the icon ![]() and select Not yet sent to kitchen
and select Not yet sent to kitchen
– Select order to delivery and click Send to kitchen
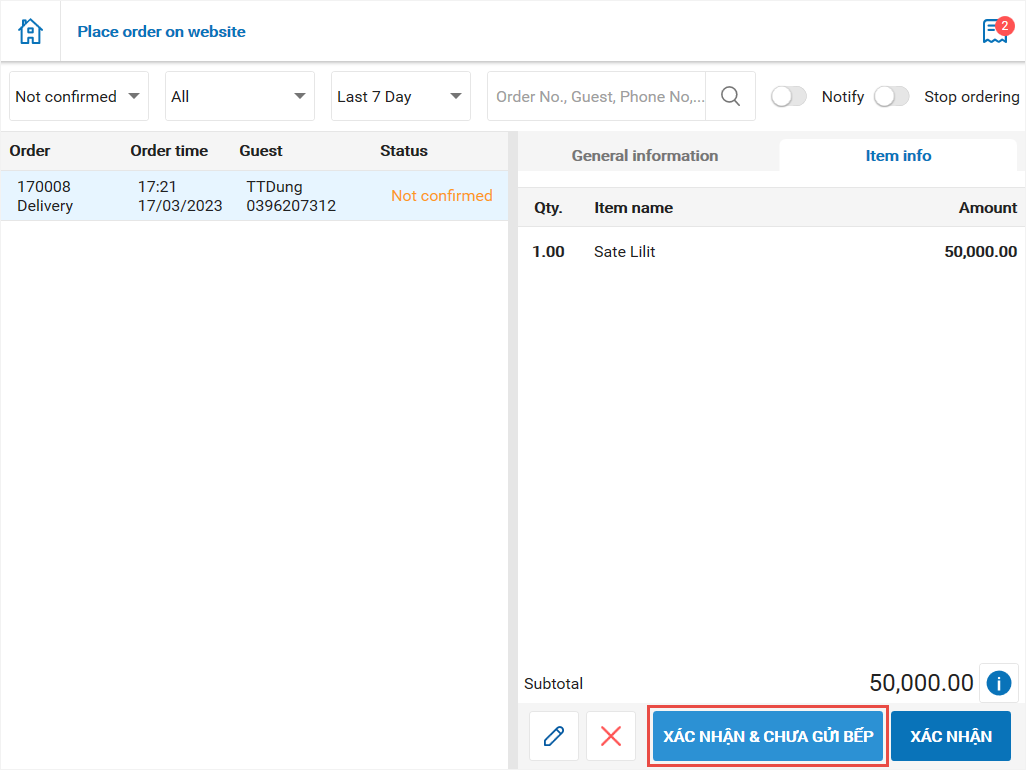
2.3. On quick service version
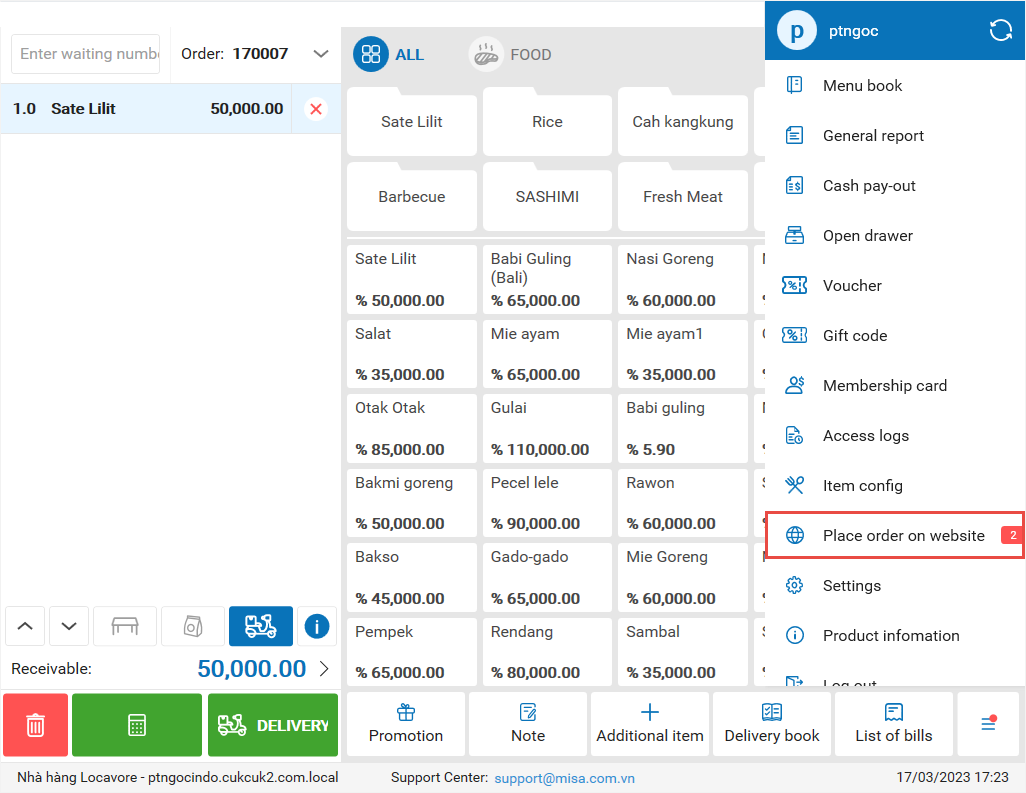
When a guest places online order, on Quick service version the cashier will receive a notification.

Click on the icon![]() Select Place order on website
Select Place order on website
For orders delivered later, the cashier select Confirm & not send to K/B
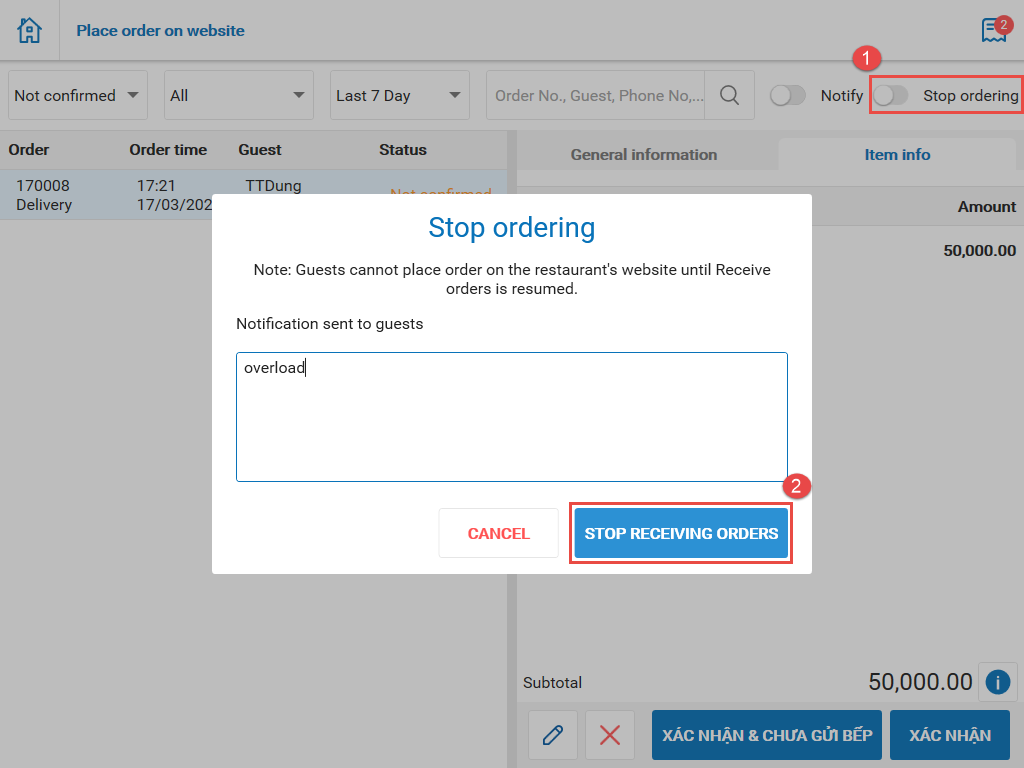
The cashier can select notifications to show on the online order page.

If the restaurant overloads and wants to stop receiving orders, the cashier clicks on Stop receiving orders
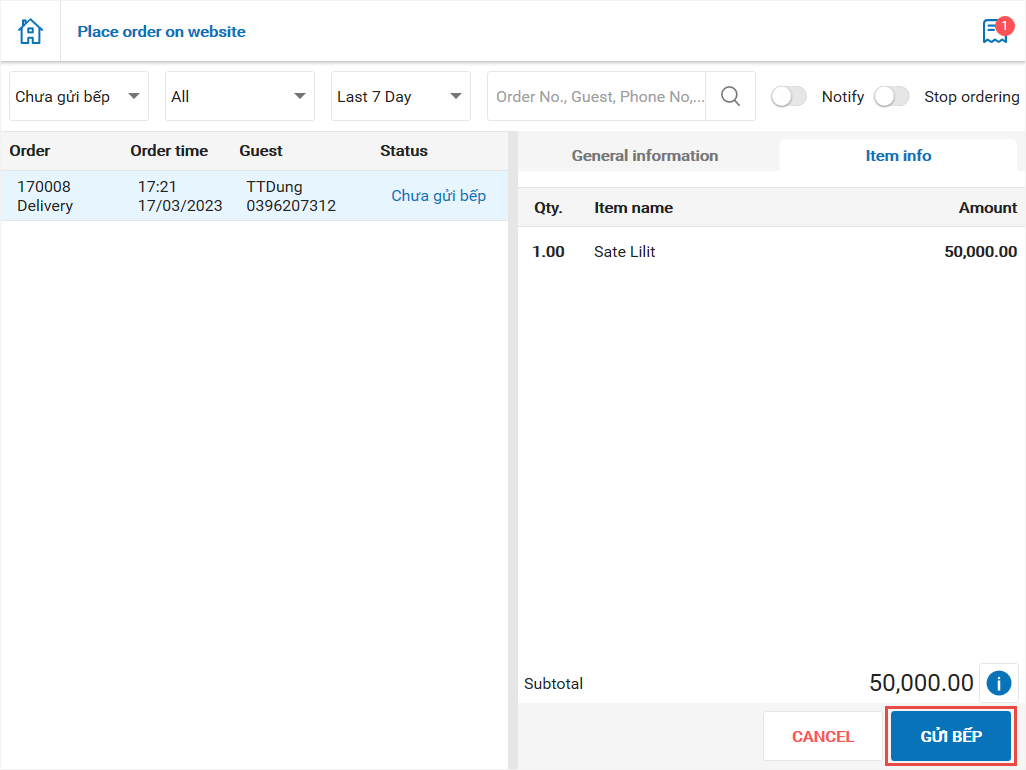
For orders delivered later, the cashier searches Not send to kitchen orders. Then, click Send to kitchen.
The order is moved to Sent to kitchen status.
To deliver the order, click on Delivery. The order will be moved to Shipping status.
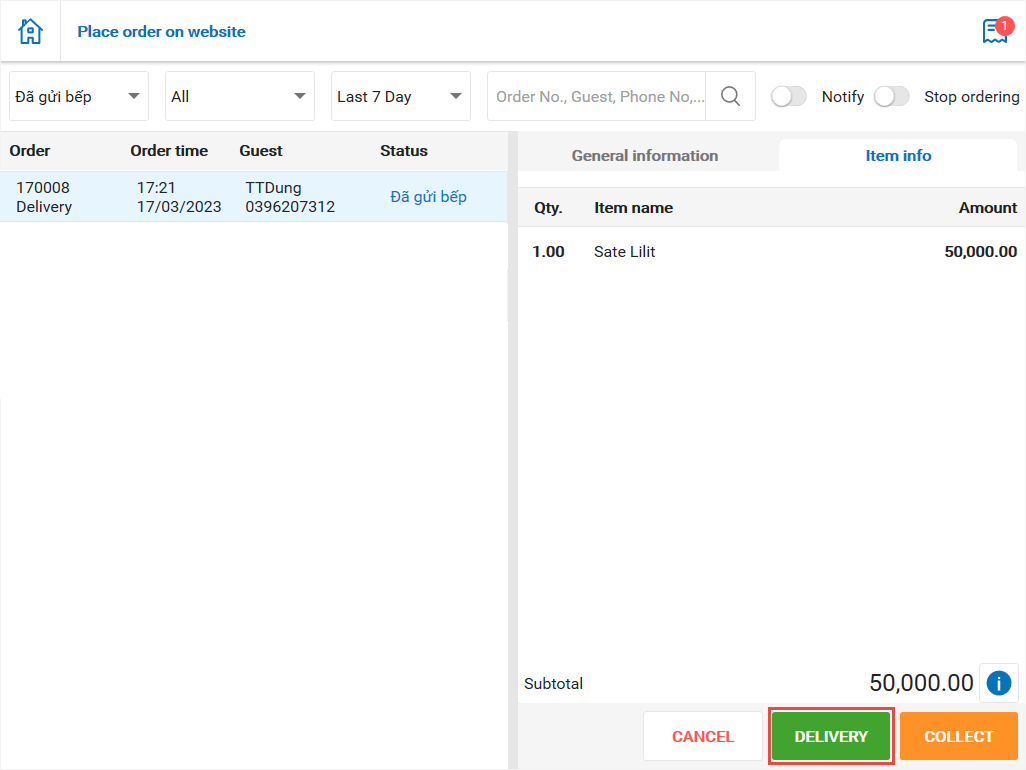
After that, the cashier gets payment. The order is moved to Paid status.

3. Add currency symbol on voucher template
Details of change:
Currently, when the voucher is printed, the cashier does not know what currency in the voucher. Therefore, as of version R104, MISA CUKCUK has added currency symbol on voucher so the cashier does not need to check again.
Instruction steps:
3.1. On the management page
Select System settings/General settings/General information
On Currency, click Edit and select the position to show currency
Then click Save

3.2. On PC/POS
3.2.1. Issue voucher
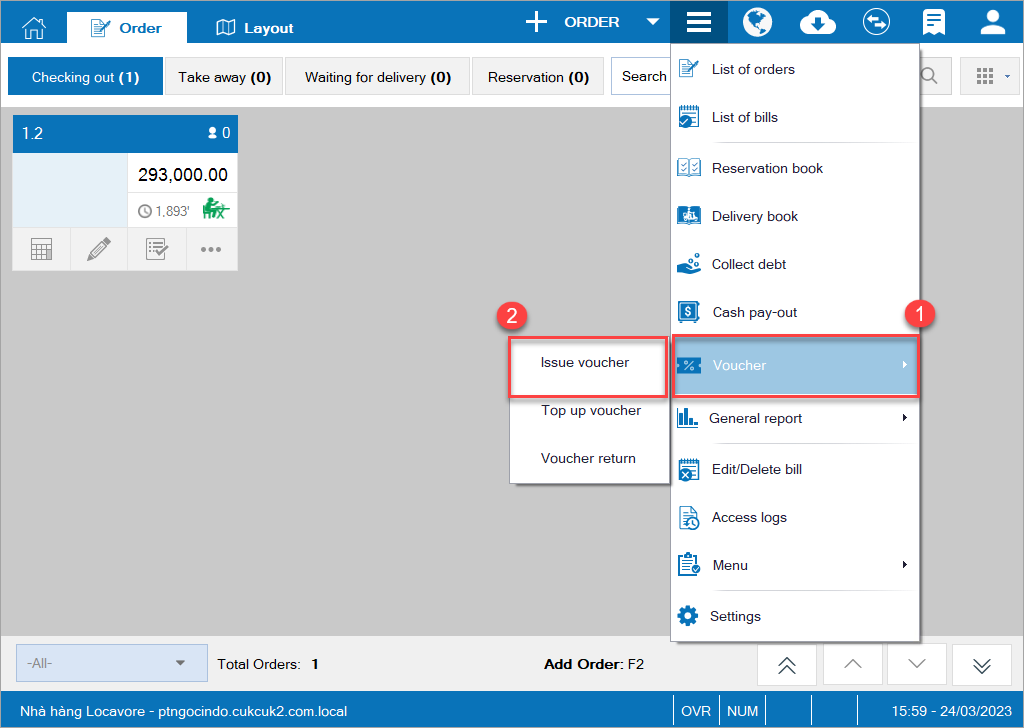
Click on the icon![]() and select Voucher/Issue voucher
and select Voucher/Issue voucher
– To issue vouchers, please fill all required information.
Then click OK.


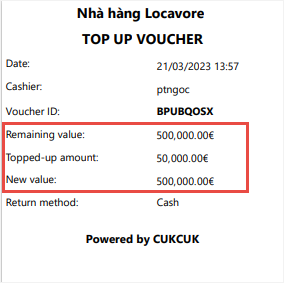
3.2.2. Top up voucher
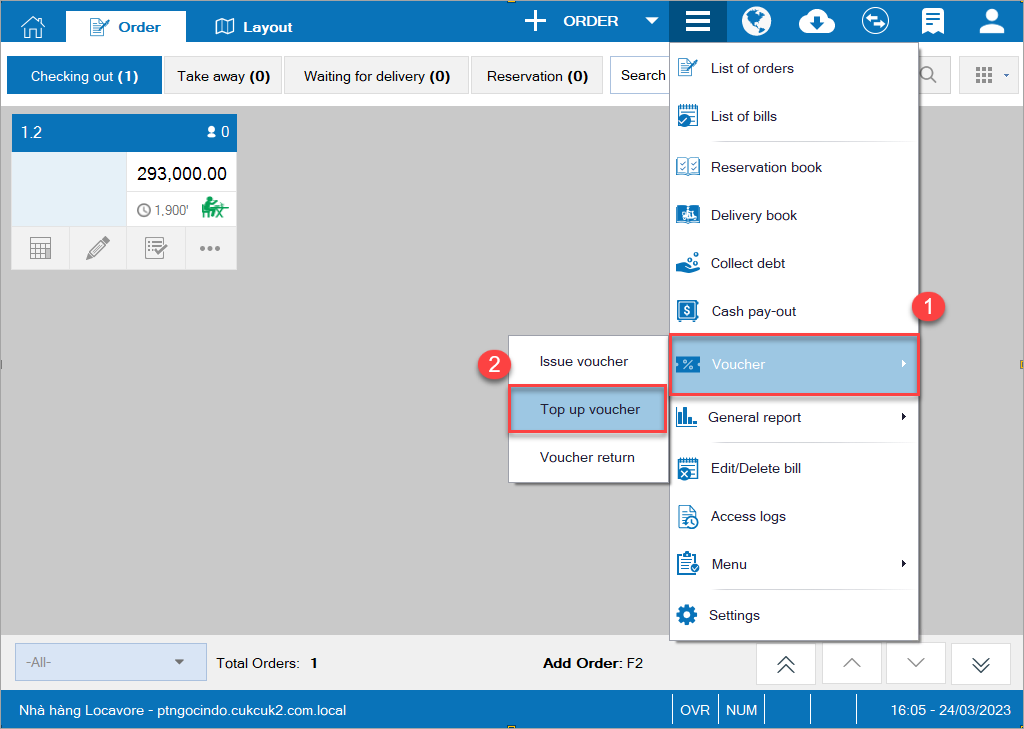
Click on the icon![]() and select Voucher/Top up Voucher
and select Voucher/Top up Voucher
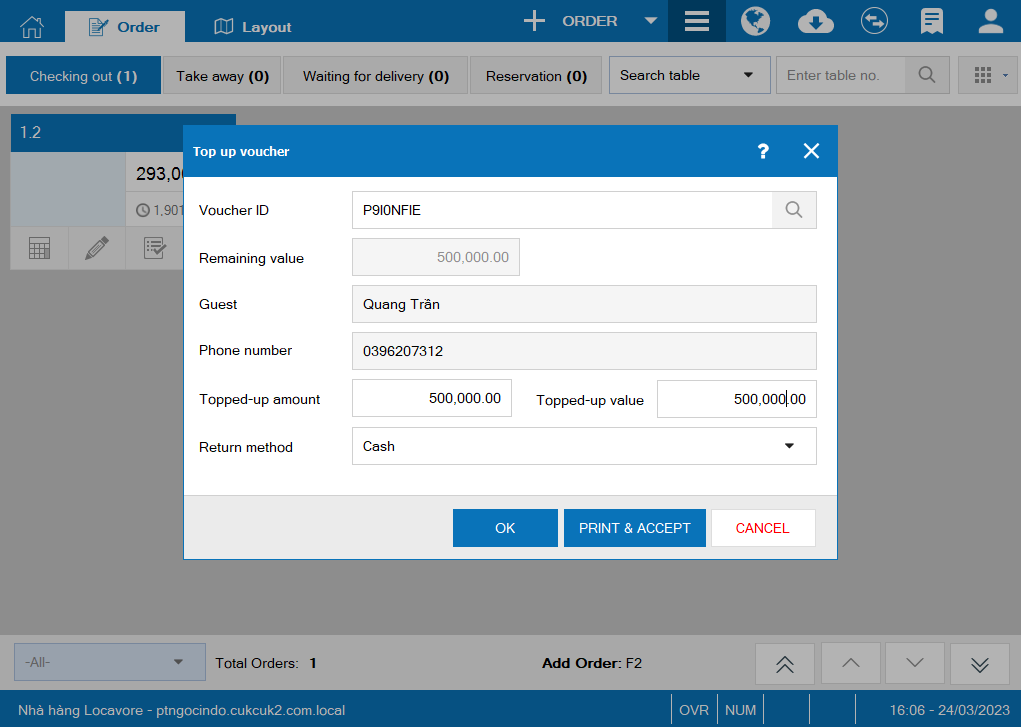
On Top up voucher screen, enter all required information.
Then click Print and accept.

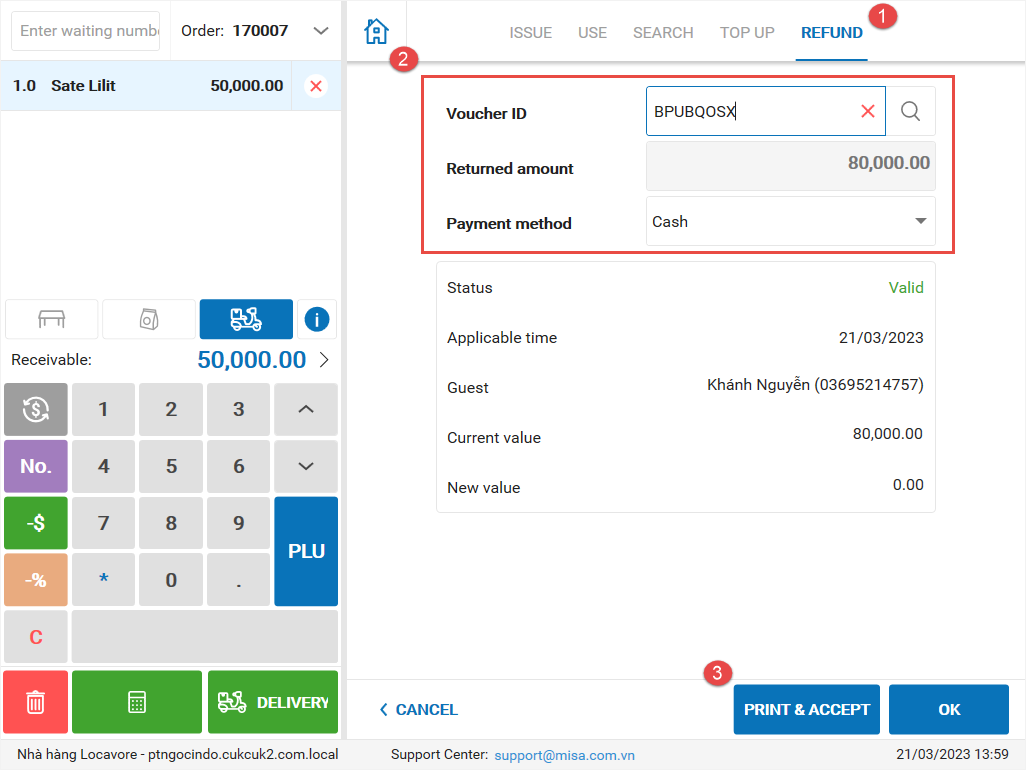
3.2.3. Refund voucher
The cashier can refund voucher as below:
Click on the icon![]() and select Voucher/Refund Voucher
and select Voucher/Refund Voucher

The cashier enters all required information. Then click Print and accept.


3.3. On quick service version
– To issue voucher, enter full information as below.
Then click OK.


After entering information, click Print and Accept.

To refund voucher, enter information and click Print & Accept.

Have a nice day!
