If the driver is installed successfully but still cannot print via LAN network, the reason may be that IP address of the printer is not in the same band with IP address of cashier’s PC. To solve this problem, follow these steps:
- For PCs running Windows 7, 8,10
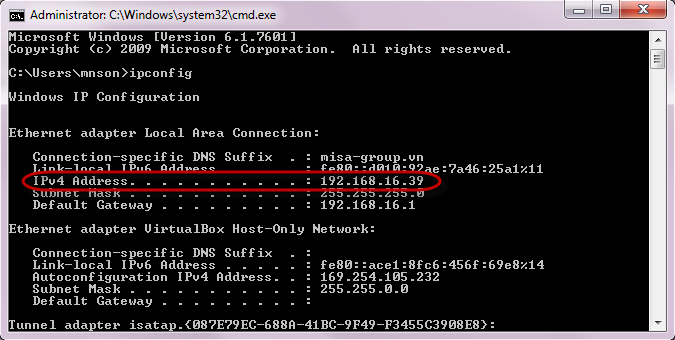
Here, IP of cashier’s PC is: 192.168.16.39
- For PCs running Windows XP
Step 2: Check IP address of the printer
- Turn off the printer
- Hold “Feed” button from 3 seconds to 5 seconds and at the same time turn on the printer
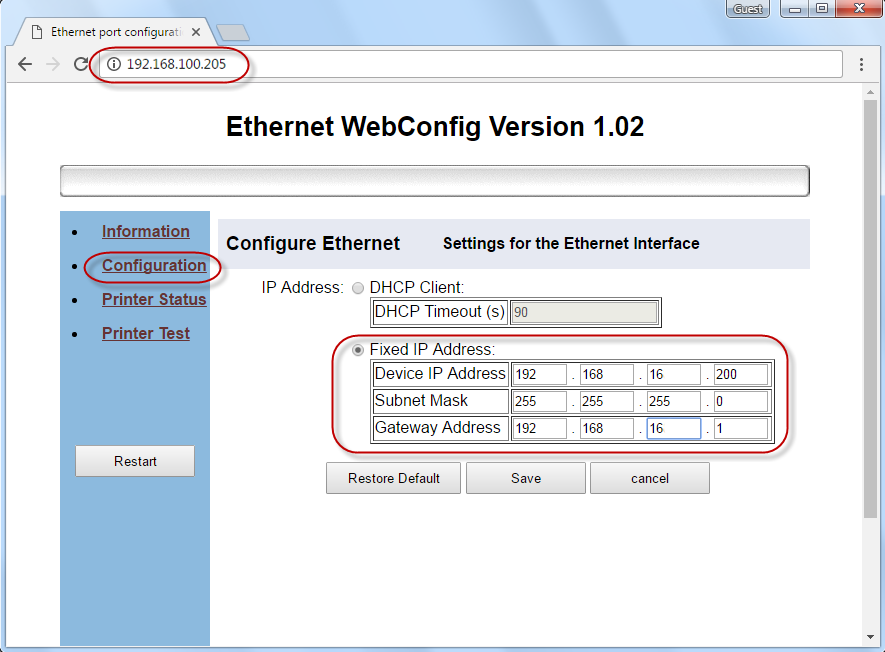
In this case, IP address of the printer is 192.168.100.205
Step 3: Change IP address of the cashier to the same band with IP address of the printer
Here, to change IP address of the cashier’s PC to 192.168.100.xxx, follow these steps:
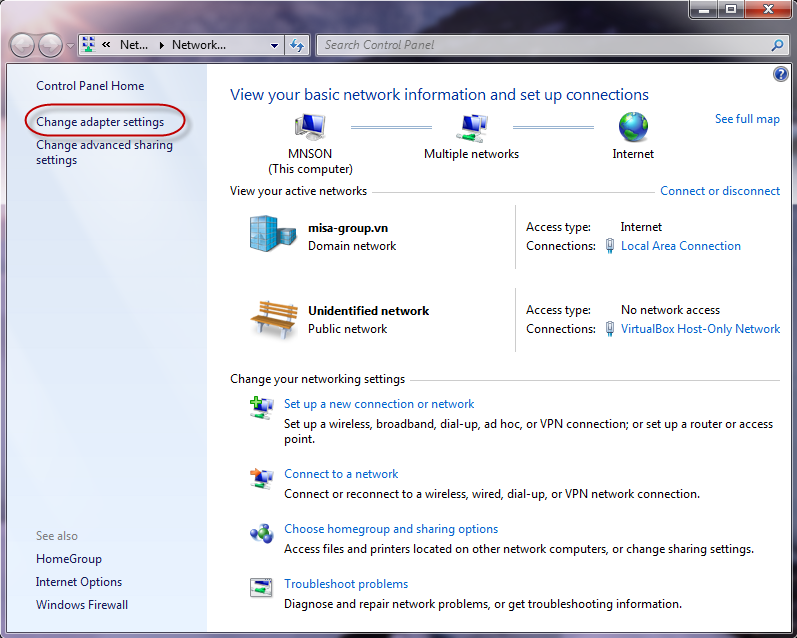
- Right click the network icon and select Open Network and Sharing Center.
- Select Change adapter settings.
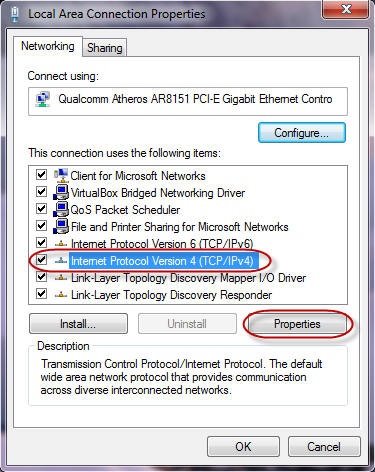
- Right click wired network connection: Local Area Connection, select Properties.
- Check Internet Protocol Version 4 (TCP/IPv4), click Properties.
-
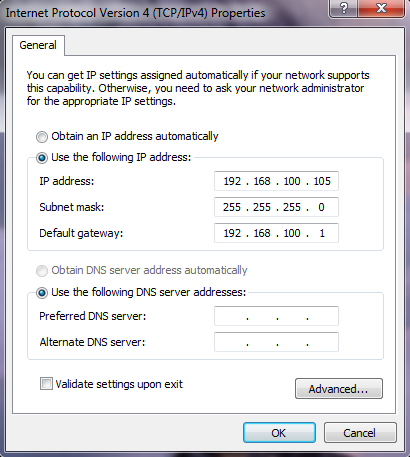
Change IP address of the cashier’s PC.
- Check Use the following IP address
- Enter IP address of the cashier’s PC in the same band with that of the printer. Here, IP address of the printer is 192.168.100.205, change IP of the cashier’s PC to192.168.100.xxx (with xxx from 002 to 253)
- Click OK.
Step 4: Change IP address of the printer
Connect the printer with the PC via a network cable. Ensure that the printer and the cashier’s PC uses the same network cable.
Then change IP address of the printer as follows: (Apply to Xprinter, APOS)
- Enter IP address 192.168.100.205.
- Click Configuration tab.
- Here check Fixed IP Address.
- Enter IP address of the printer in the same band with the set IP address of the cashier’s PC (set IP address of the cashier’s PC is 192.168.16.39 => enter IP address of the printer within 192.168.16.xxx)
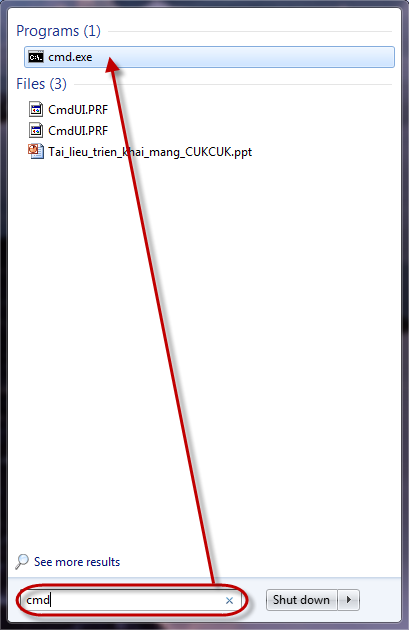
- Note: when entering IP address of the printer, check if such IP address is used or not by clicking Start => enter “cmd” => enter “ping [IP address]” (enter ping 192.168.16.200 here). If Request time out is displayed, this address can be used..
- Next click Save, and then click Restart.
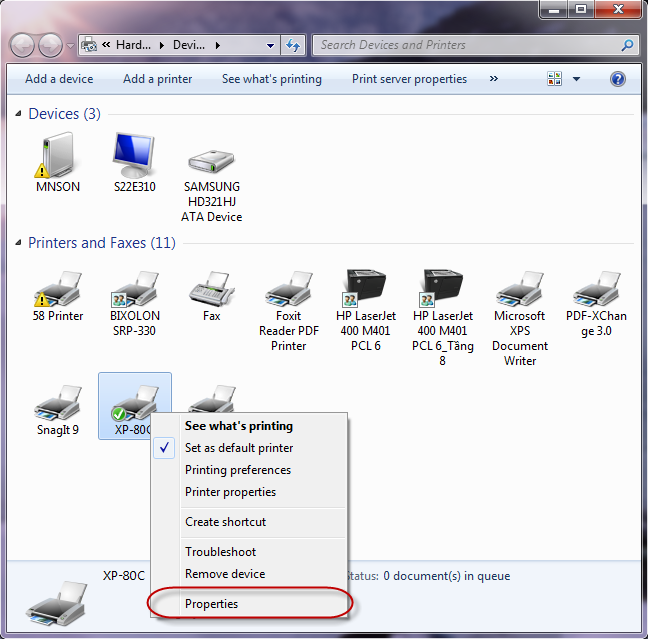
- On Devices and Printers section, right click the printer and select Printer properties.
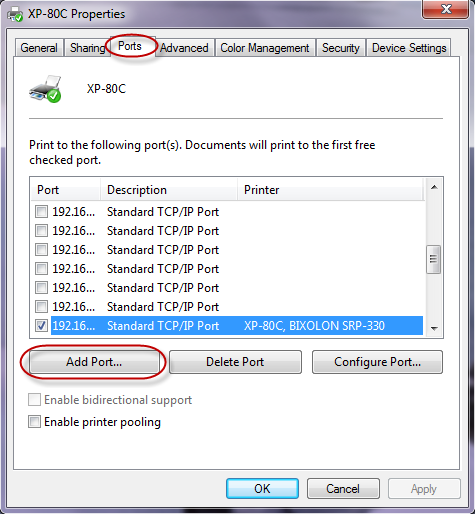
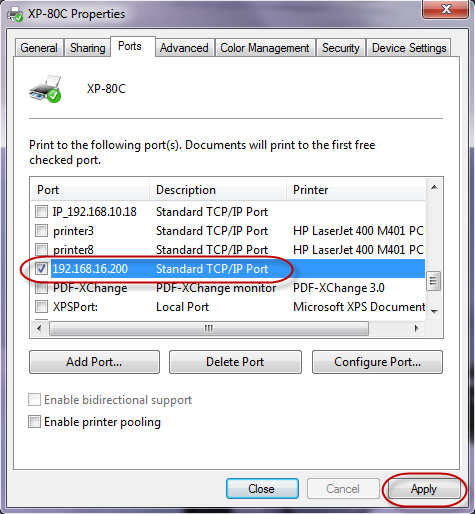
- Select Port tab, click Add Port…
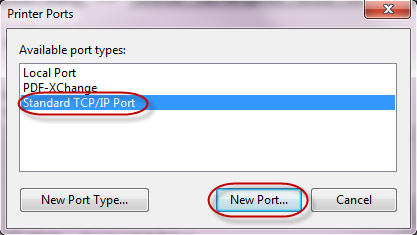
- Select Standard TCP/IP Port, click New Port.
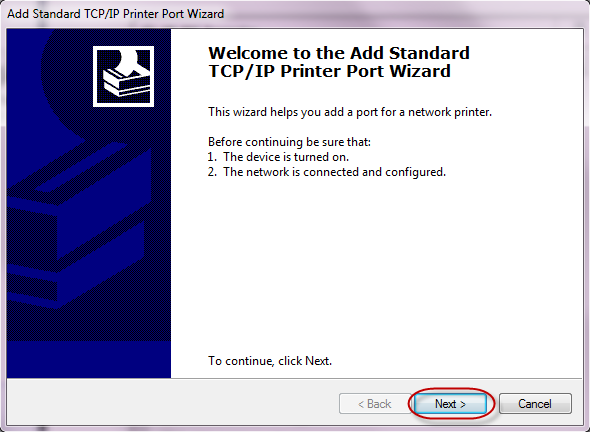
- Click Next.
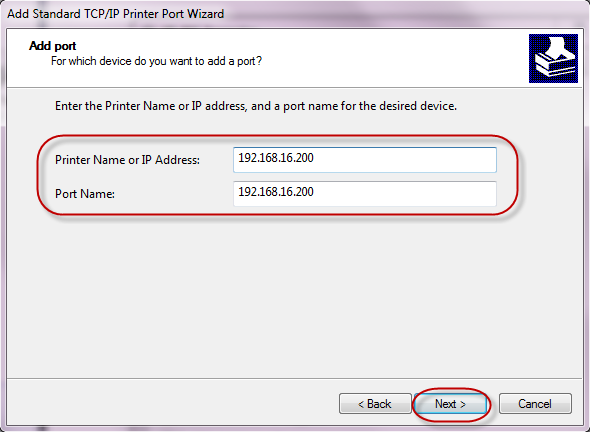
- Enter IP Address for the printer (the above address, here is 192.168.16.200).
- Click Next.
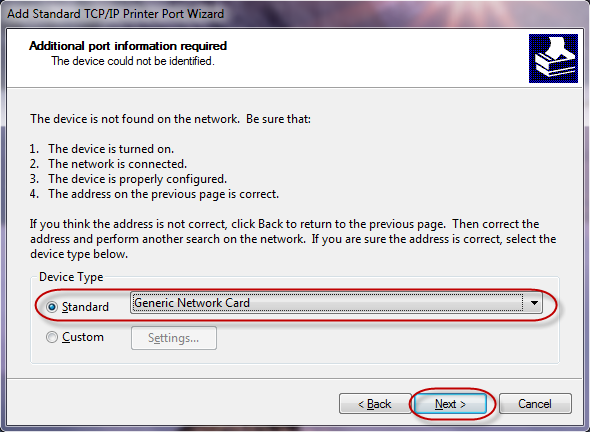
- Select Standard – Generic Network Card, click Next.
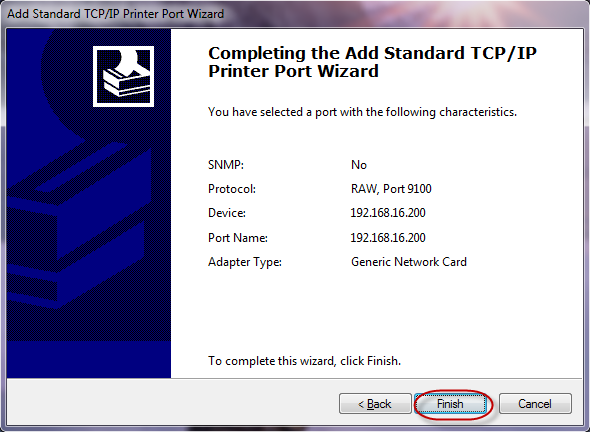
- Click Finish.
- At that time, printer port is added successfully. Click Apply to complete.

