1. Purpose
If the restaurant wants to manage tables in order to know which guest is sitting on which table or how many tables are available, it is necessary to set up layout before the restaurant goes into operation.
* Case 1: Not yet set up layout at getting started step
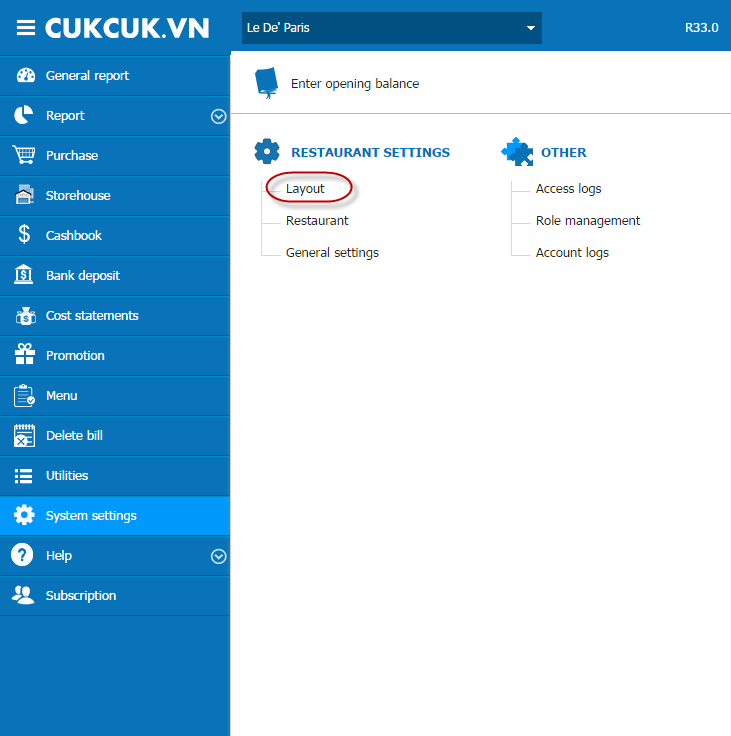
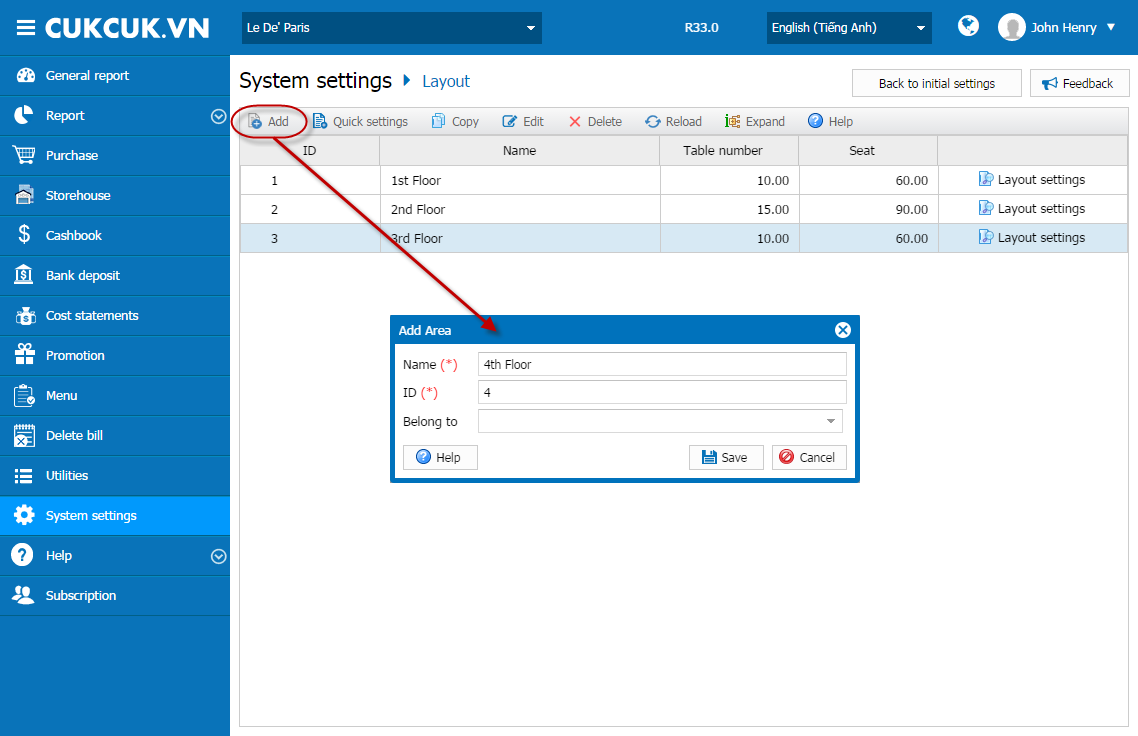
1. Go to System settings\Layout.
2. Enter Sale area.
3. Click Create.
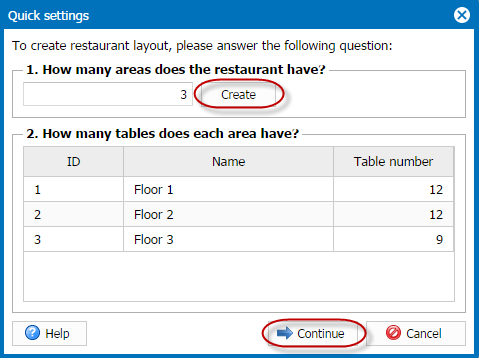
4. Edit area name according to the restaurant regulation.
5. Enter the number of tables for each area.
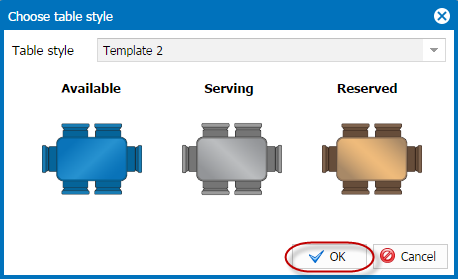
6. Select table template.
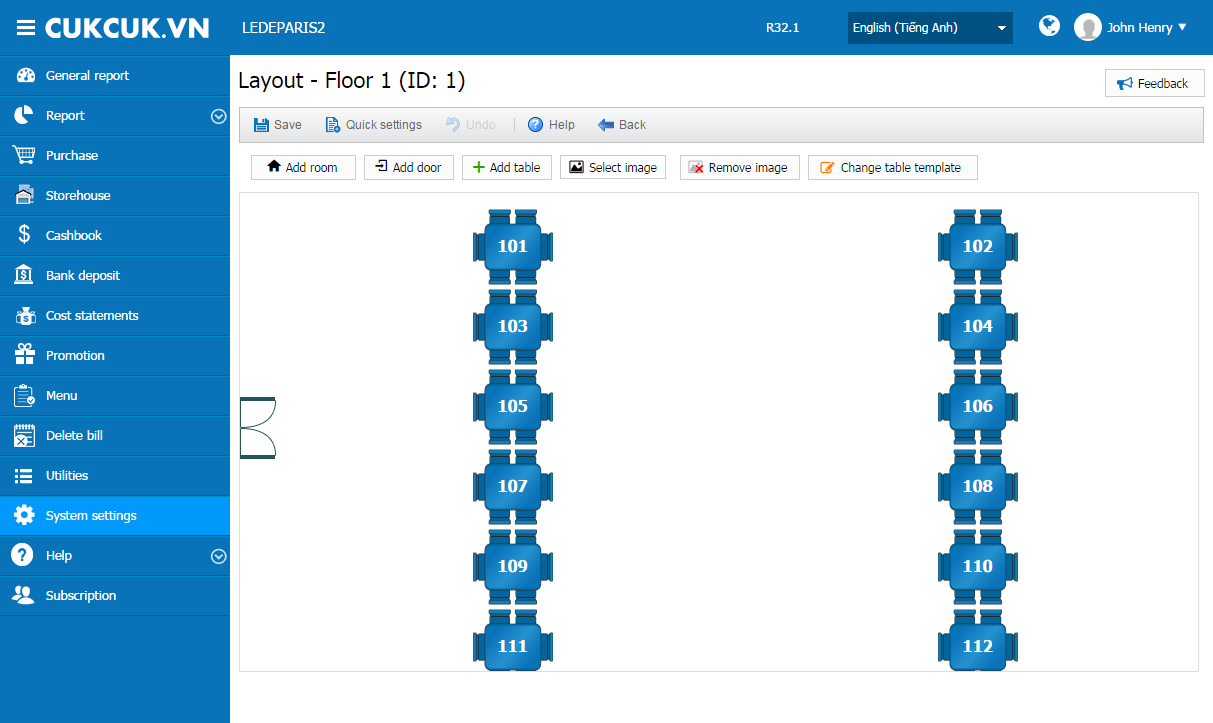
7. Click OK, the area will display as follows.
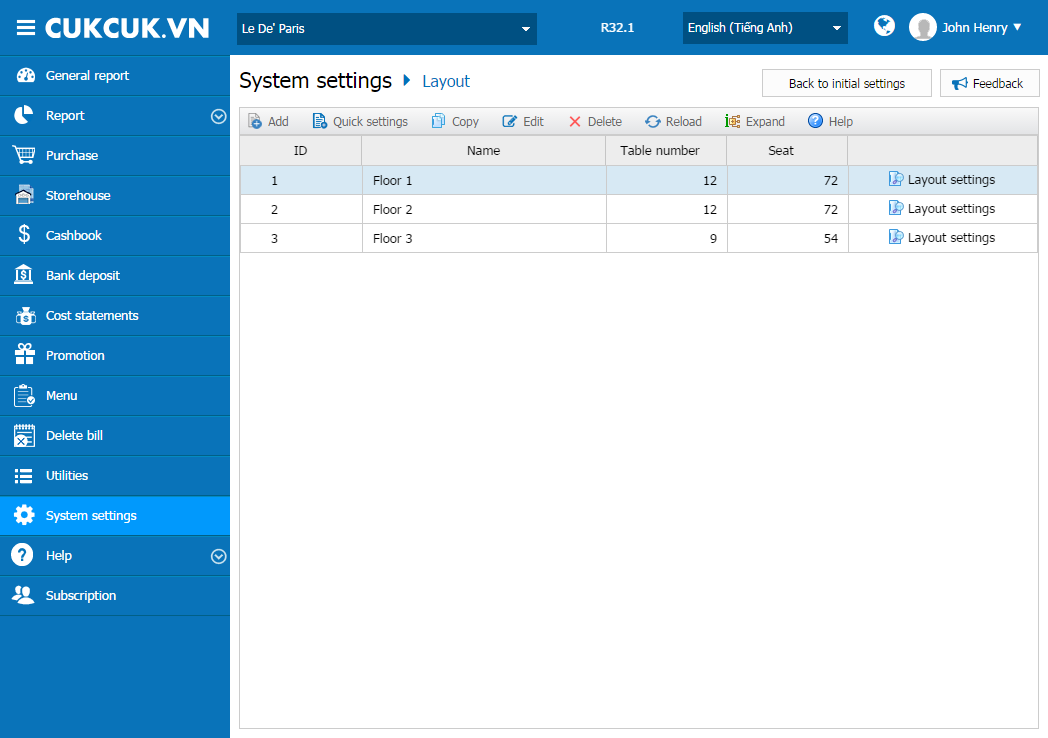
8. In the area to be set, click Layout settings
9. Reset the layout according to actual location.
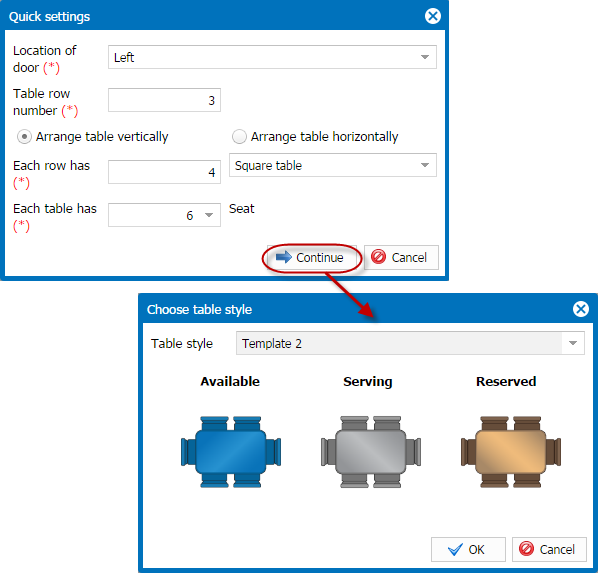
Alternative 1: Select Quick settings.
Alternative 2: Drag and drop the mouse to change the positions on the layout.
- Move the mouse to the table (or door) until it becomes four-way arrow.
- Press and hold the left mouse button and drag the table (or door) to the expected location.
- Right-click and select a proper function to reset the table (or door).
- Moreover it is possible to use these functions: add room, add door, add table on the toolbar to reset the layout.
- And it is possible to select a background so that the staff can imagine the layout when assigning table.
9. Click Save.

- After setting up, table information will display as follows:

To reset Layout, follow these steps: 1. Go to System settings\Layout.
2. Click Add to create new area.
3. Select a created area, click Delete to delete the selected areas.
 4. In the area which needs to reset the layout, click Layout Settings.

5. Reset the layout according to the actual location.Alternative 1: Select Quick Settings.
Alternative 2: Drag and drop the mouse to change the positions on the layout.
- Move the mouse to the table (or door) until it becomes four-way arrow.
- Press and hold the left mouse button and drag the table (or door) to the expected location.
- Right-click and select a proper function to reset the table (or door).
- It is possible to use these functions: Add room, Add door, Add table on the toolbar to reset the layout.
- Click Change table template to reselect the table template for the area.
- And it is possible to select a background so that the staff can imagine the layout when assigning table.
6. Click Save.
- After setting up, table information will display as follows:
