I. Purpose:
Restaurants in Philippines can take order, check out and close entries in the end of the day.
Instructions include:
1. Enter quantity of devices on the management page
2. Enter device information
3. Take order and check out
4. Close entries
5. Disable devices
II. Instruction steps:
1. Enter quantity of devices on the management page
Step 1: On the management page, select System settings\General settings.
Go to Implementation model, click Edit.

Step 2: Enter Quantity of devices.
1. Enter quantity of devices on the management page
Step 1: On the management page, select System settings\General settings.
Go to Implementation model, click Edit.

Step 2: Enter Quantity of devices.

Note:
– The restaurant can check devices entered on the program on List of devices.
– If the restaurant wants to disable any device, please check out here.
2. Enter device information
Step 1: On Sale screen, select Settings.

Step 2: Go to Device information, click Edit and enter full information.

Then, click Save.
Note: MIN, Serial Number, Register Number are required fields.
3. Take order and check out
Step 1: On sale screen, after taking order click on the icon
The program allows users to enter quantity of guests to apply promotion/discount for each guest group.
– Senior citizens
– Person with disability
– Coaches/Athletes
– Common guests

Note: The program only allows to enter quantity of each guest group when they dine in.
Enter Object information in the field (if the order has many objects, the restaurant only needs to enter information of 1 object)

Step 2: To check out, on Order screen click Check out.

Click on Discount to view details. Here show discount details applied to each group.
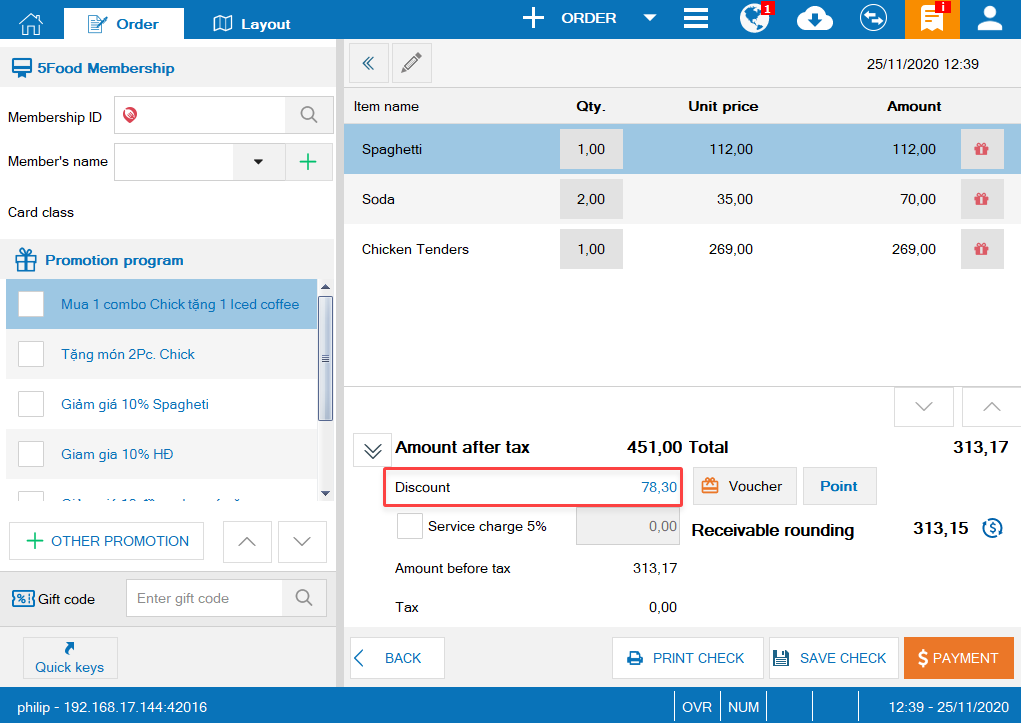

If the guest uses voucher to check out:


If the guest uses voucher to check out:
- If the voucher is more than the payable amount, the cashier will proceed applying the voucher and return the change.
Note:
- On the management page, you need to check the box “Return change to guest if the voucher value is more than total payment” in System settings\General settings\Purchase/Sale

- If the voucher is only applicable to drinks, but the order only includes food with no drink or vice versa, this voucher will not be applied
Step 3: Click Payment to complete payment for the customer.
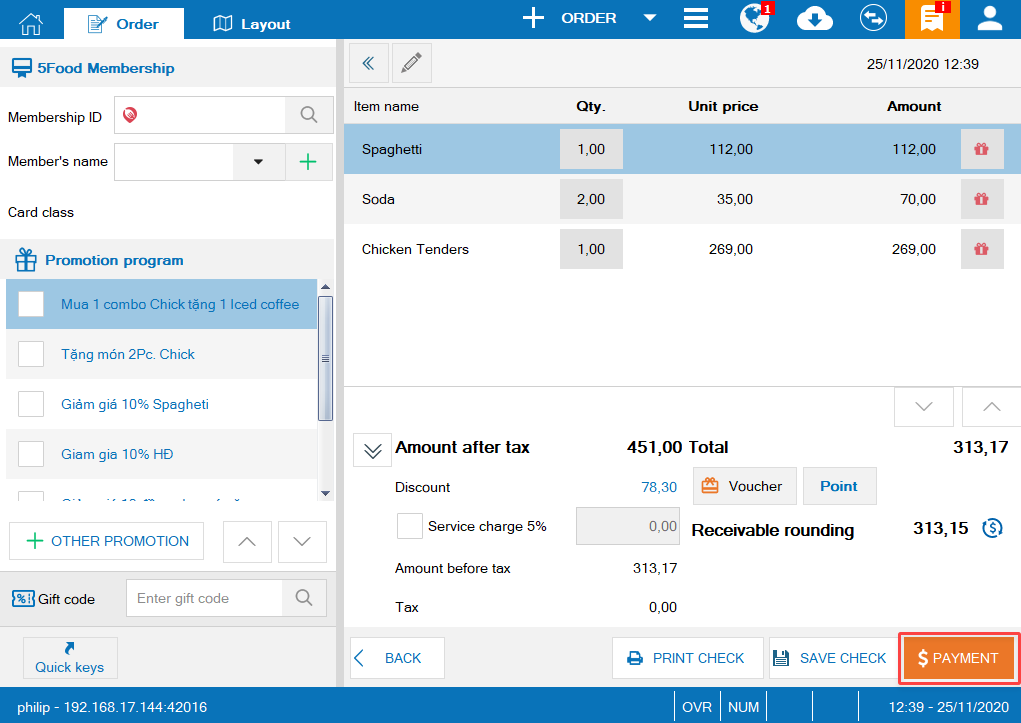
4. Close entries
4.1. Shift closing entry
In the end of the shift, when the staff logs out, the program will show Close shift message. Click Yes to close shift.
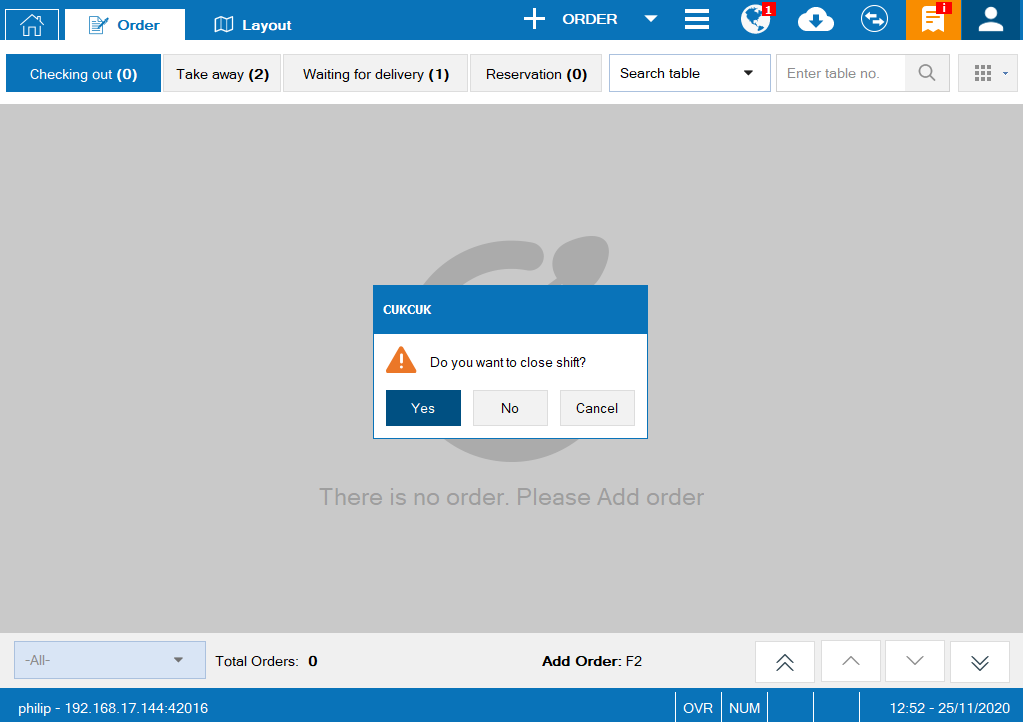

4. Close entries
4.1. Shift closing entry
In the end of the shift, when the staff logs out, the program will show Close shift message. Click Yes to close shift.


After closing shift, the manager click on the icon

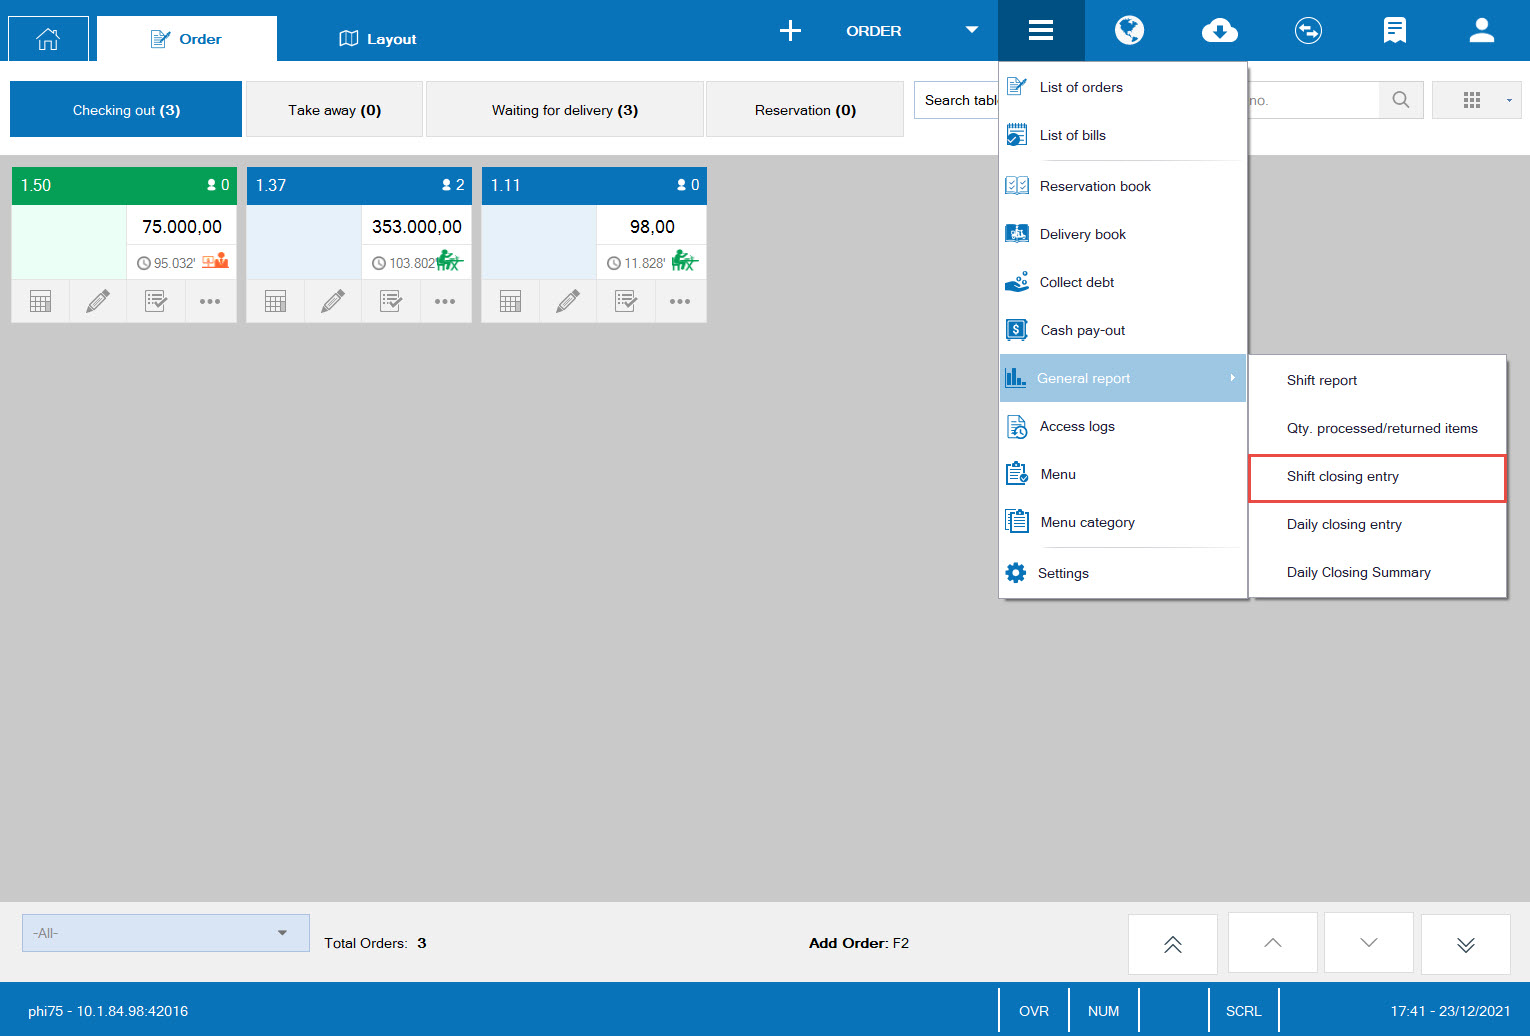
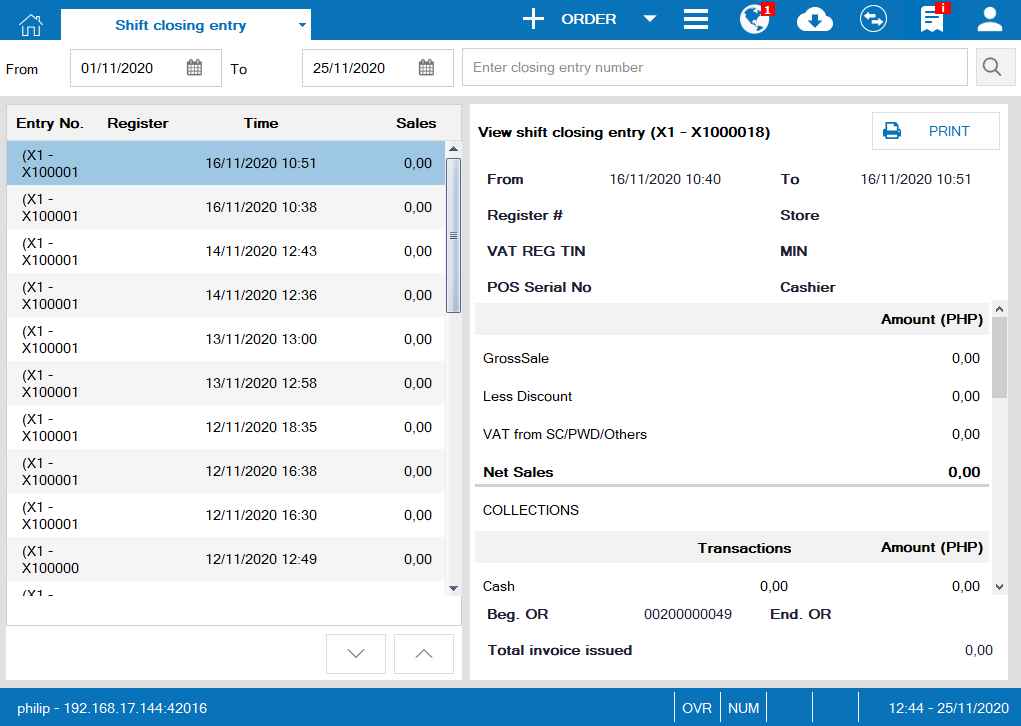
4.2. Close daily entries
Step 1: In the end of the day, the manager closes daily entry. On the sale screen, click on the icon

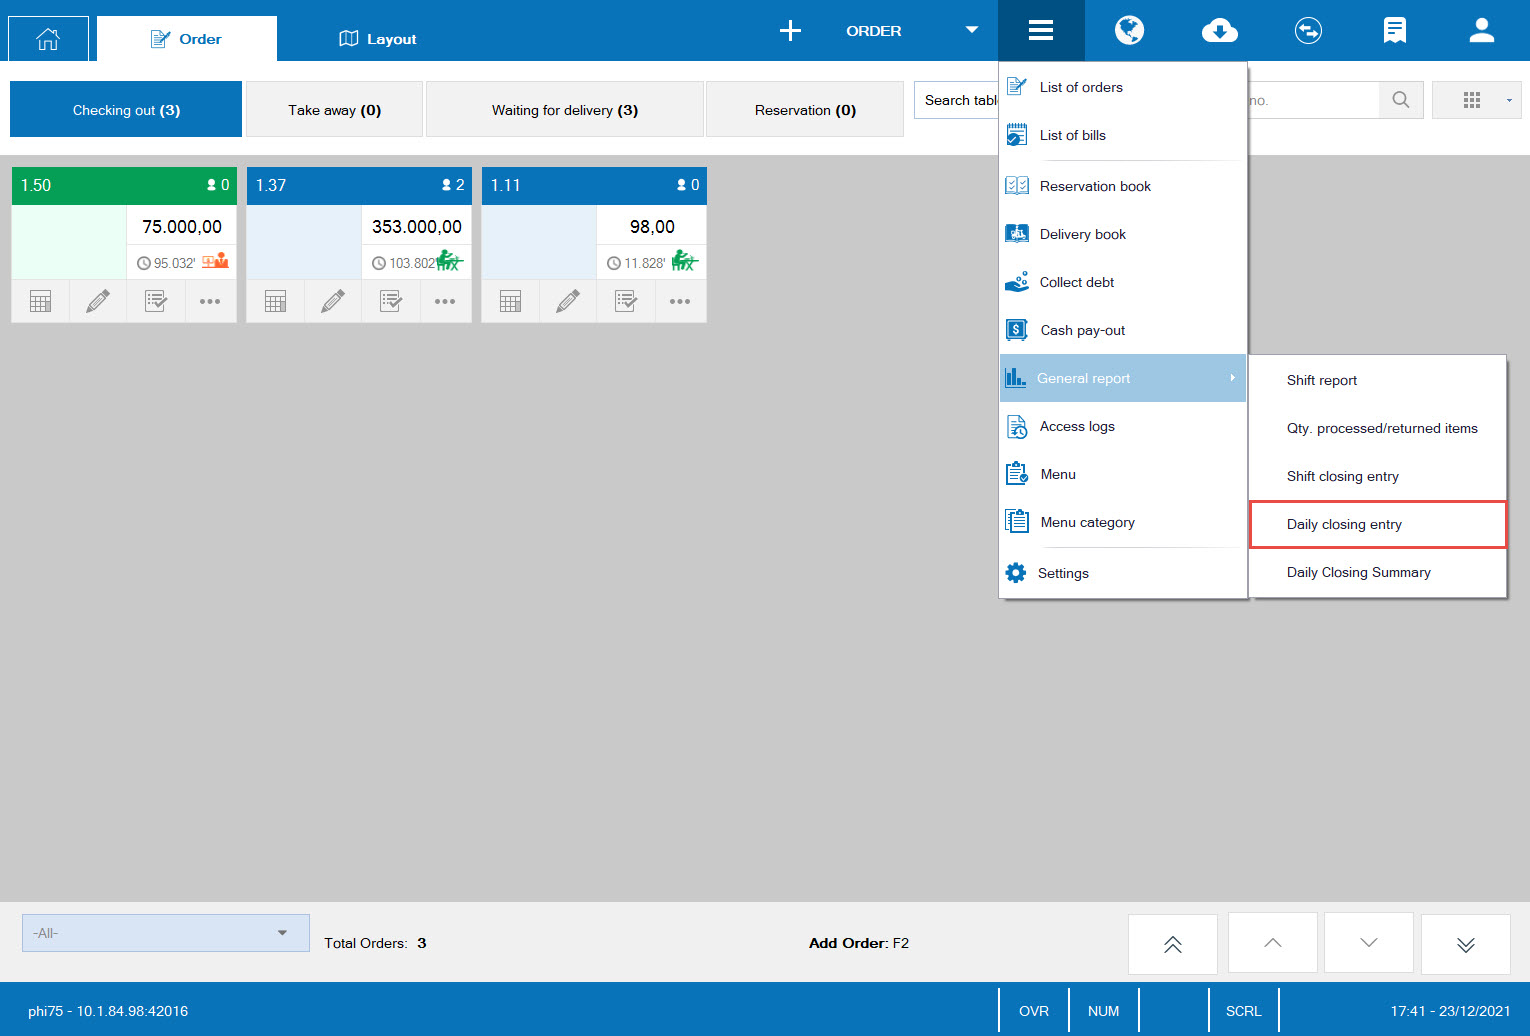
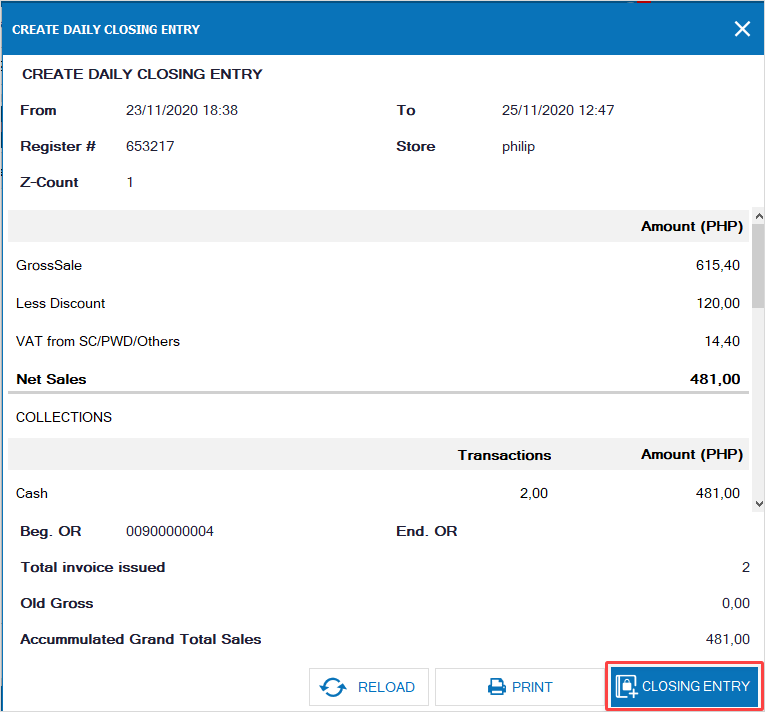
Step 2: Click Create daily closing entry.

Step 3: The screen shows sales of each shift, click Close entries to close daily entries.
4.3. Closing entry
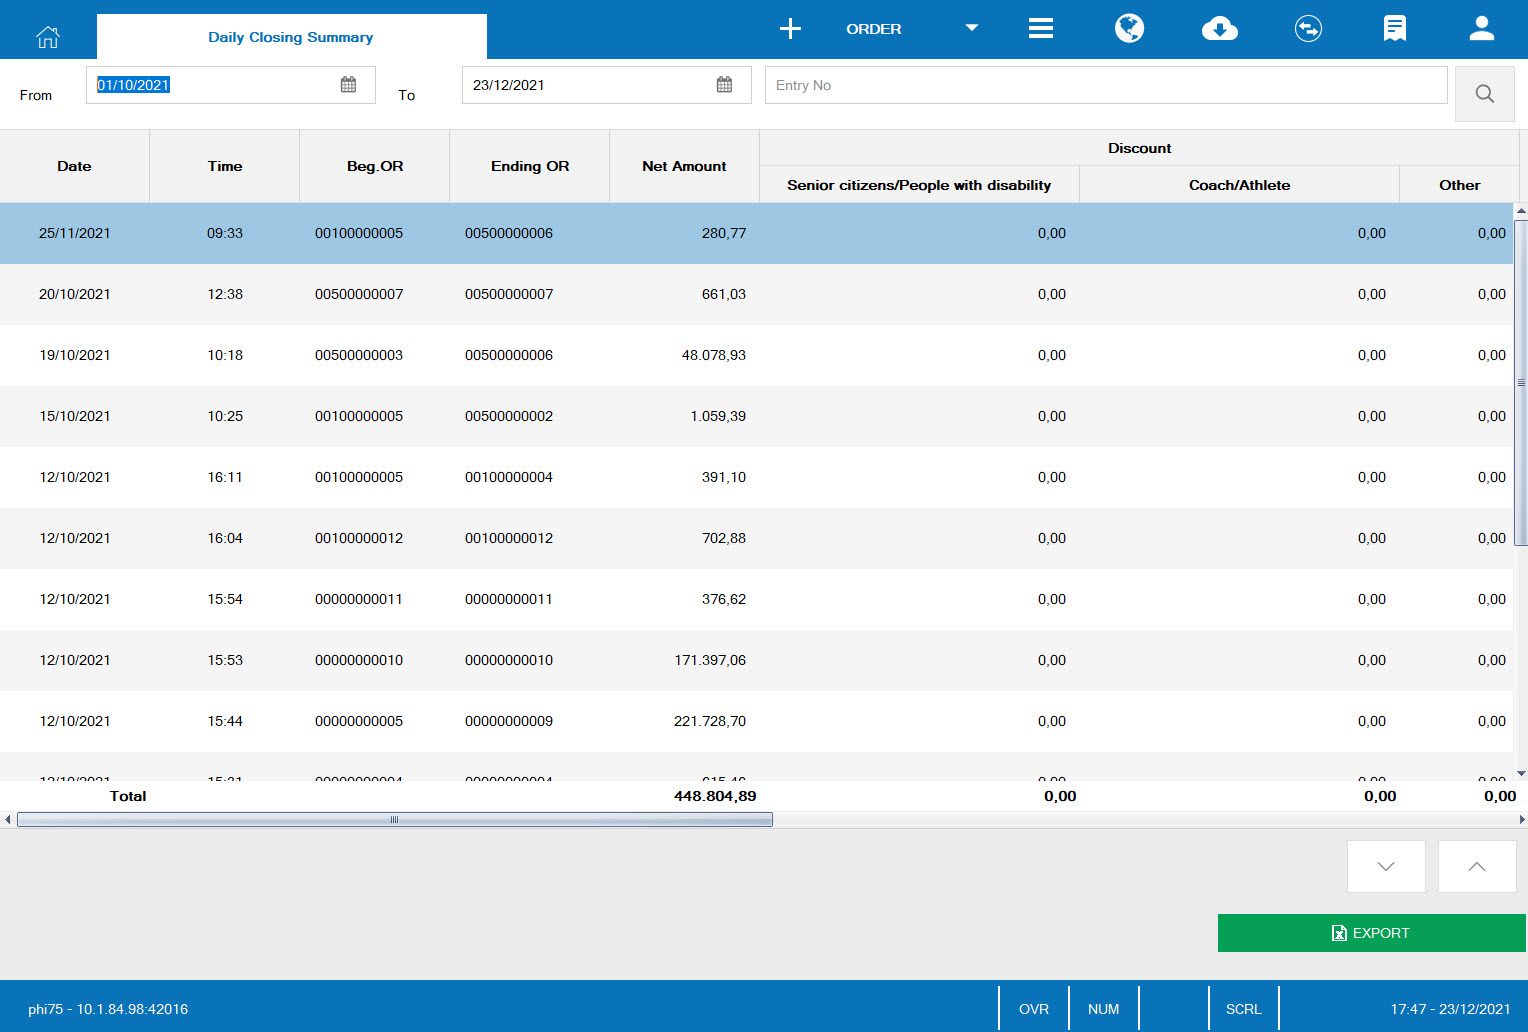
Step 1: In the end of a working day, the manager checks daily closing entry by clicking on the icon

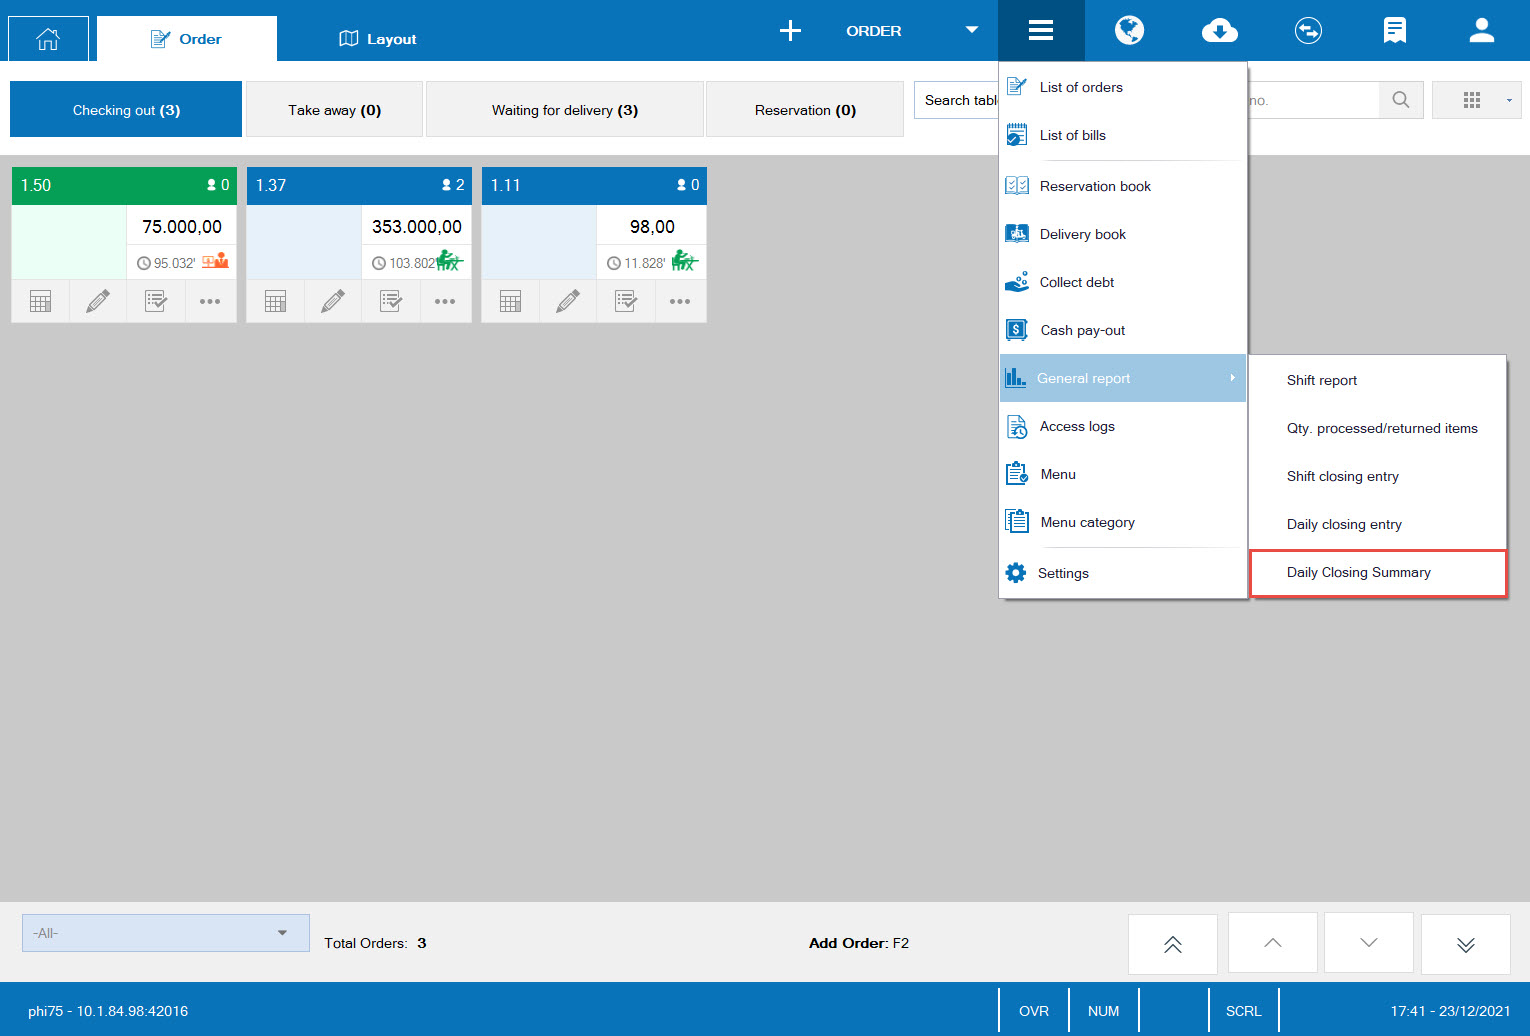
Step 2: On Daily closing summary screen, the manager can export the summary to an Excel file to check and manage.
5. Disable devices.
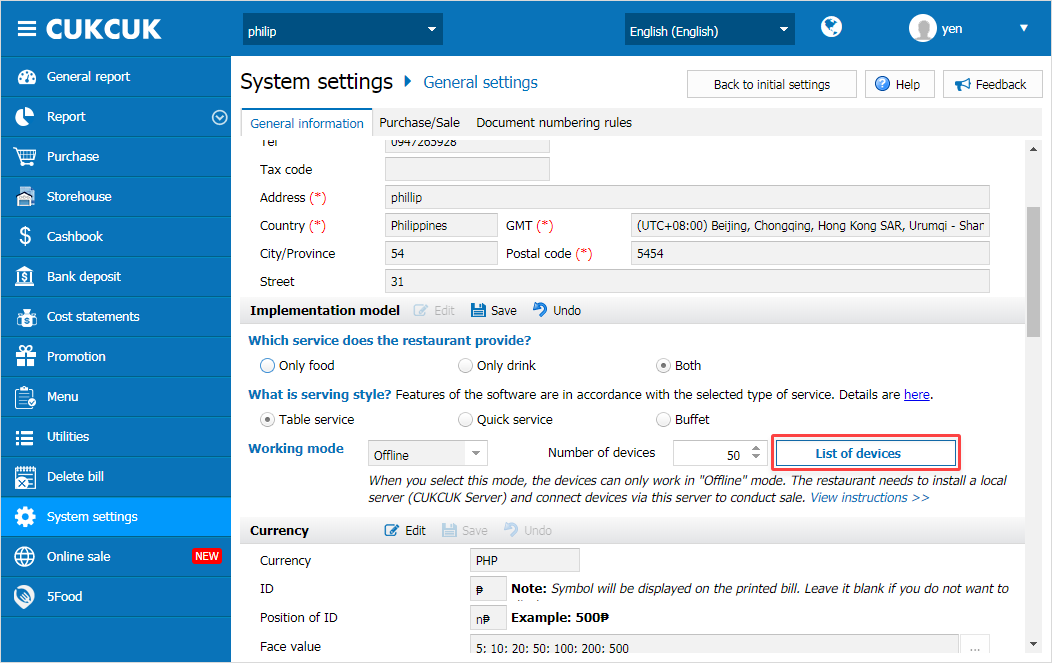
Step 1: On the management page, select System settings\General settings.
On Implementation model, click List of devices.
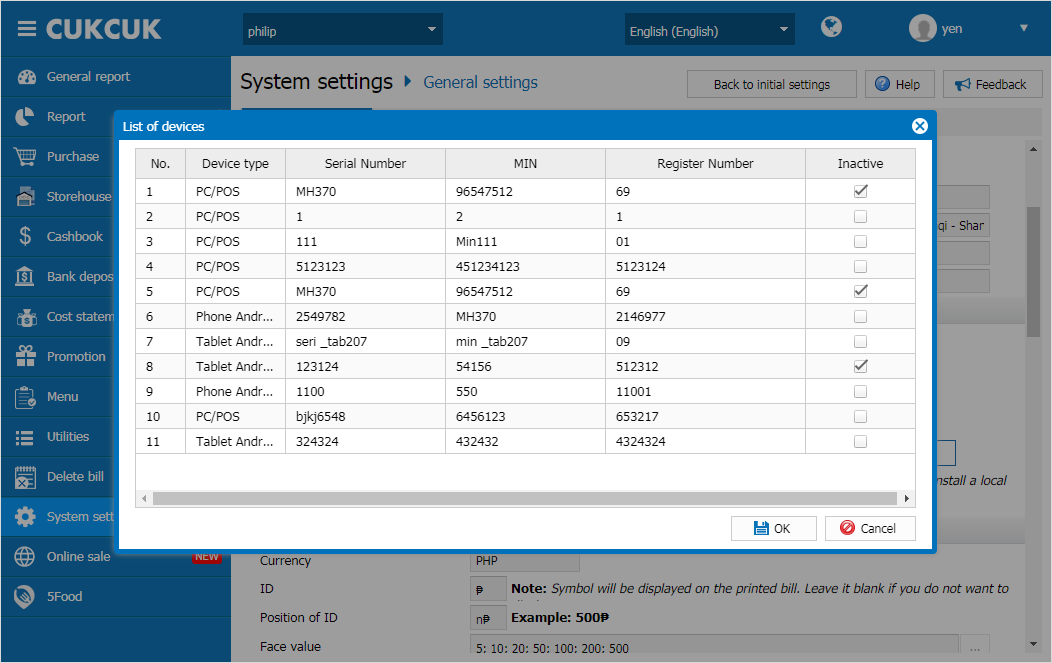
Step 2: The screen shows list and status of devices, check the box in Inactive column on the row of the device to be disabled.
Then click OK.
Step 3: Click Save.


