1. Connect POS with the card reader
2. Change Utilities\Cards/e-Wallet to Utilities\Method of payment
3. Increase the number of characters in a note on the table
4. The manager can add and edit items in KDS settings form
1. Connect POS with the card reader
Purpose:
Support the restaurants in connecting POS with the card reader to proceed payment more quickly and accurately
Instruction steps:
Here are detailed instruction steps:
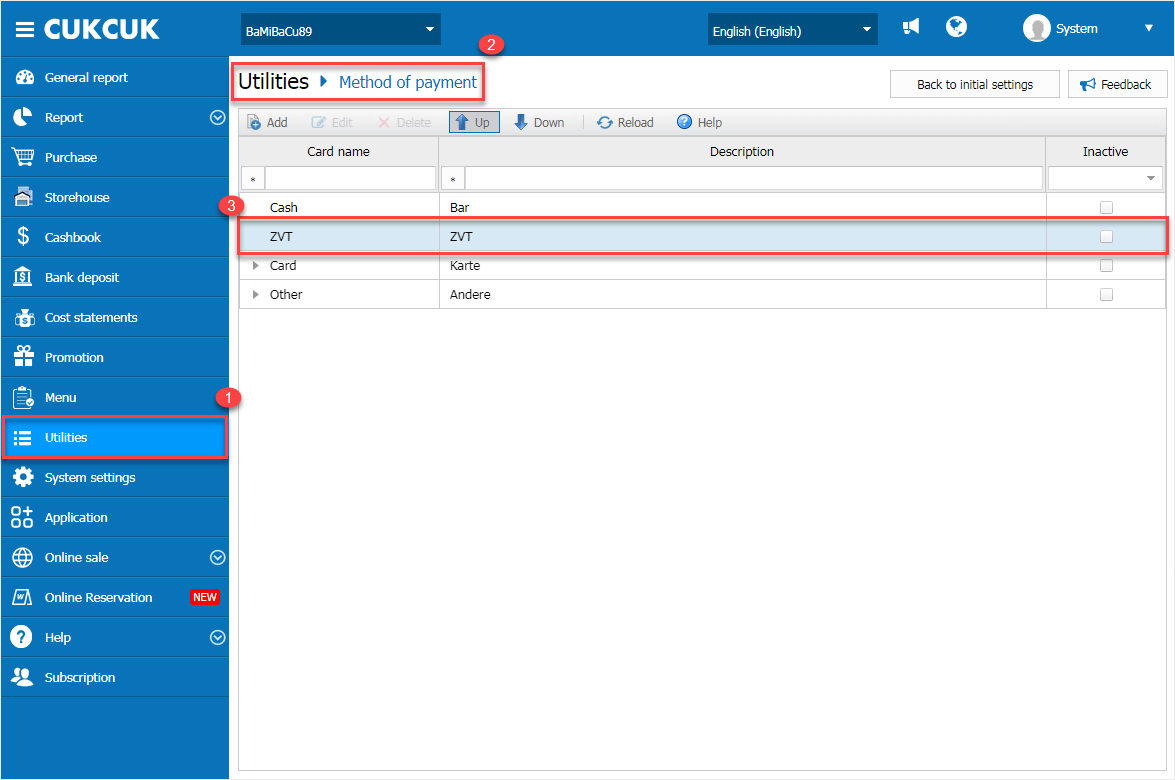
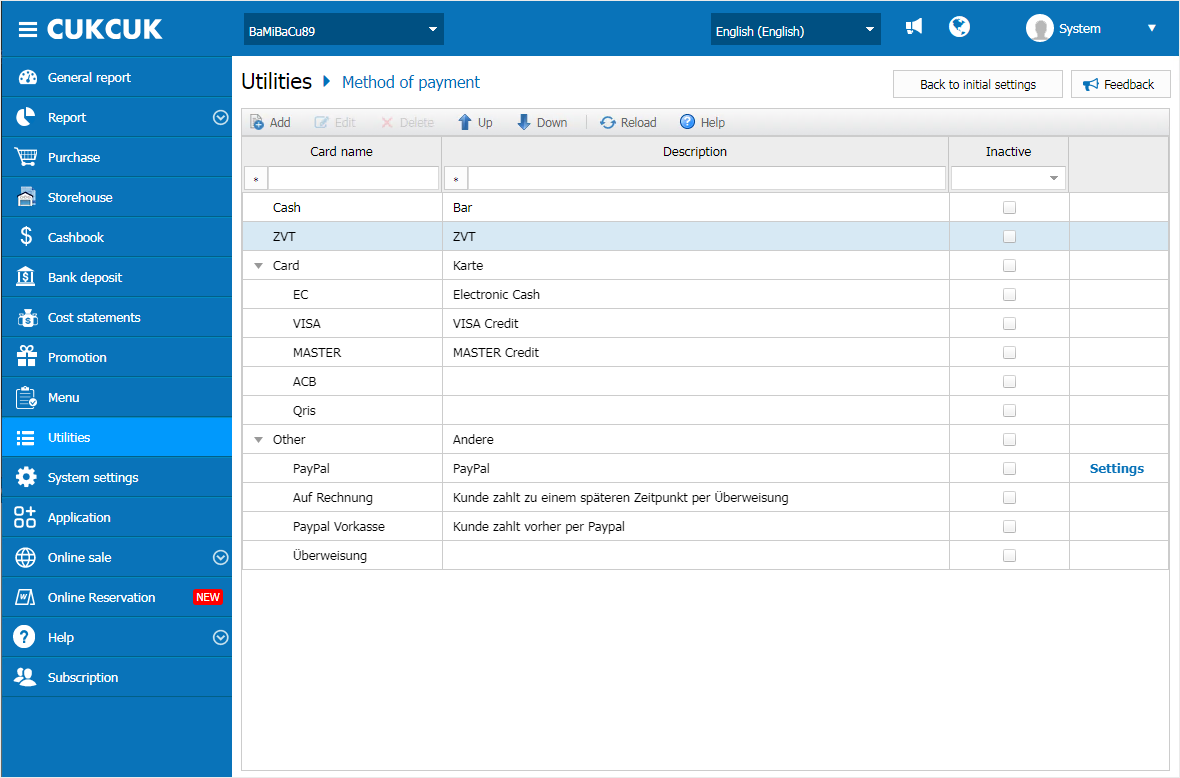
– Go to Utilities/Method of payment
– The software defaults ZVT
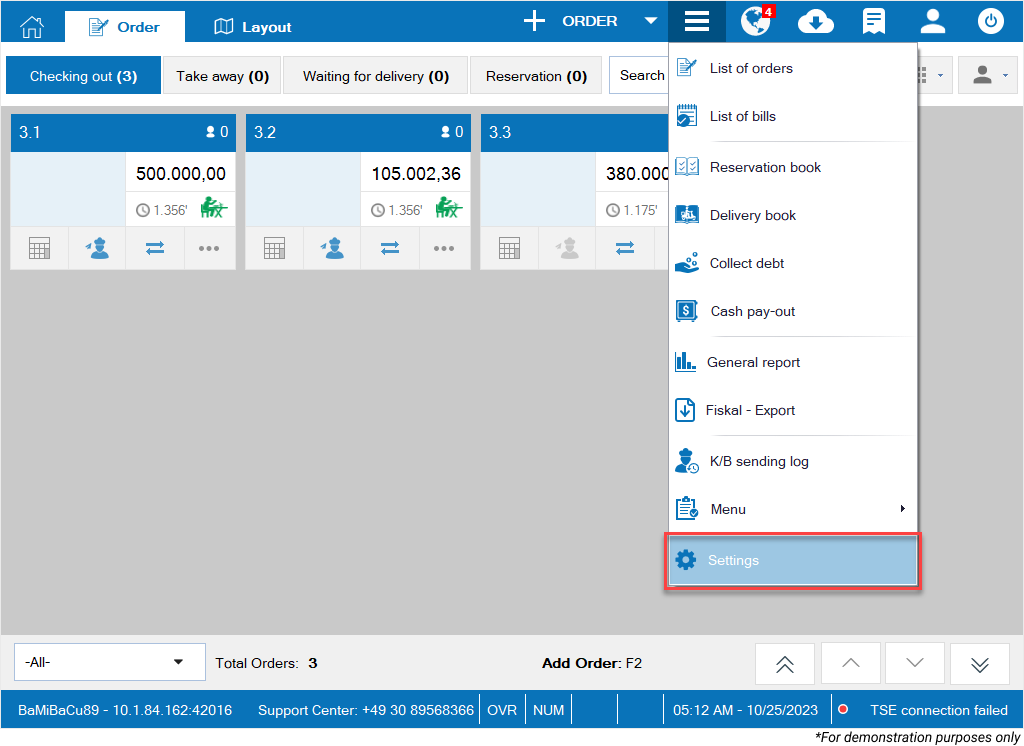
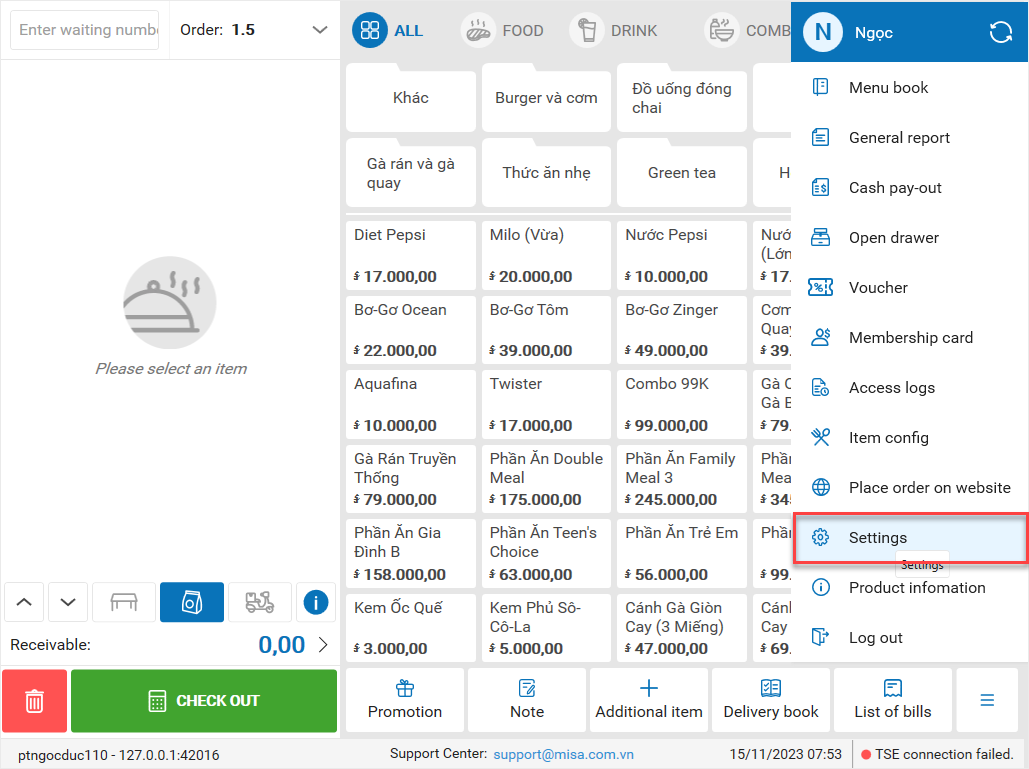
1. Click on the icon![]() and select Settings
and select Settings
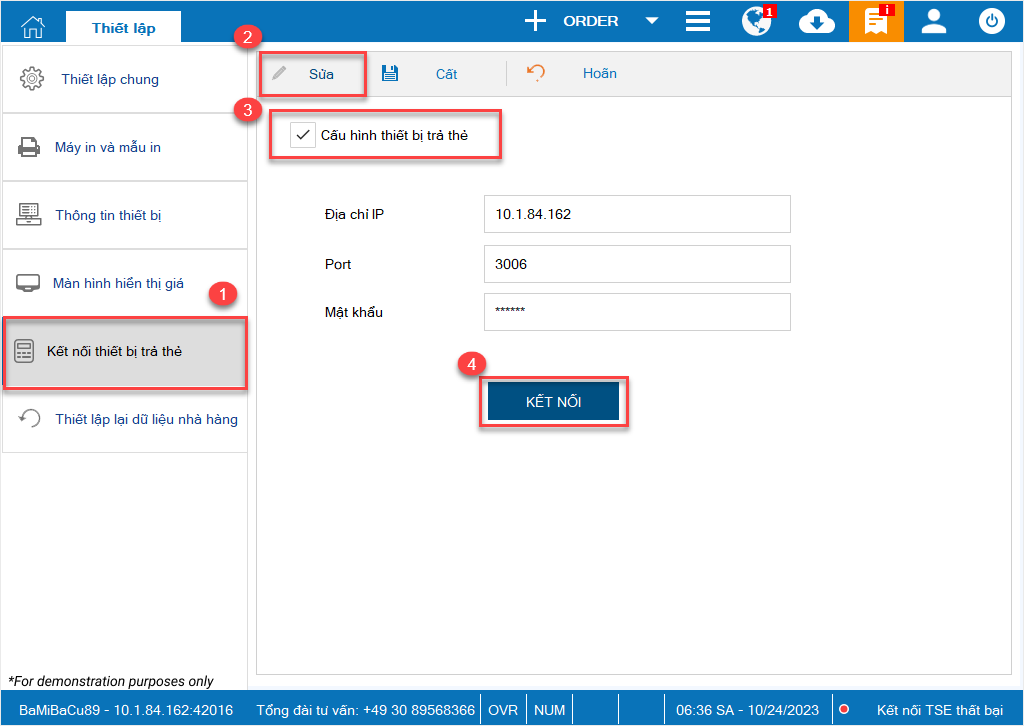
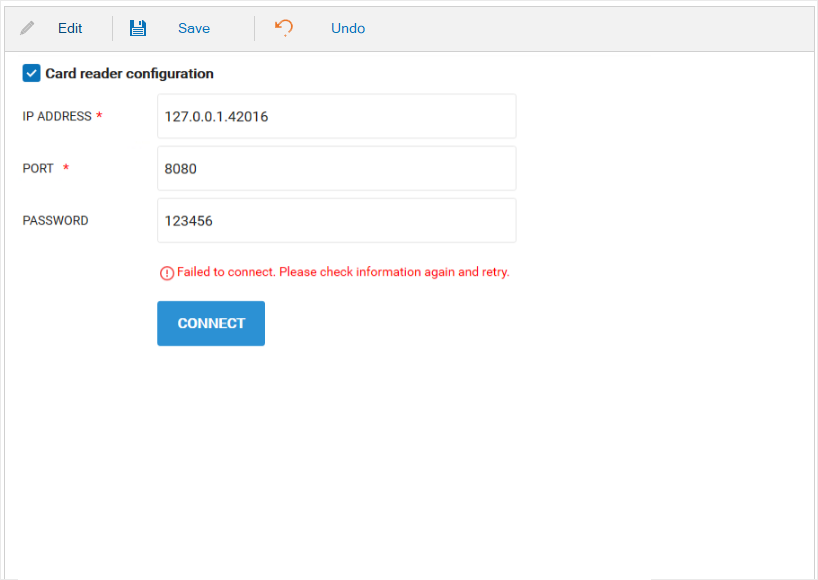
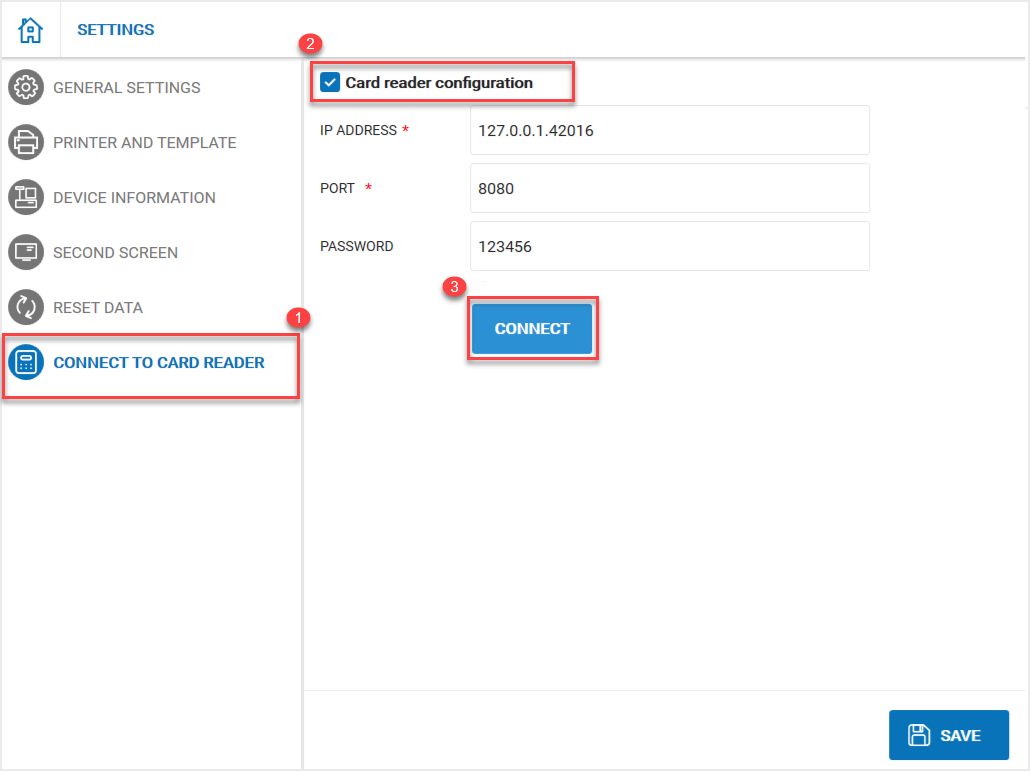
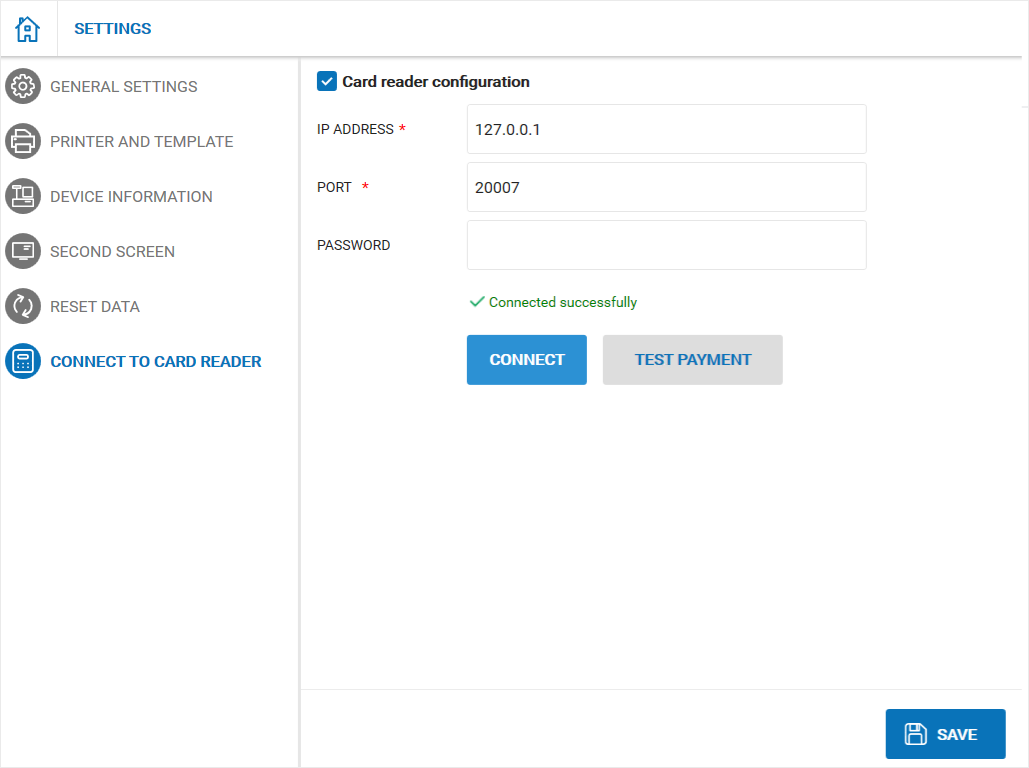
2. Select Connect to card reader
– Click Edit and check Card reader configuration
– Enter IP Address, Port and Password
Then click Connect
3. If everything is correct,
– This screen will show the status Connected successfully
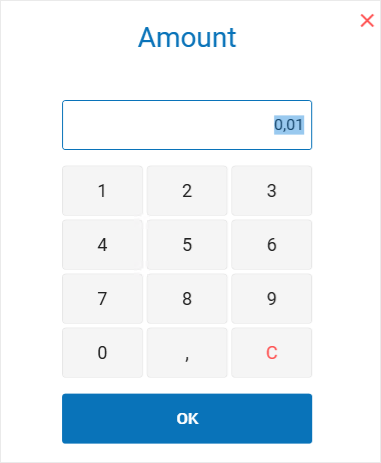
– Show the button Test payment
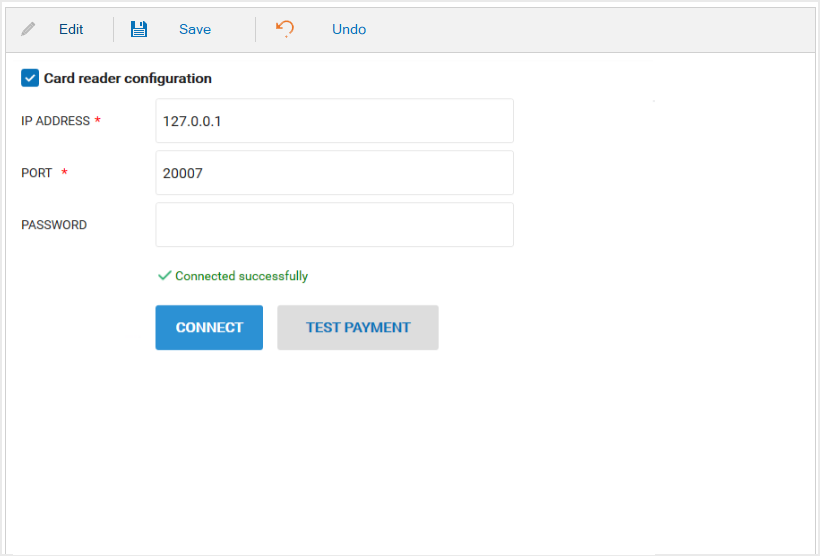
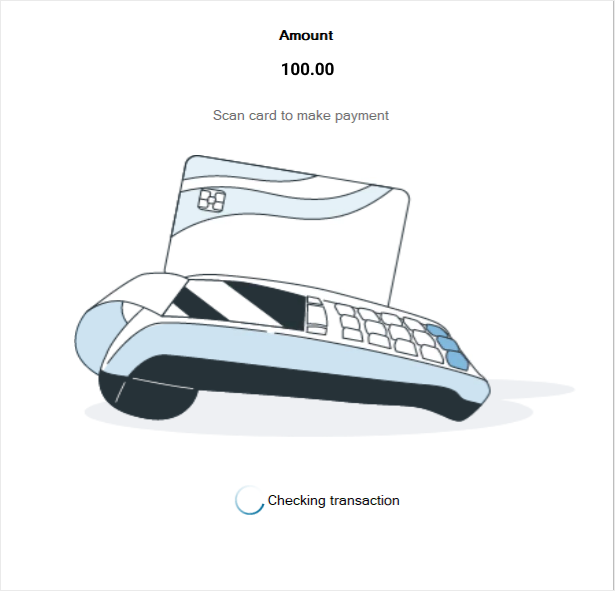
– Click Test payment. Test payment defaults 1 cent and maximum 10 cents.
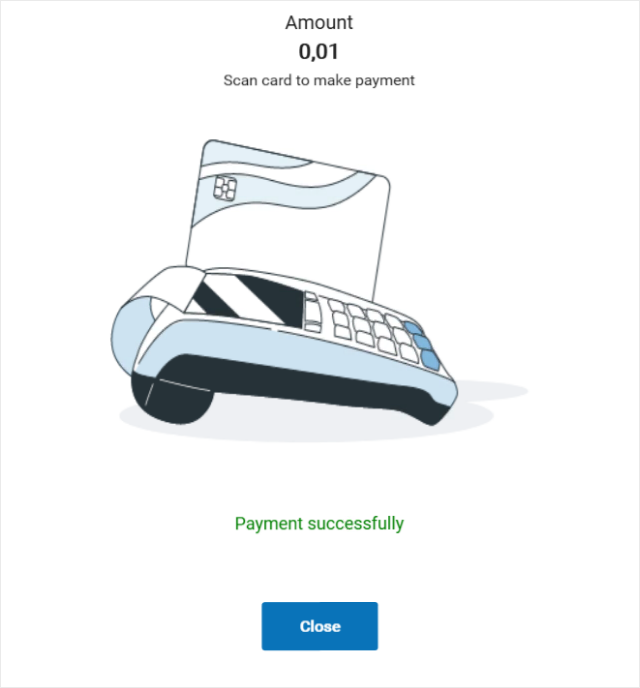
- Click OK. This testing amount will transmit to the card reader
- After successfully swiping the card, the program navigates to the setup screen


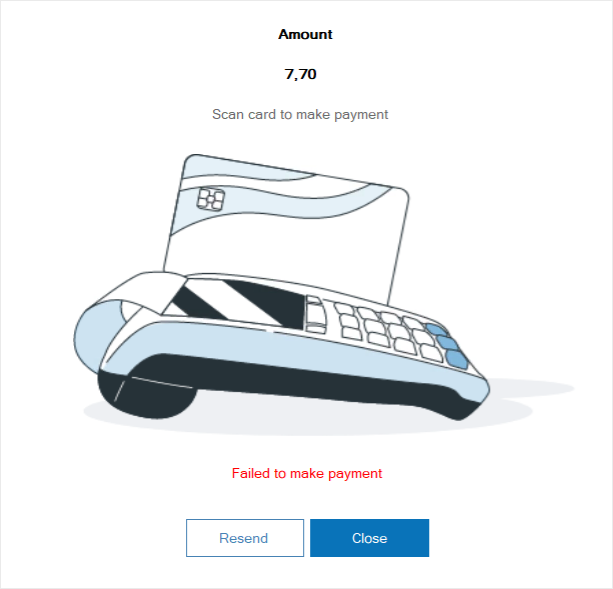
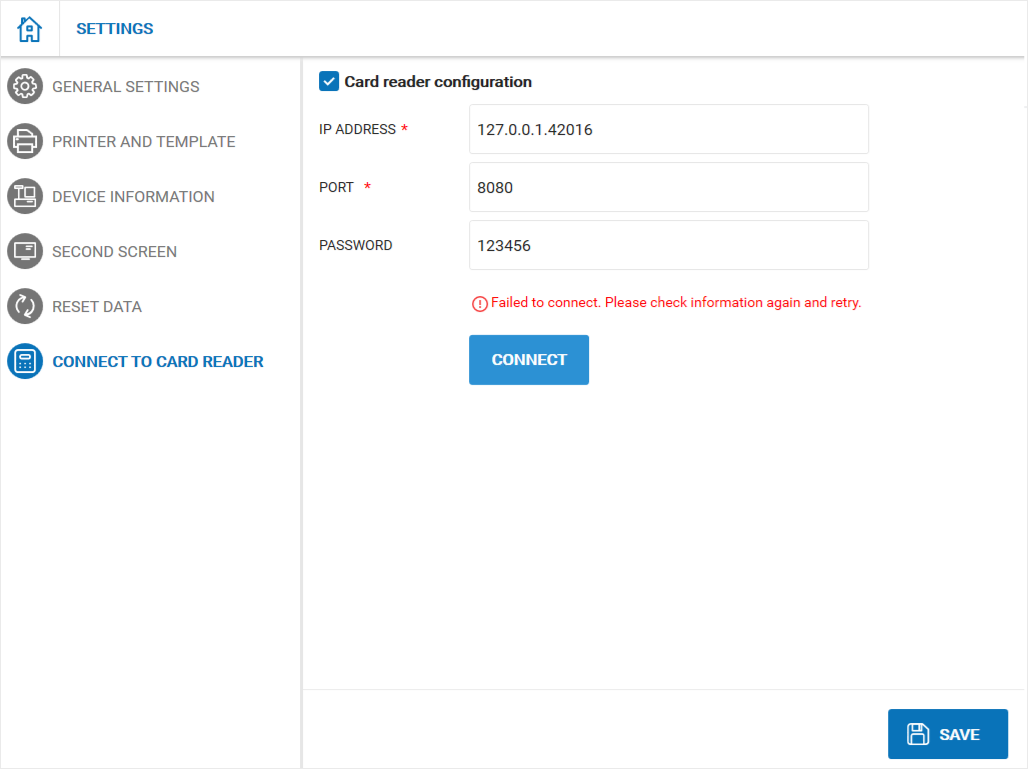
- If test payment fails,
-
- Click Close and go back to the settings screen
- Click Resend and the program navigates to Checking transaction screen and the manager can proceed payment again.
4. If the information is wrong, test payment will fail. The manager needs to reconnect.
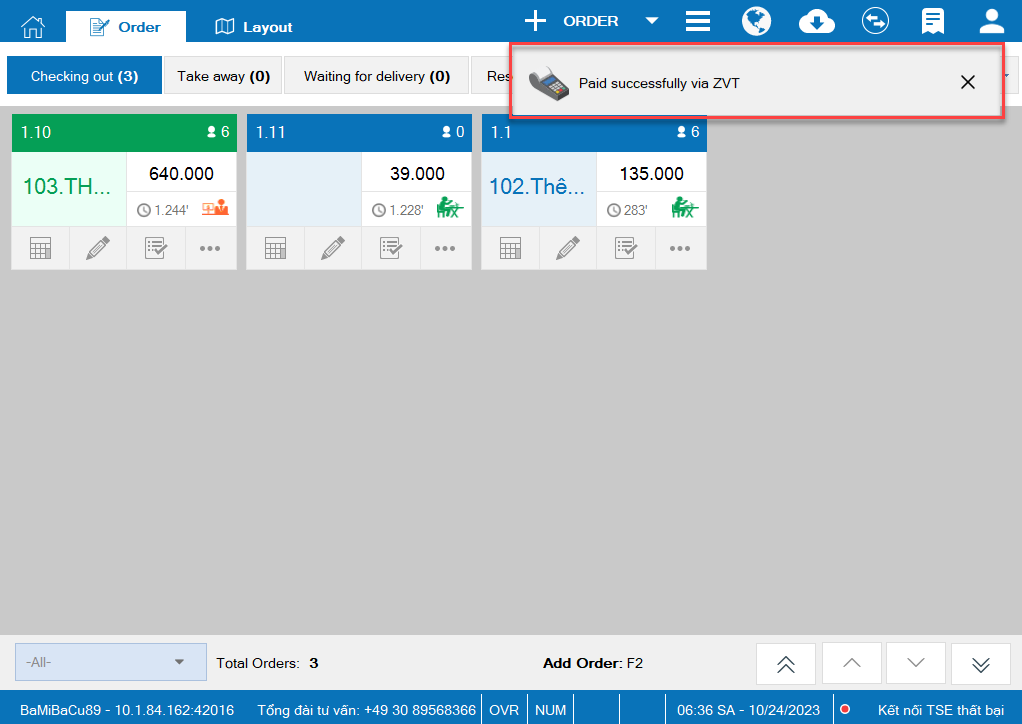
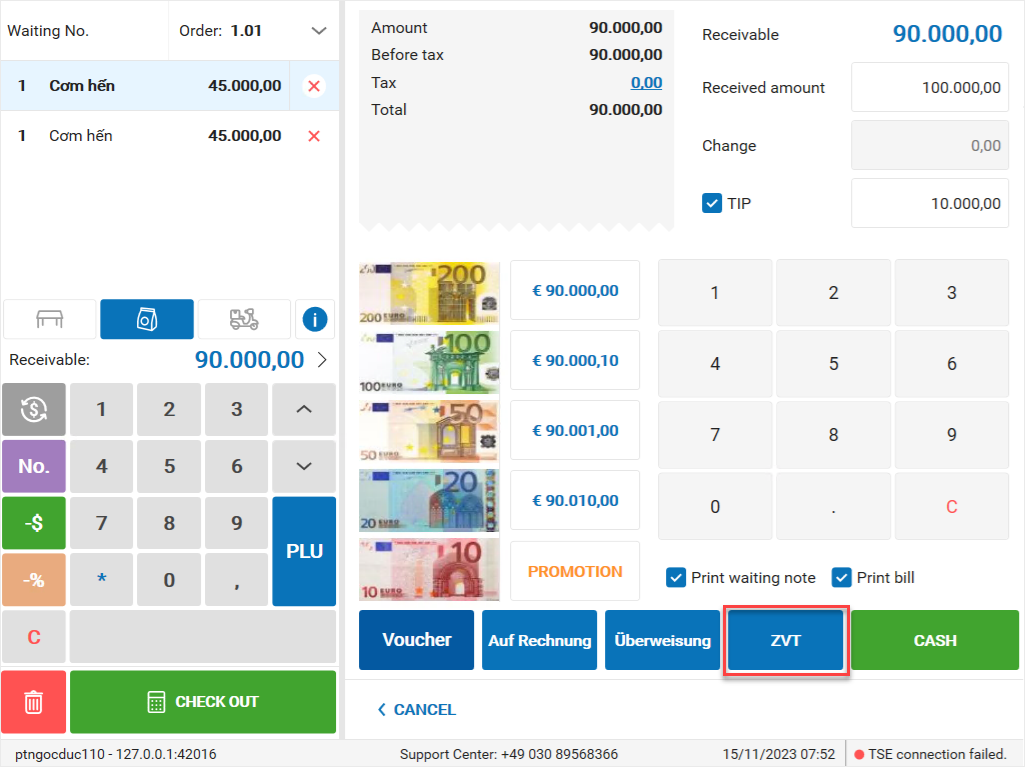
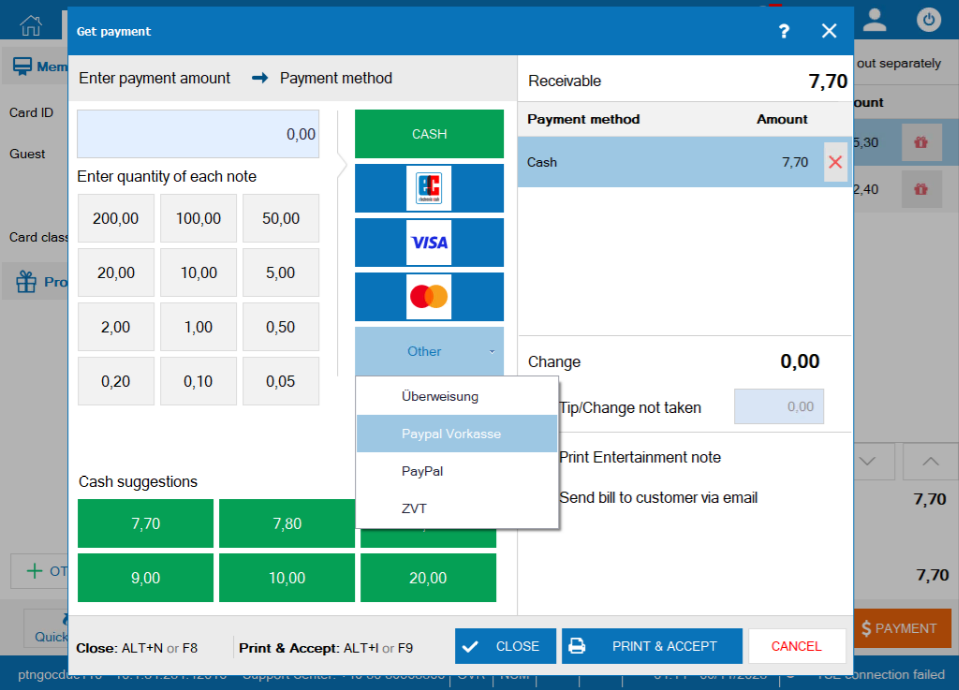
5. After connecting successfully with ZVT, on Get payment screen:
– Show payment by ZVT
– Select ZVT
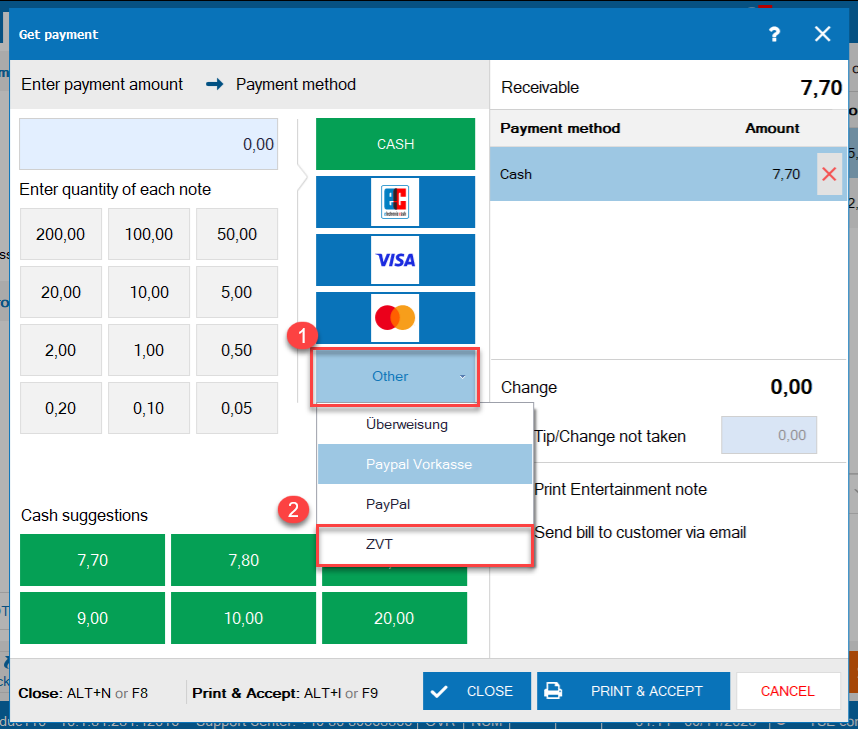
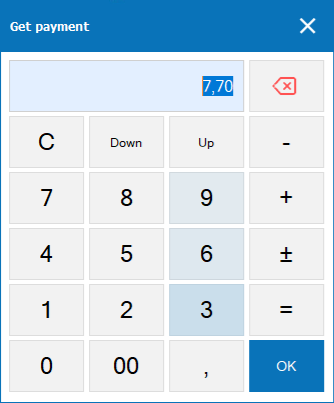
– Enter amount (including tip) and then click OK.

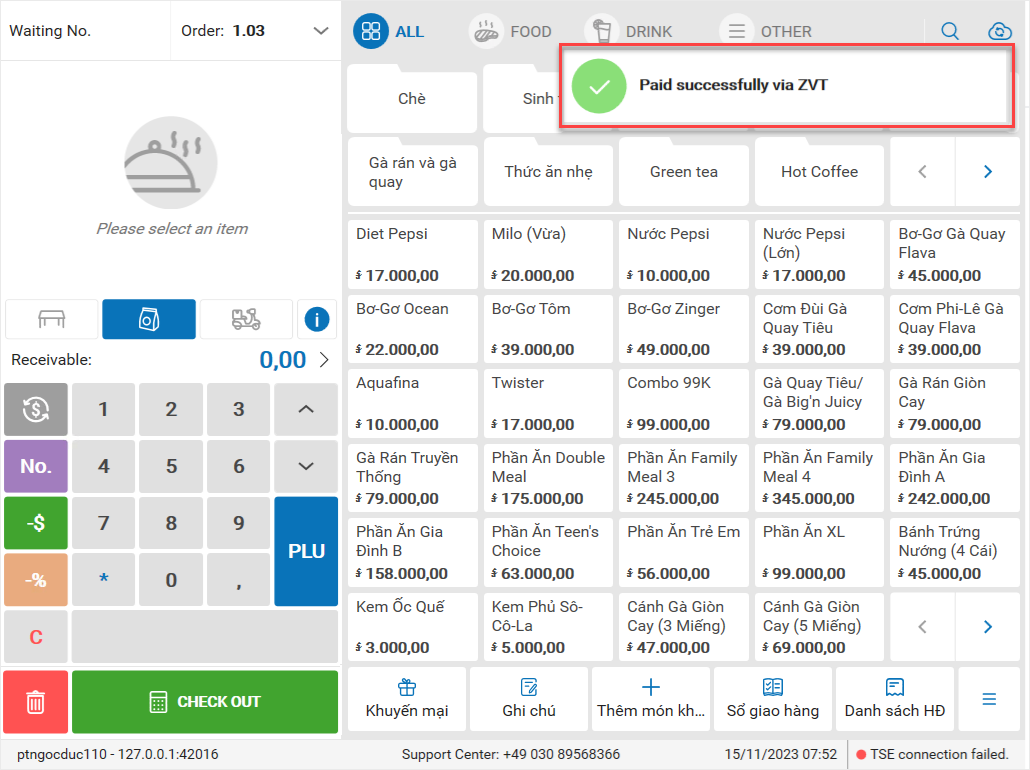
After getting payment successfully, the program navigates to Order screen and shows Paid successfully as in the image.
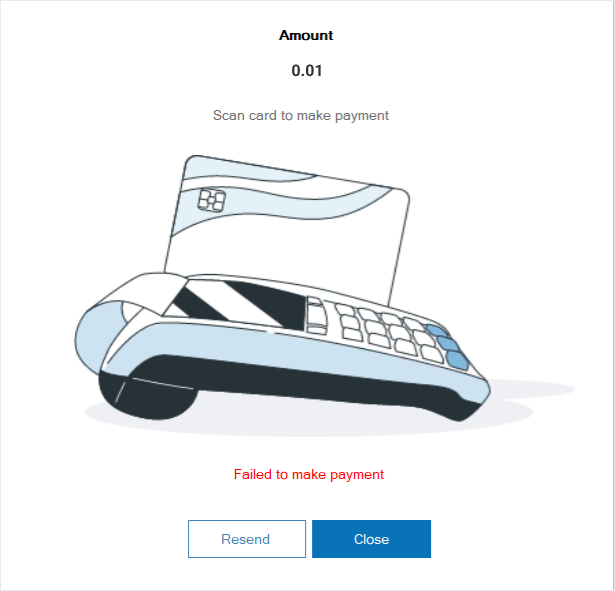
– If getting payment fails, the program will show the message as in the image.
- Click Resend to proceed payment again
- Click Close to close the form. The program goes back to Get payment screen.
7. Note:
– Upon making payment by ZVT,
- One order can be paid with only 1 ZVT card and Required to make full payment for the order (including tip).
- If the paid amount is more than the payable amount (including tip), upon clicking OK the extra amount will be added as tip.
– Bill cannot be edited after getting payment successfully.
1. Click on the icon![]() and select Settings
and select Settings
2. Select Connect to card reader
– Check Card reader configuration
– Enter IP Address, port and password. Then click Connect.
3. If everything is correct,
– This screen will show the status Connected successfully
– Click on Test payment and enter the amount
Note: Test payment defaults 1 cent and maximum 10 cents.
- Click OK. This testing amount will transmit to the card reader
- If test payment fails,
-
- Click Close and go back to the settings screen
- Click Resend and the program navigates to Checking transaction screen and the manager can proceed payment again.
4. If the setup information is wrong, please reconnect.
5. After connecting successfully with ZVT, on Get payment screen:
– Show payment by ZVT
– Select ZVT
– Enter amount (including tip) and then click OK.
After getting payment successfully, the program navigates to Order screen and shows Paid successfully as in the image.
2. Change Utilities\Cards/e-Wallet to Utilities\Method of payment
Details of change:
On the management page, change Utilities\Cards/e-Wallet to Utilities\Method of payment to easily prepare reports to the finance department.

Payment methods include:
– Cash
– Card: defaults Master, EC, VISA
- The manager can edit logo, description,…
- The manager can add other methods
– Others: defaults Paypal, Aufchnung, Uberweisung
- The manager can edit logo, description,…
- The manager can add other methods
Note: On check-out, reservation book, shipping book, and voucher screen, order of payment methods is the same as that on the management page.
– If the cashier selects wrong payment methods,
- and the shift has not been closed yet, the cashier can edit it right on the bill
- and the shift has been closed, the cashier follows it up manually
3. Increase the number of characters in a note on the table
Purpose:
The staff can add note with more characters to easily follow up and serve the guests
Instruction steps:
3.1. Go to System settings\General settings\Purchase/Sale
On Sale, click Edit and check Allow different guest groups to sit at the same table.
Then click Save.

3.2. On PC
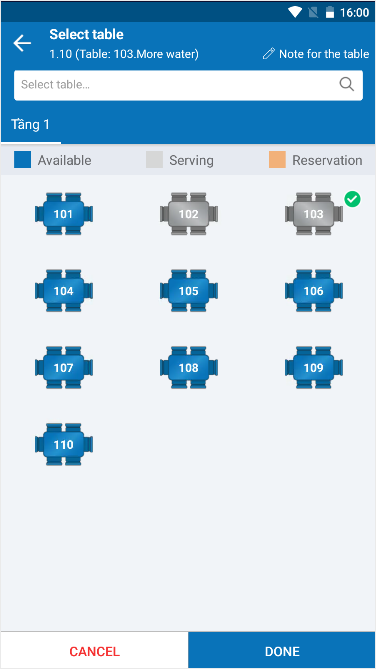
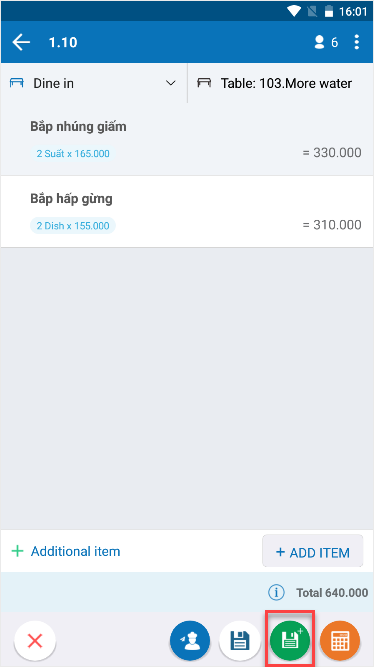
– Create order
– Click on the icon ![]() to select table and enter note.
to select table and enter note.
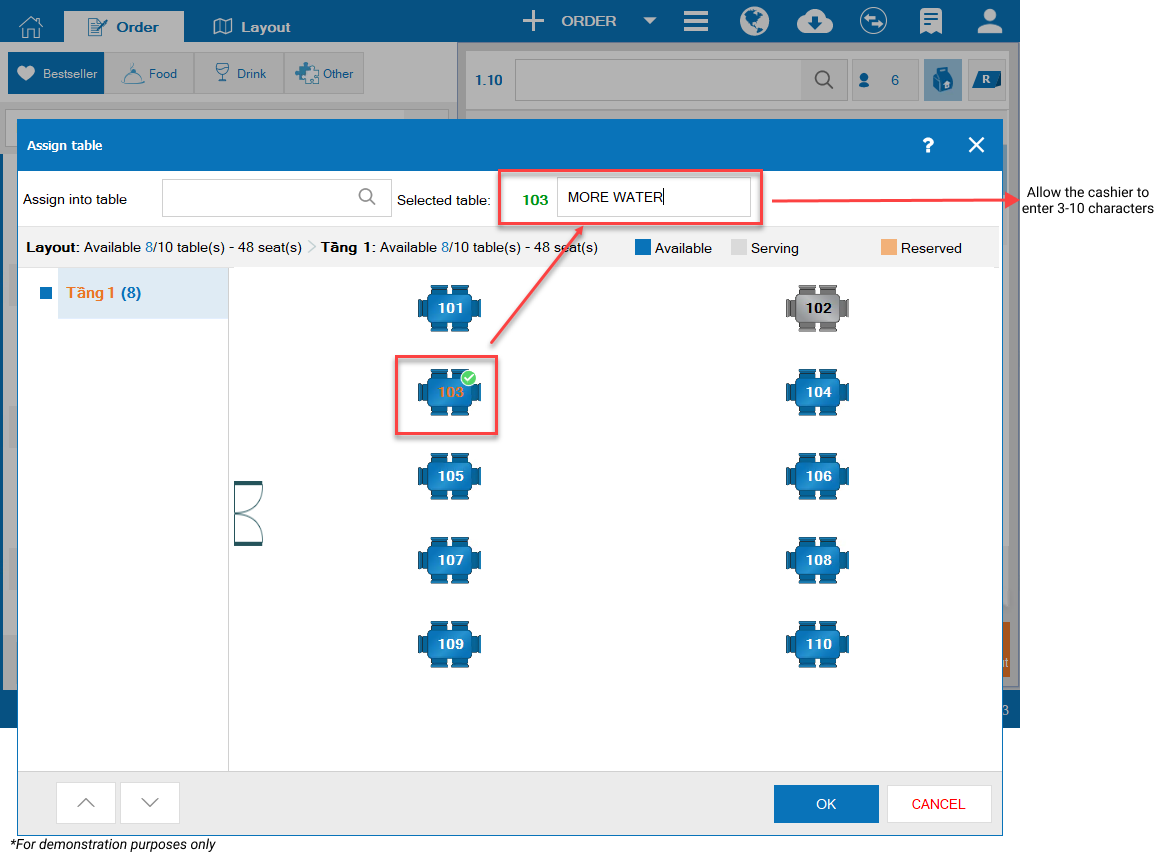
– Select items and then click Save or Save & Add to save information.
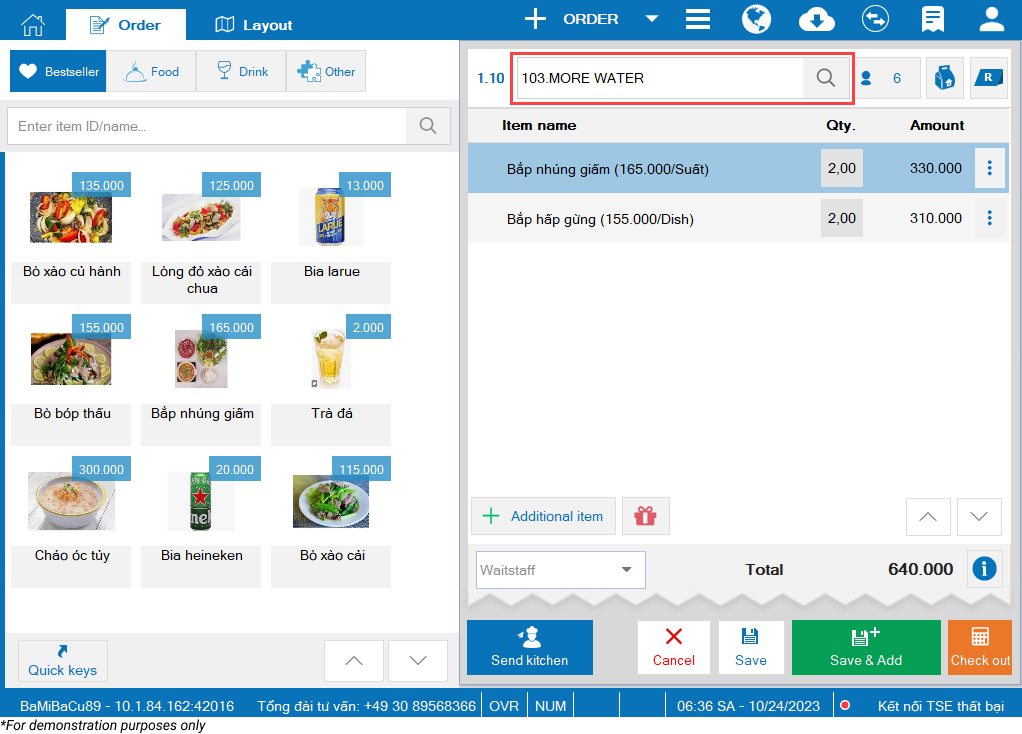
Note: The staff can add from 3 to 10 characters. From the 11th character, the program will not show content.
3.3. On Mobile/Tablet/KDS
3.3.1. On Mobile:
– Create order
– Click on the icon ![]() select table and enter note.
select table and enter note.
Then click OK.
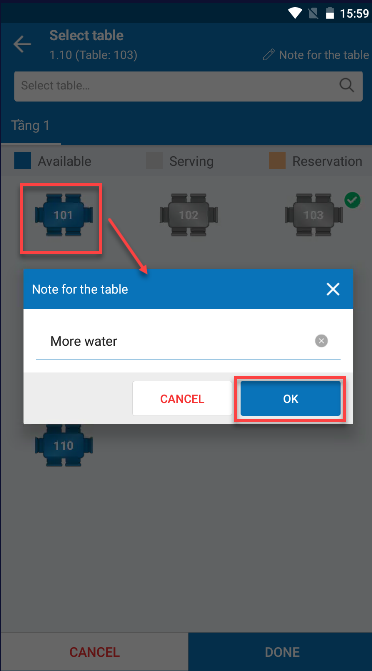
– Click on the icon ![]() to save order.
to save order.
3.3.2. On Tablet/KDS: The same as on mobile.
4. The manager can add and edit items in KDS settings form
Details of change: Currently, for inactive items or items which do not need sending to kitchen/bar, the staff has to manually remove them from the kitchen. Therefore, as of R110 CUKCUK allows the manager to quickly add and edit items in KDS settings form.
Here are detailed instruction steps:
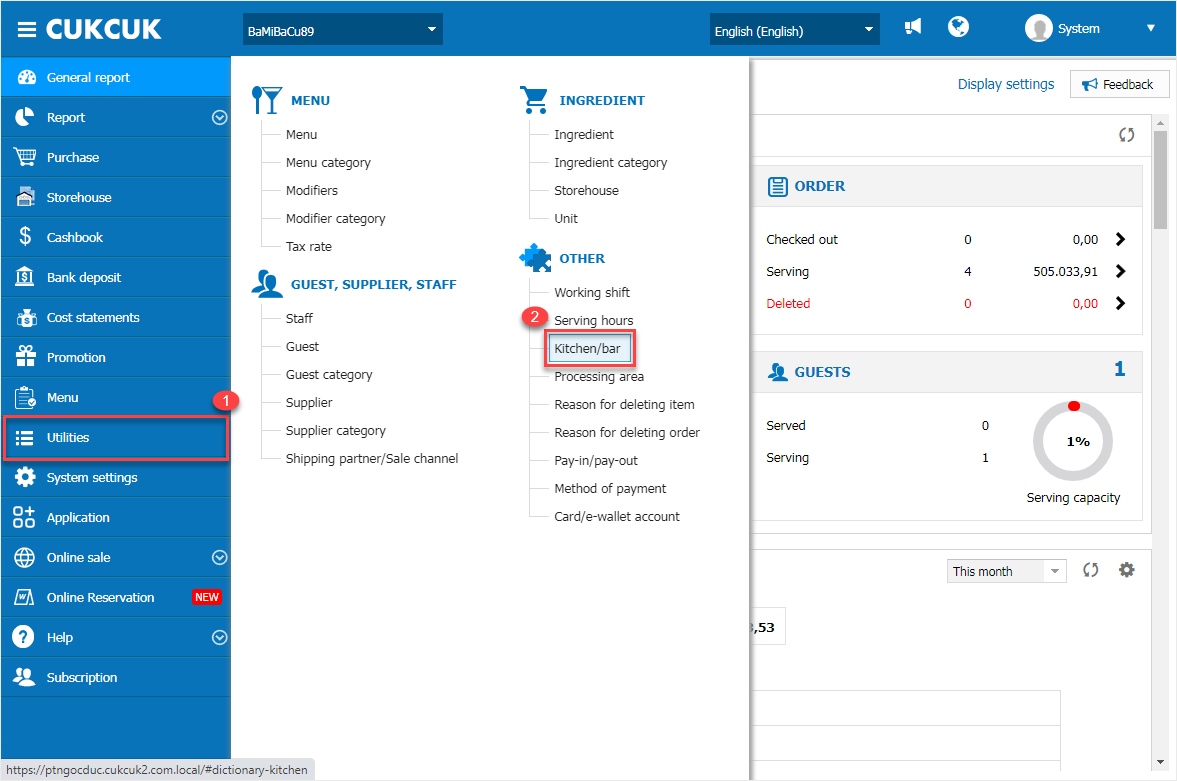
1. On the management page, go to Utilities\Kitchen/Bar
2. Upon creating a new kitchen/bar, the program removes the button Add item and adds Item name and Menu category field.
- Always has 1 row to add items to the kitchen/bar
- Add the tab Add row and Delete row on the bottom left
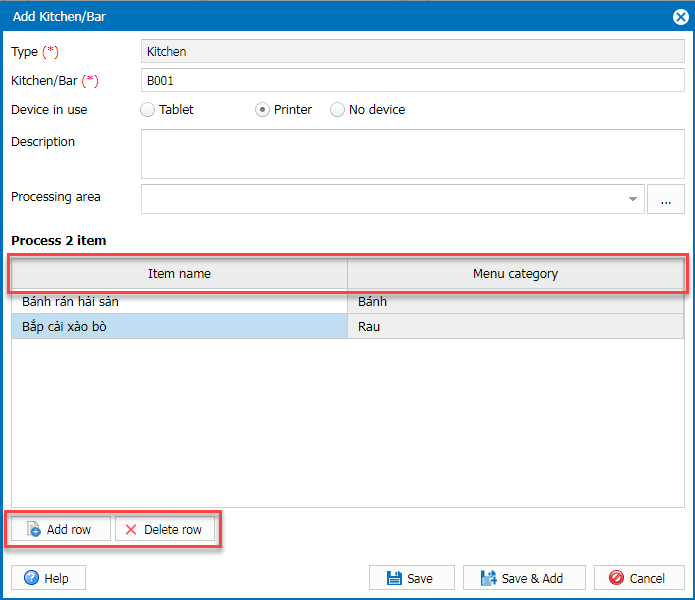
3. On Item name field:
- The manager can enter characters to search item
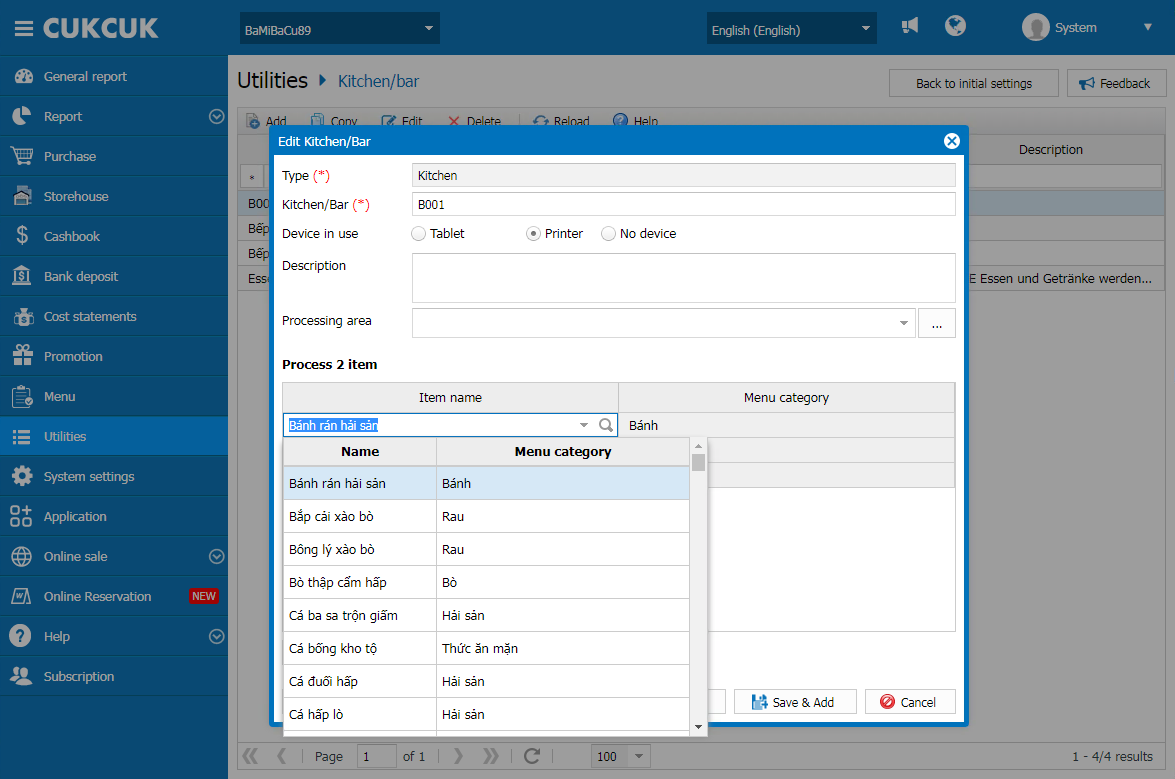
- Or click on the icon
 to quickly search items to update.
Then click Select to save information.

4. Click Save or Save & Add to save
If the restaurant wants to edit information of kitchen/bar:
Select kitchen/bar to edit.
- The manager can edit item name directly in the item name box
- The manager can Add or Delete row
- Upon clicking on the iconitems in the kitchen will be on the top and you can uncheck any item to remove it from the kitchen
Then click Save to update list of items.

Have a nice day!
