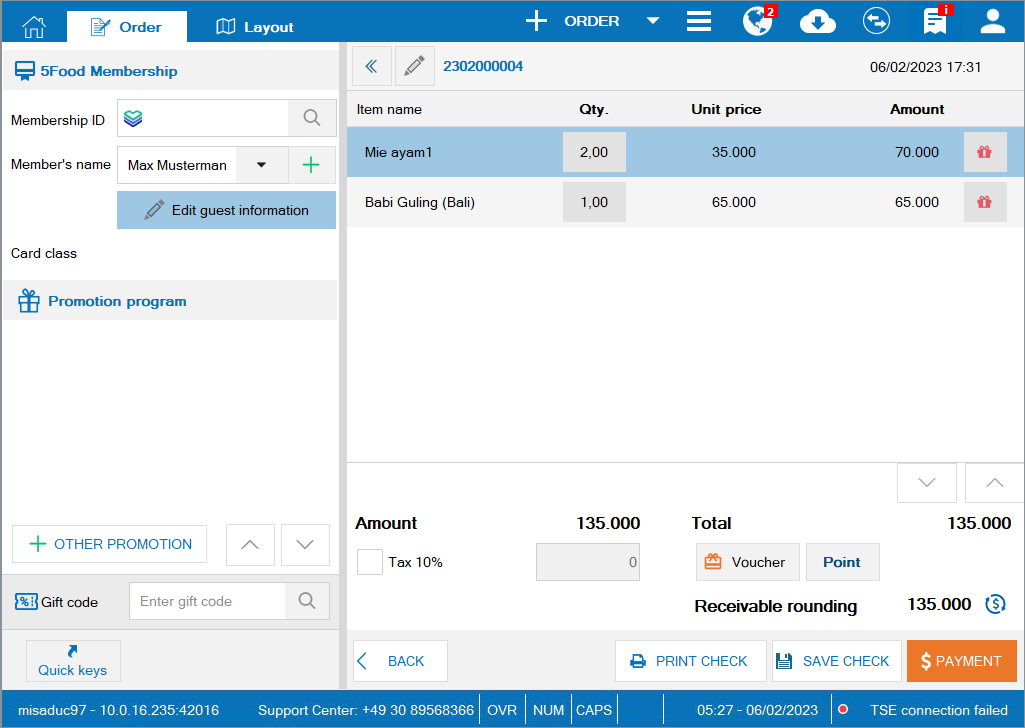
1. The cashier can print voucher with QR Code to get payment quickly
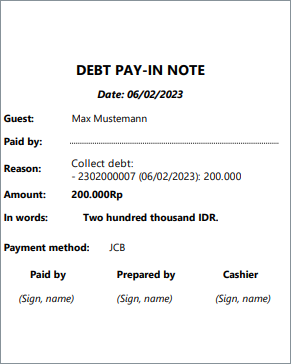
2. The cashier can print debt pay-in note when the guest makes payment with card or transfer
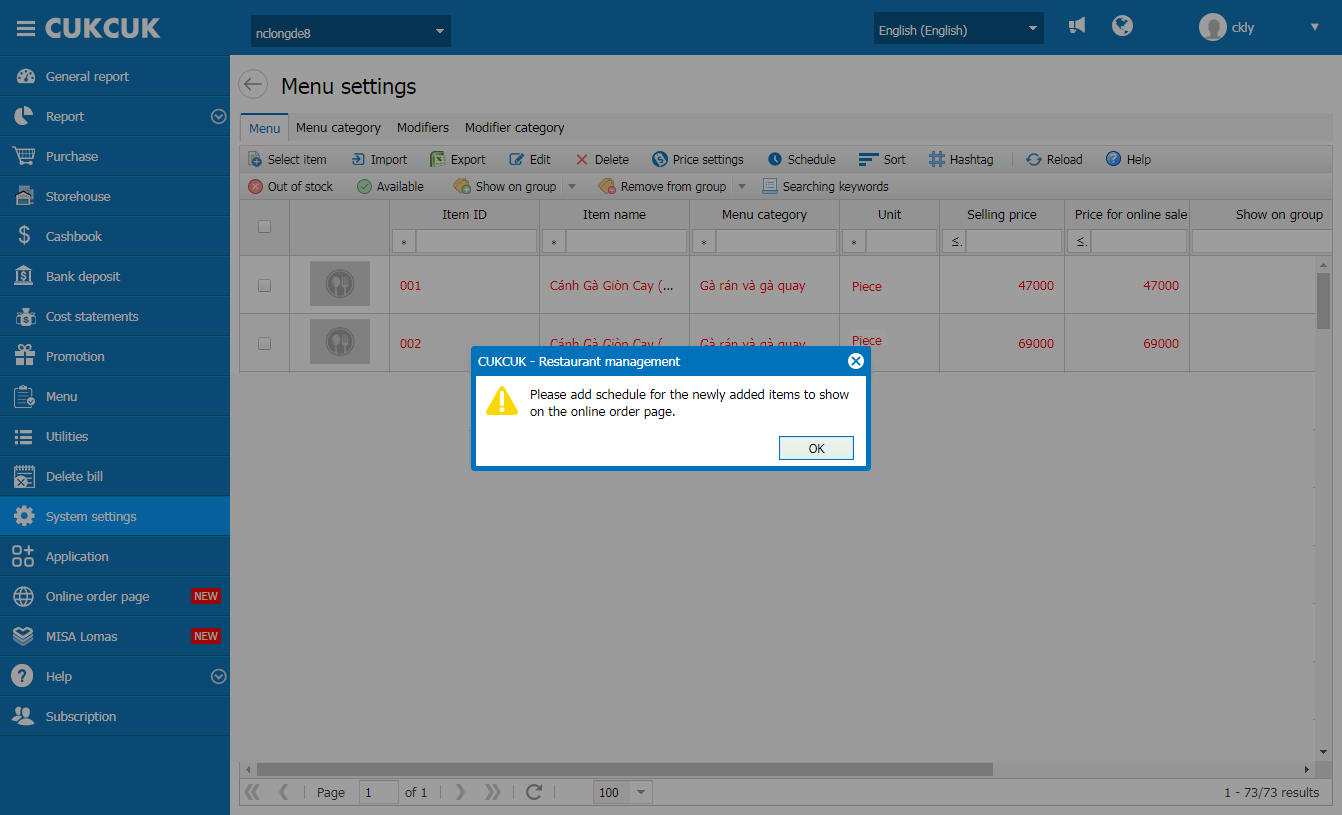
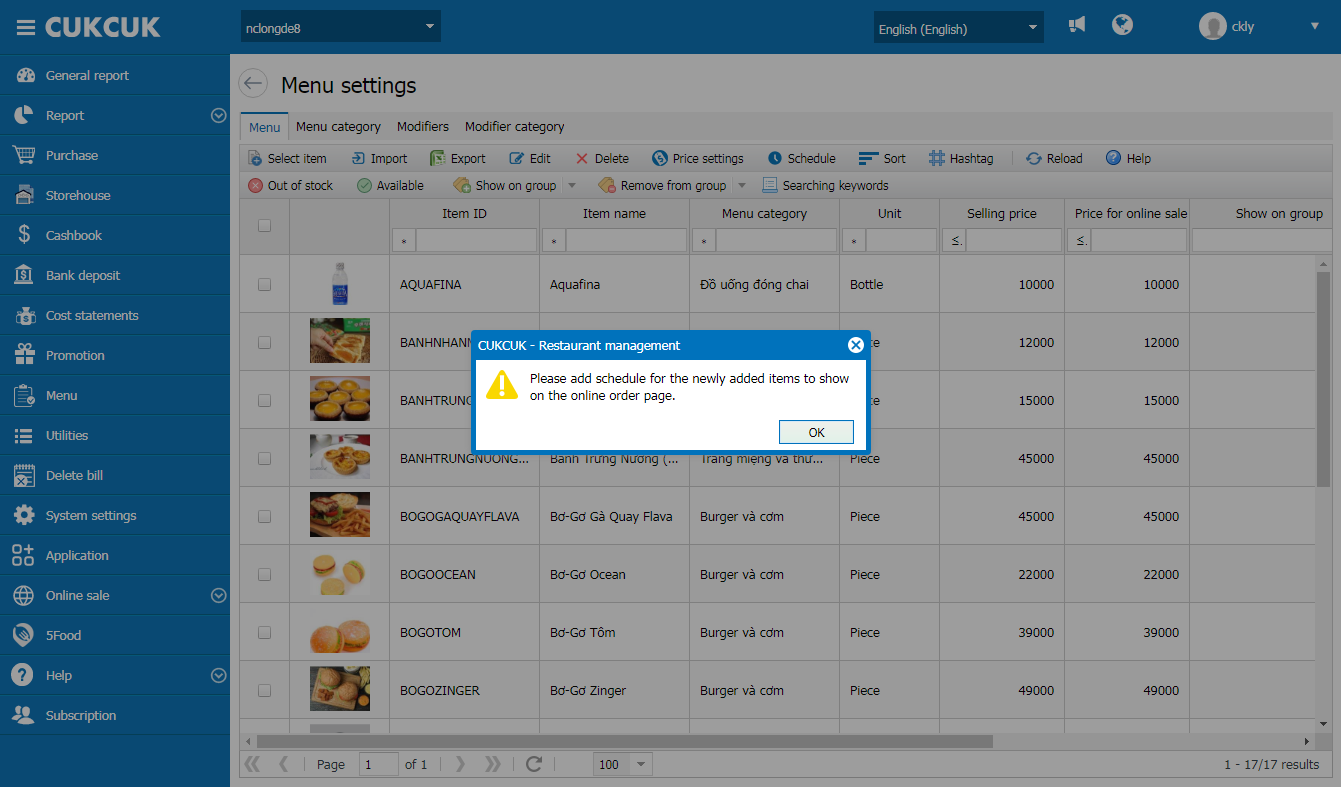
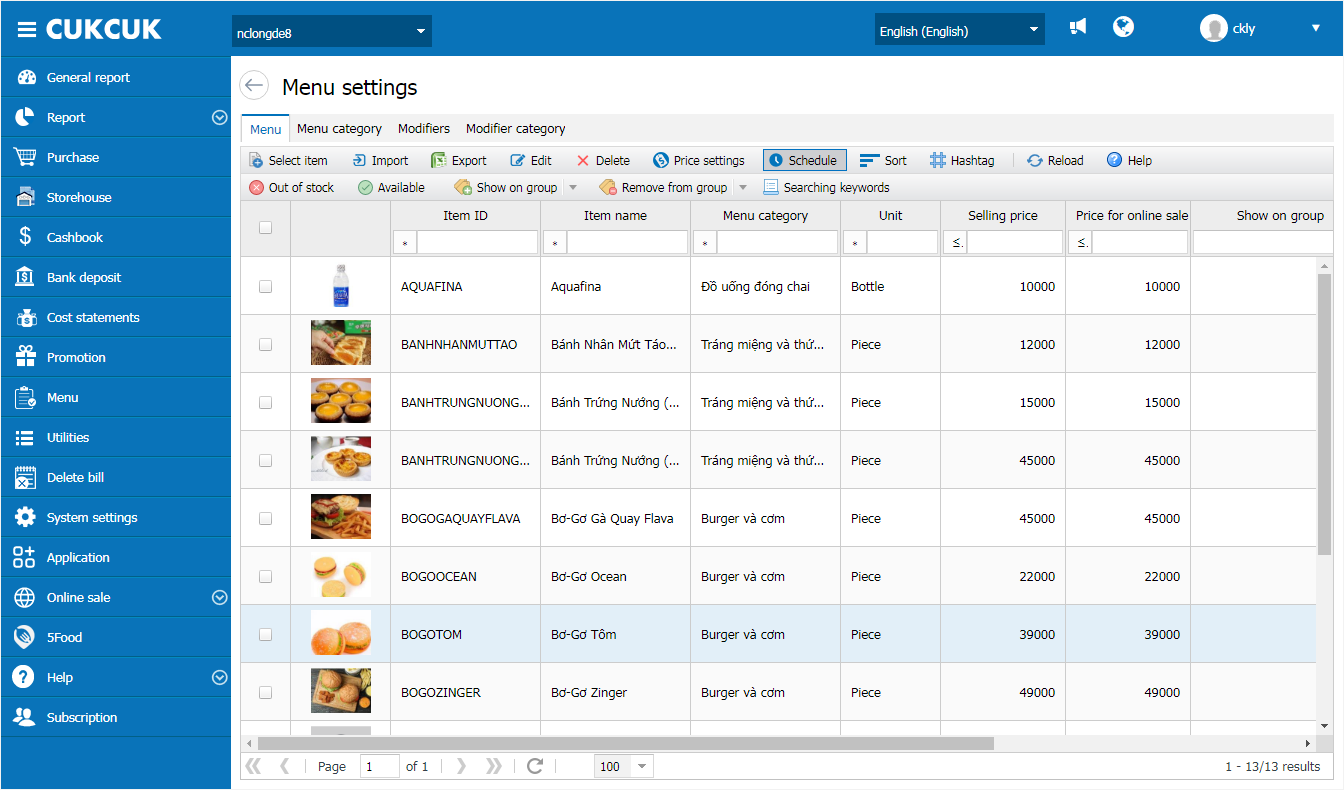
3. The restaurant owner can set up schedule for an item when it is added to the online order page
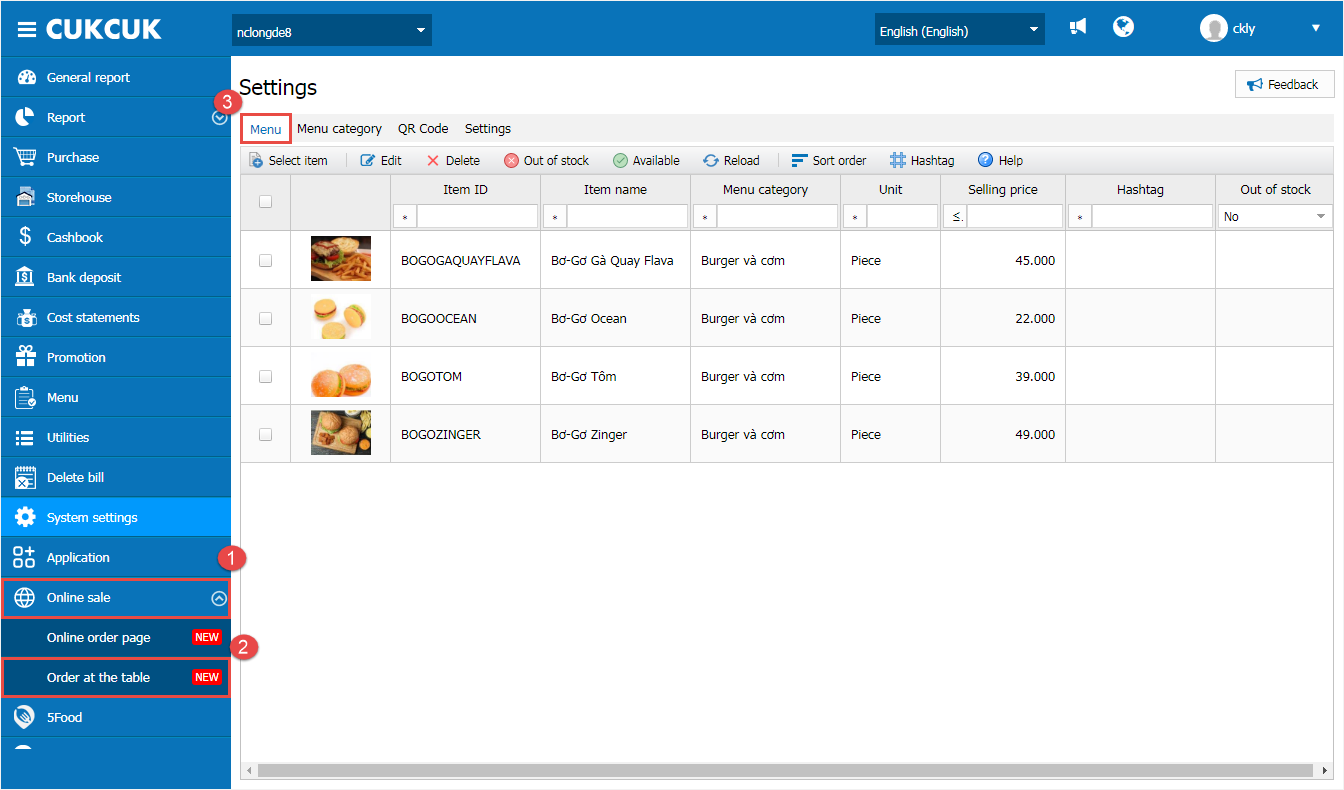
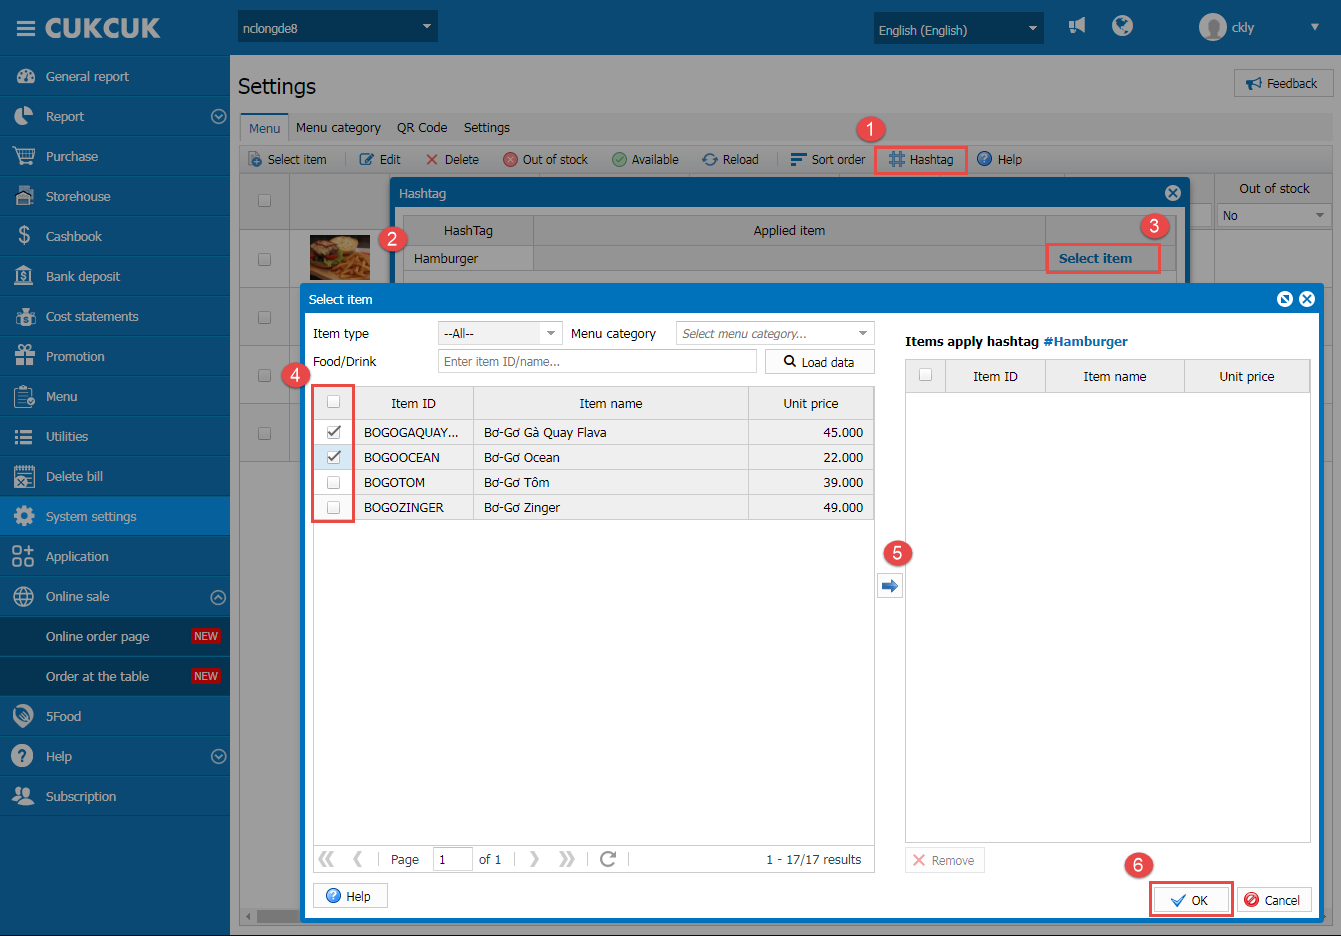
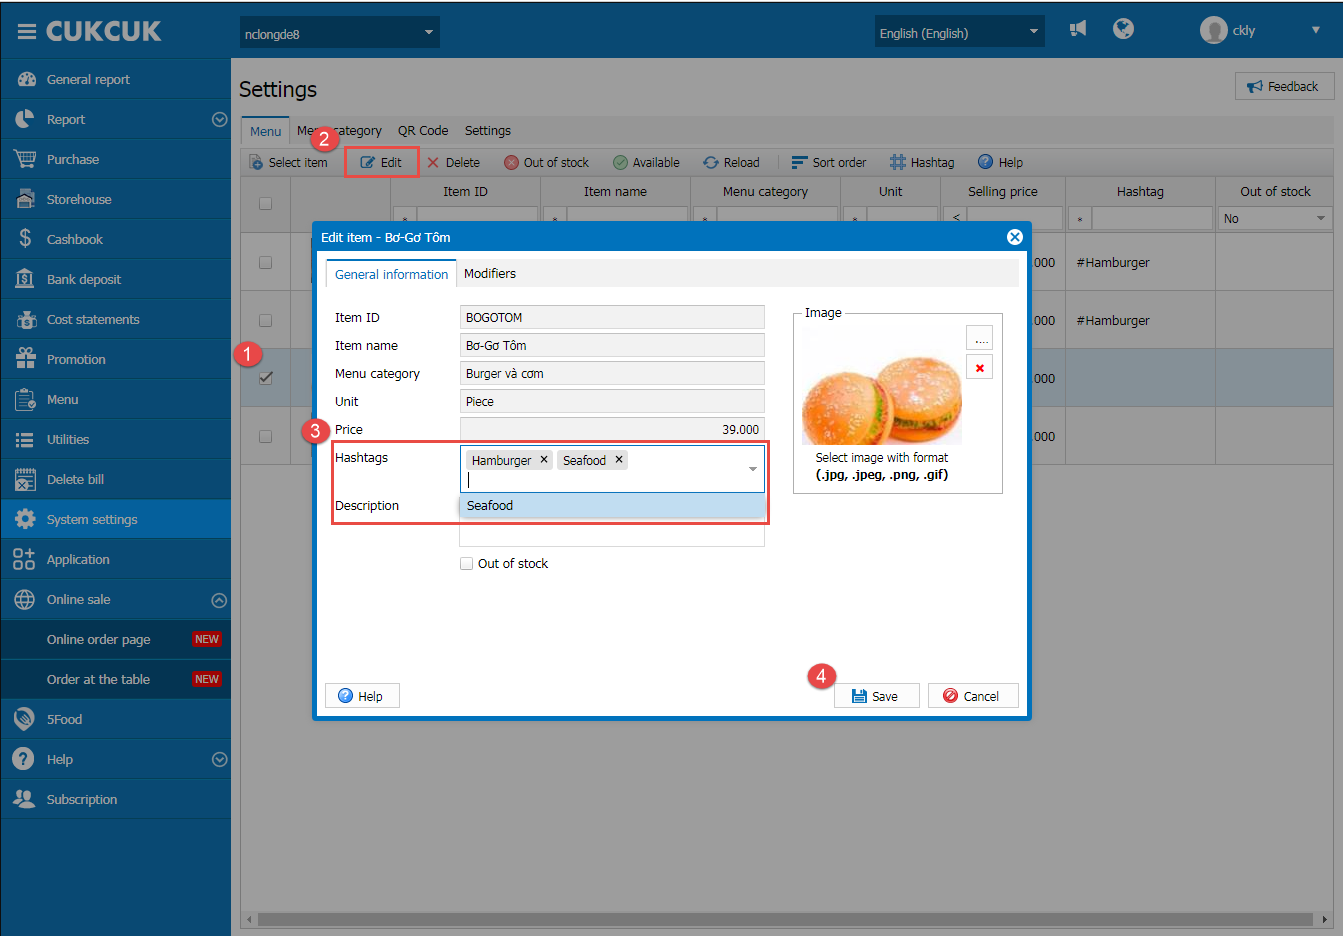
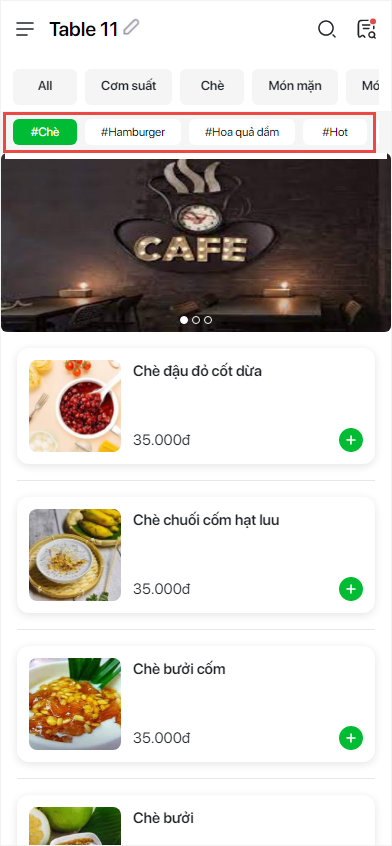
4. Add hashtags to suggest items for the guests
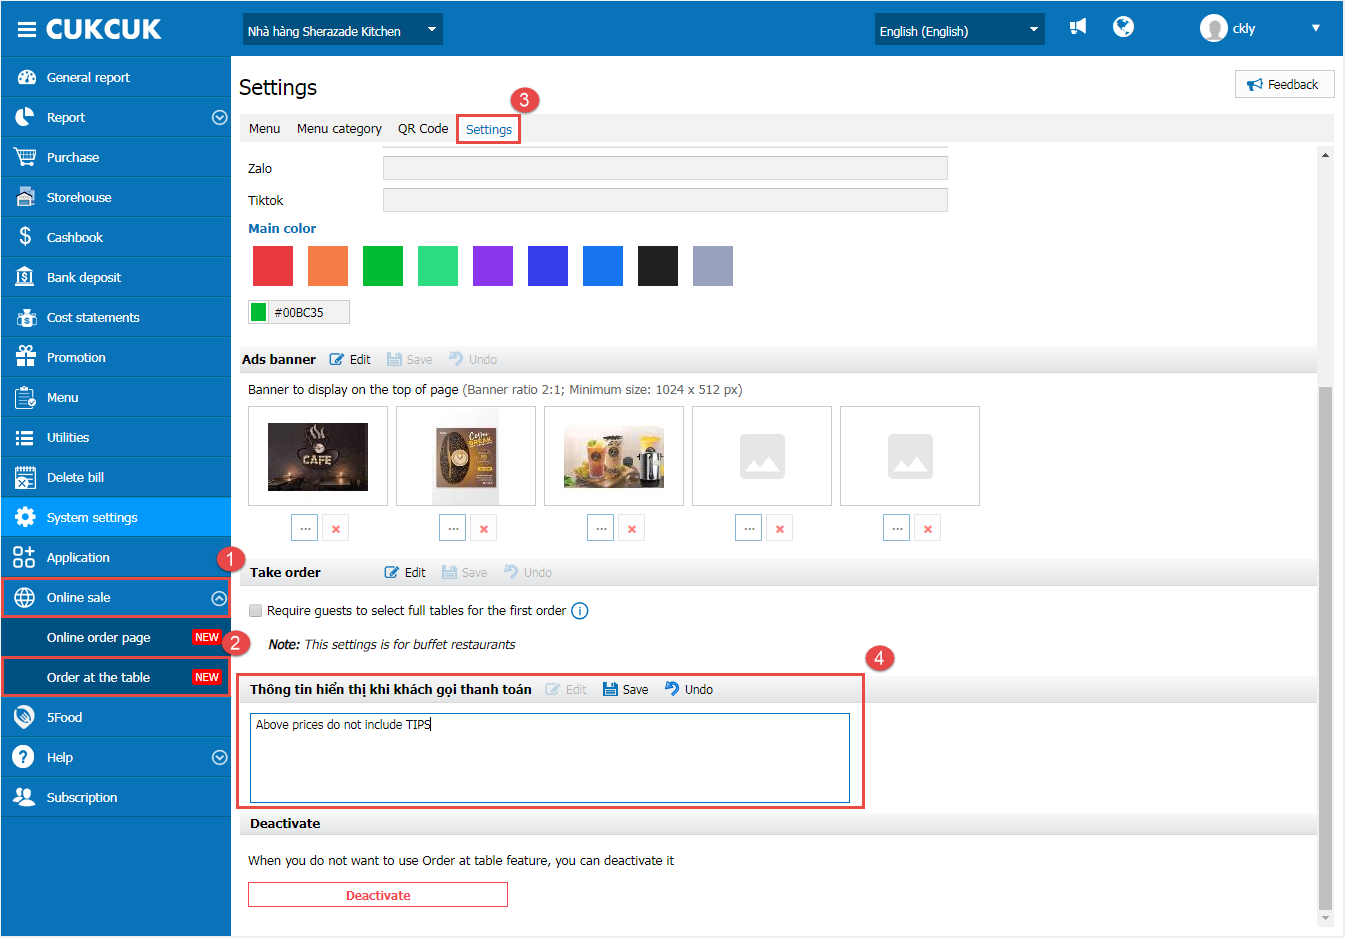
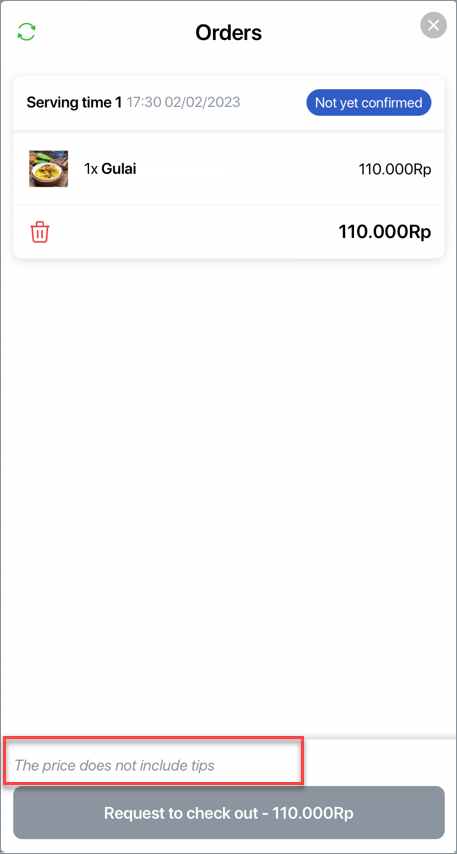
5. Set up to show information on Order at the table screen when the guest requests payment
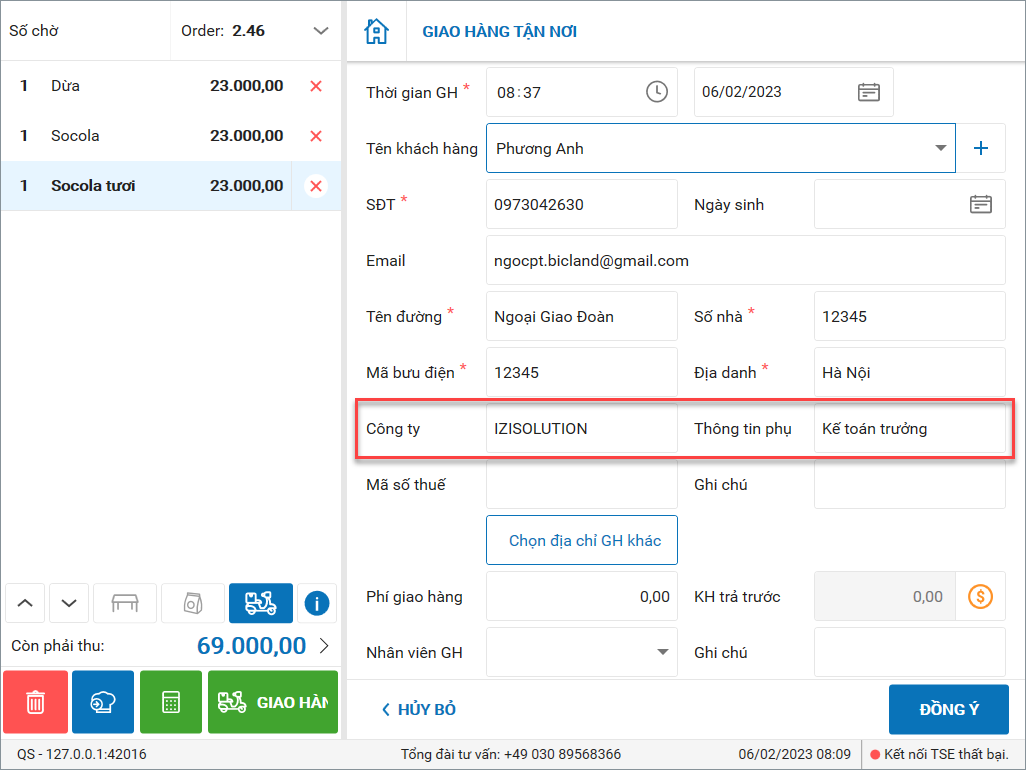
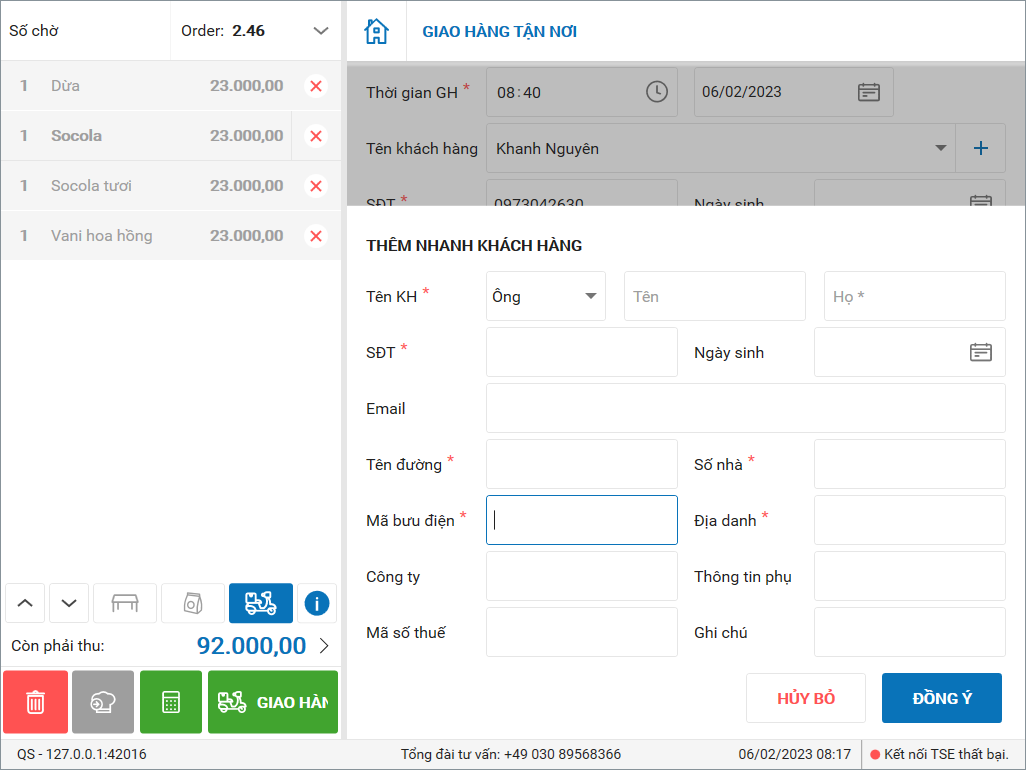
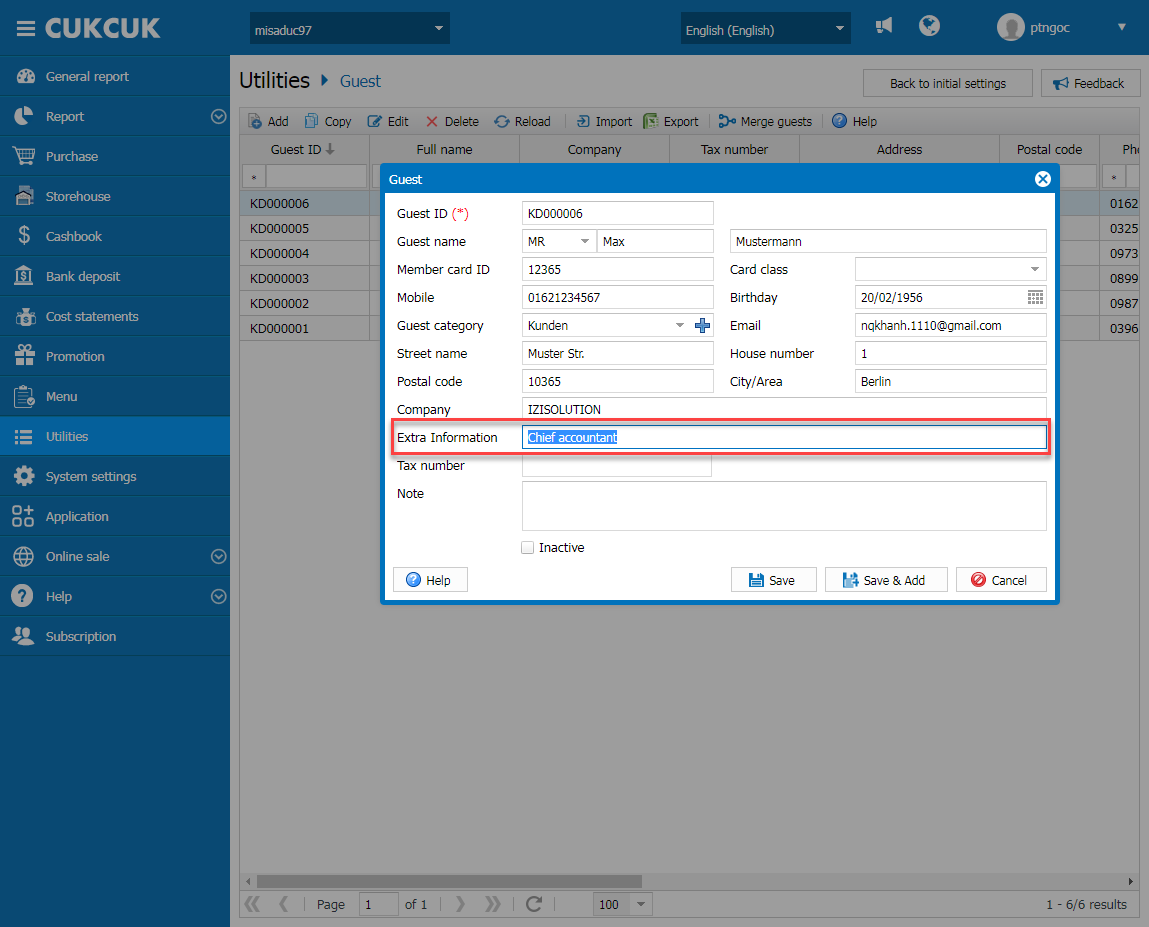
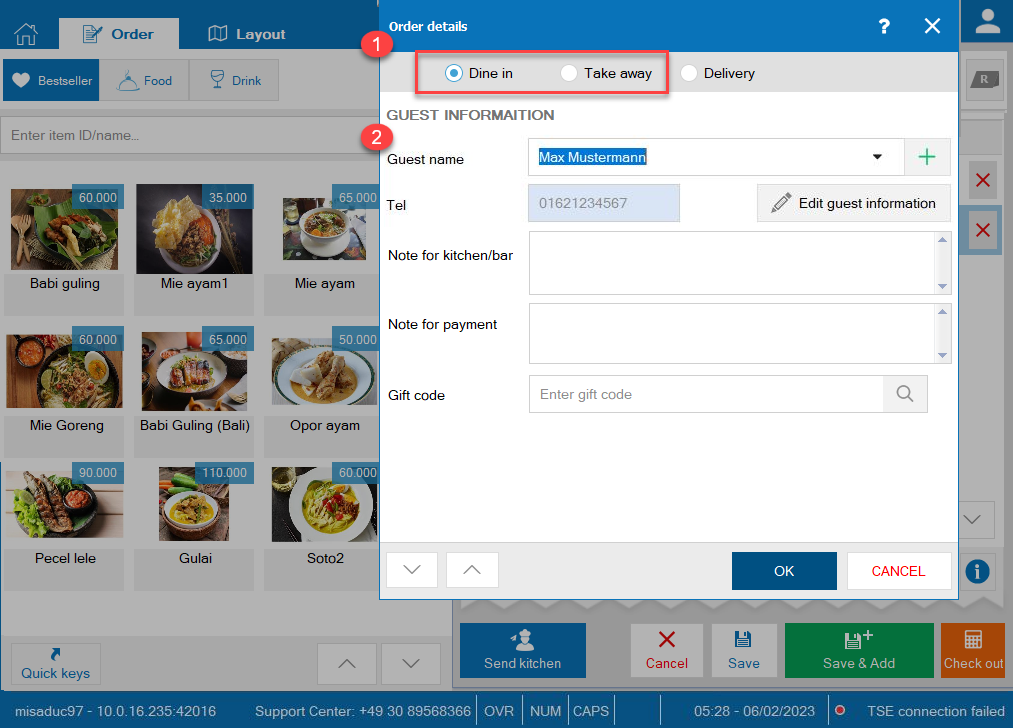
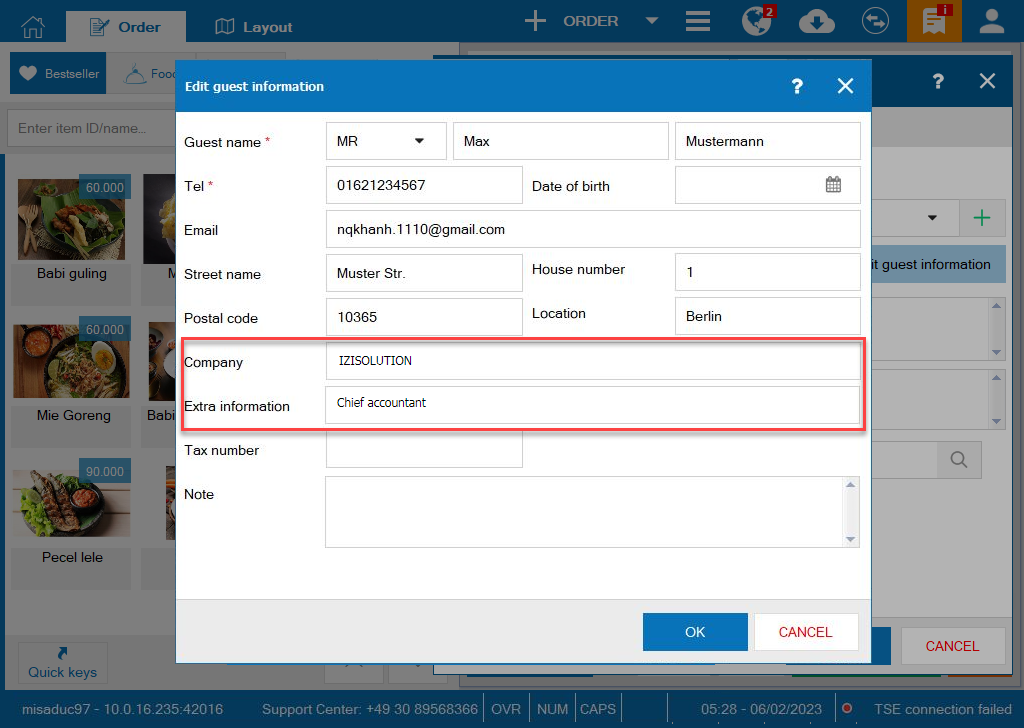
6. The cashier can save information if the order is placed by an enterprise
1. The cashier can print voucher with QR Code to get payment quickly
Purpose:
The cashier can print voucher with QR Code to get payment quickly
Instruction steps:
1.1. On PC/POS
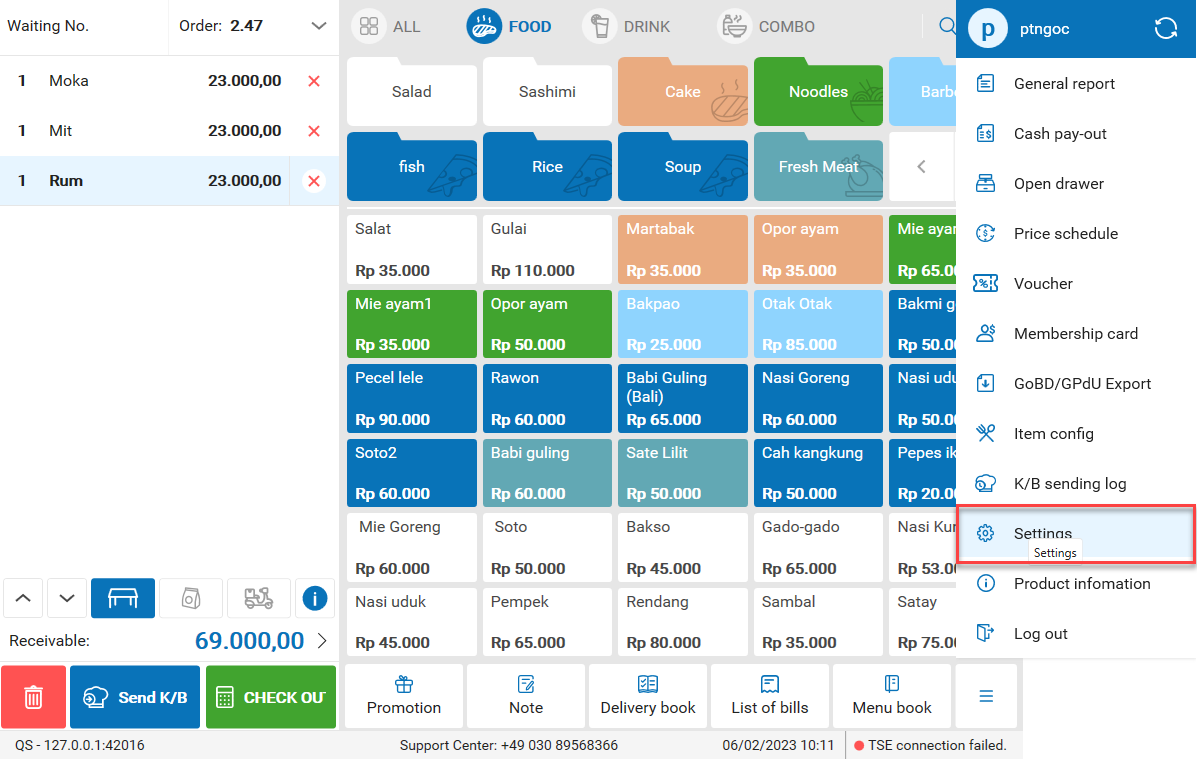
On PC/POS, click on the icon![]() and select Settings
and select Settings
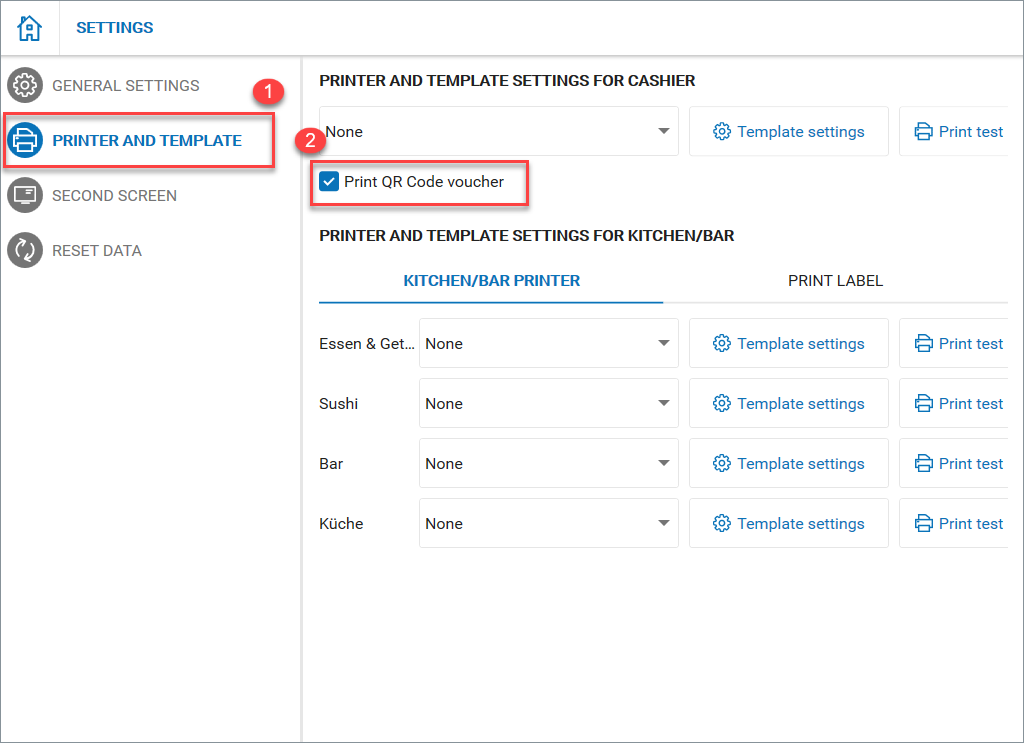
– Select Printer and template
– Click Edit and check Print QR Code Voucher
Then, click Save.
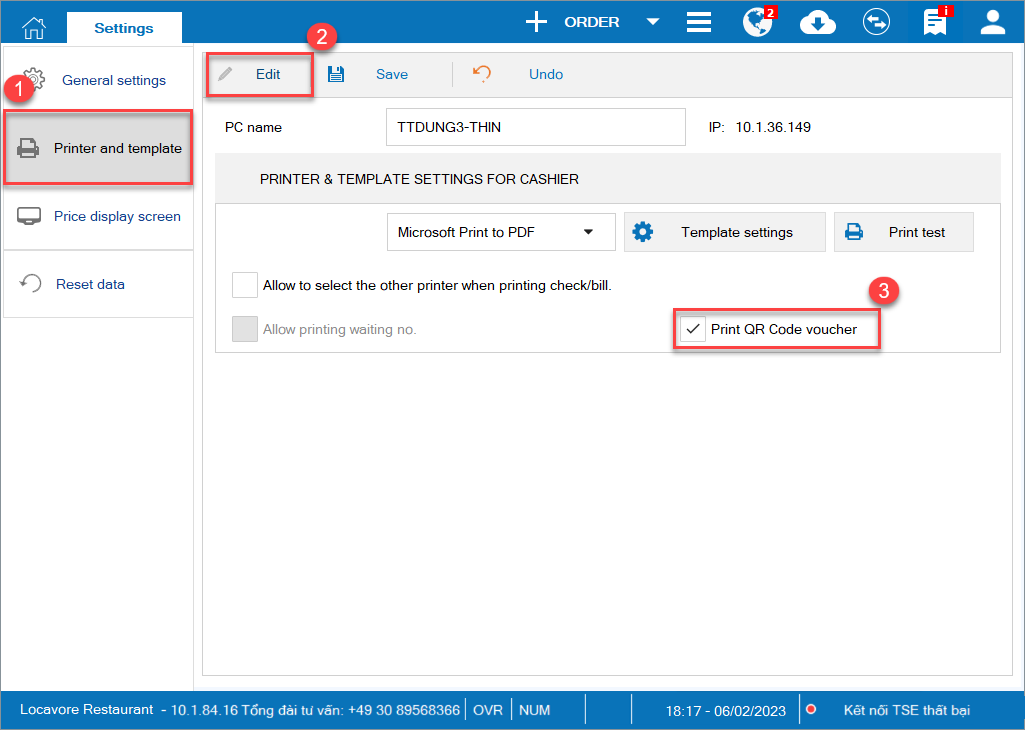
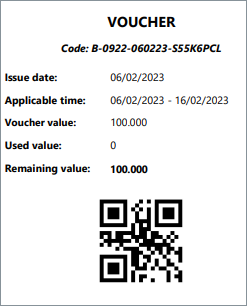
Here is the voucher template.
1.2. On Quick service version
– On Quick service version, click on the icon![]() and select Settings
and select Settings
– Select Printer and template and check Print QR Code Voucher
Here is voucher template.
2. The cashier can print debt pay-in note when the guest makes payment with card or transfer
Instruction steps:
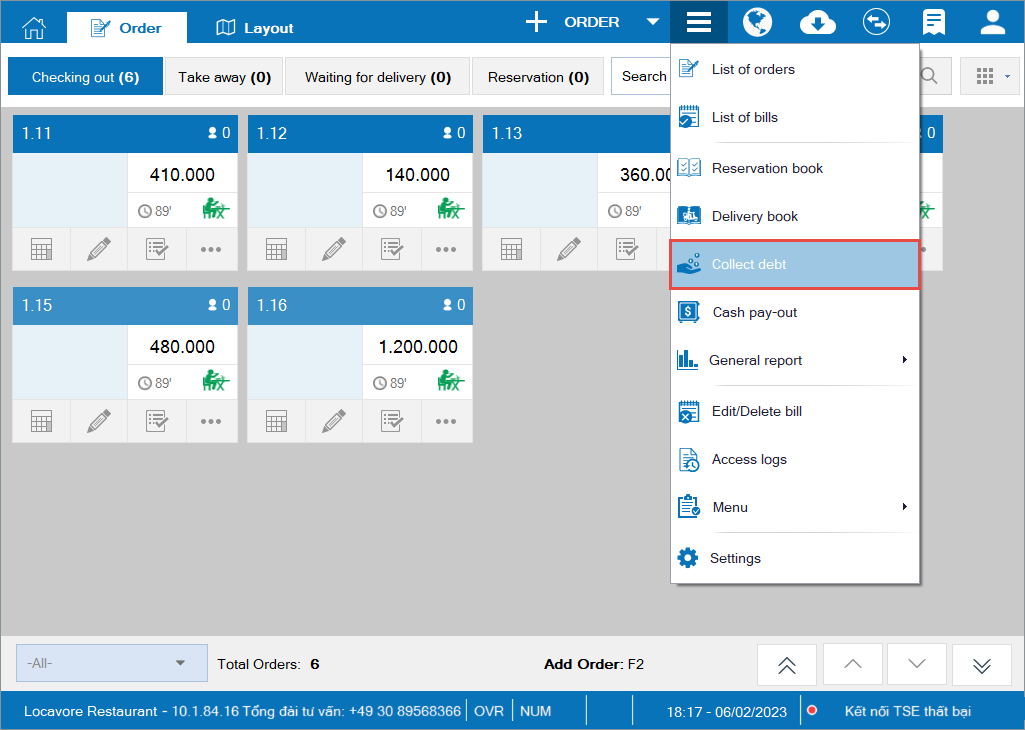
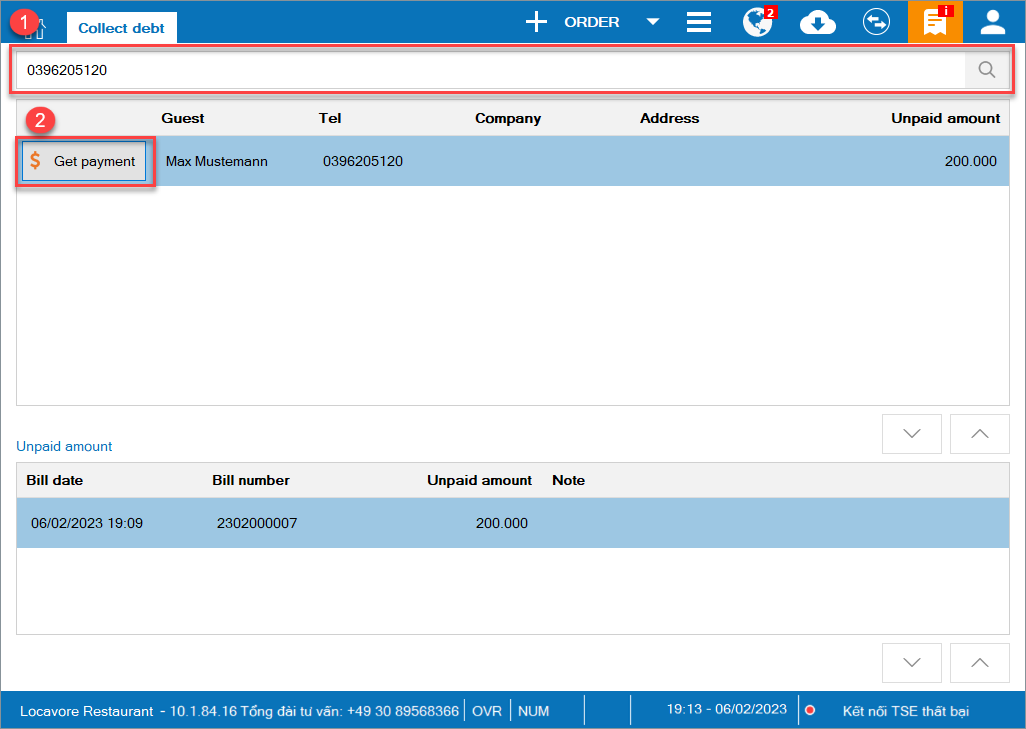
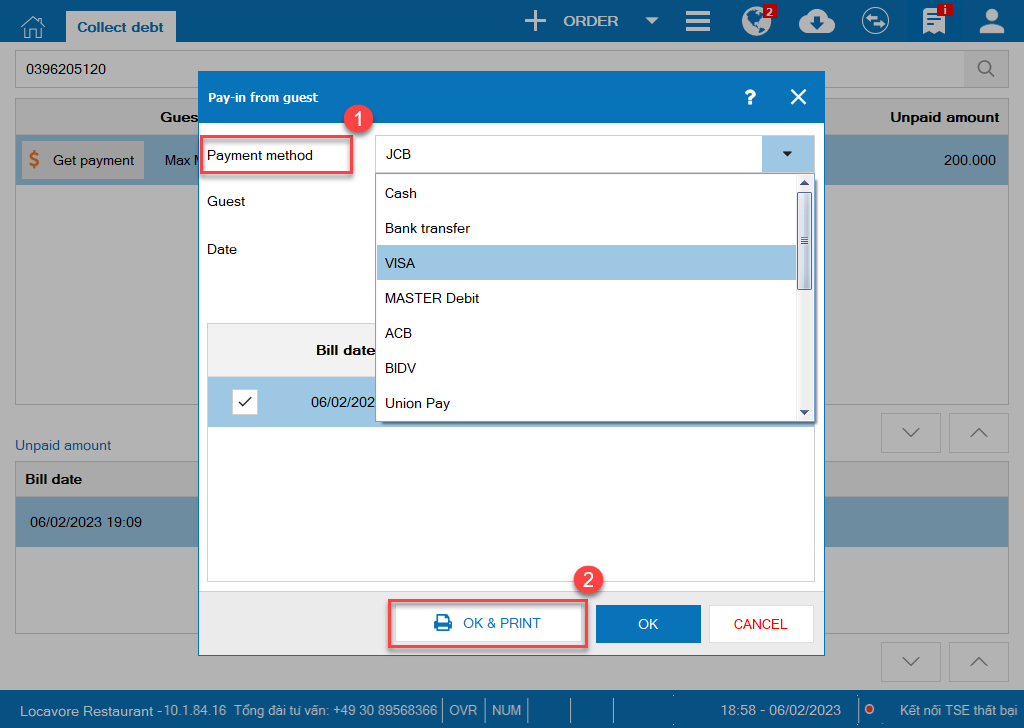
– Click on the icon![]()
– Click on the icon![]()


![]()
– Click OK
Moreover, upon checking out if the guest wants to change info, you also can click ![]() to update.
to update.
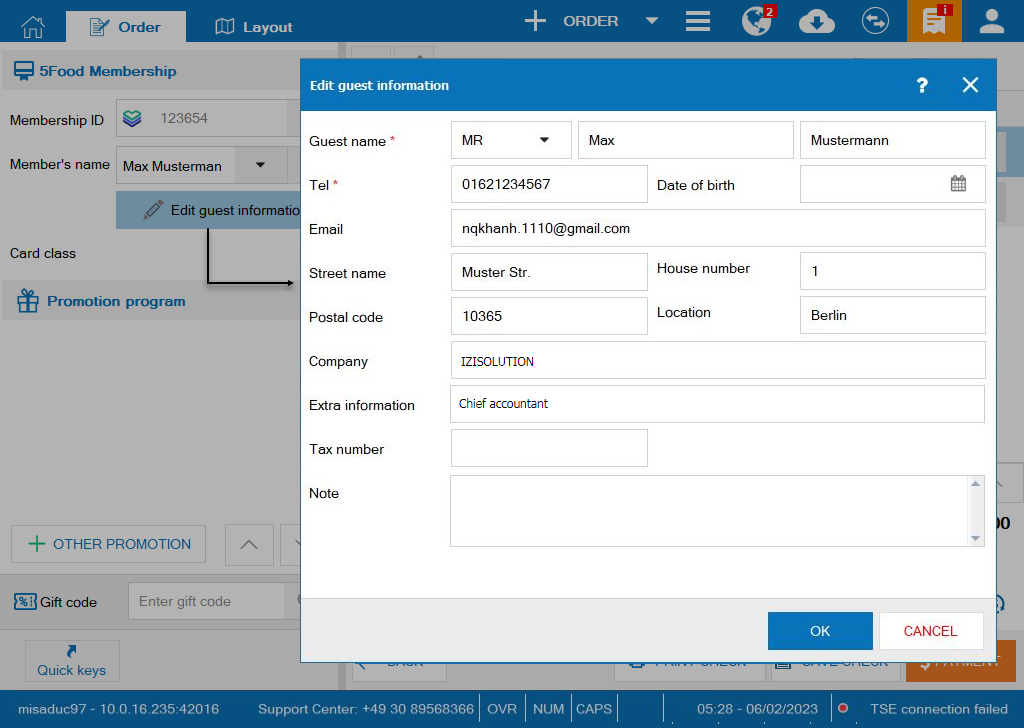
Then click Payment.