Here are the steps of upgrading from SQL Server 2005 Express to SQL Server 2017 Express
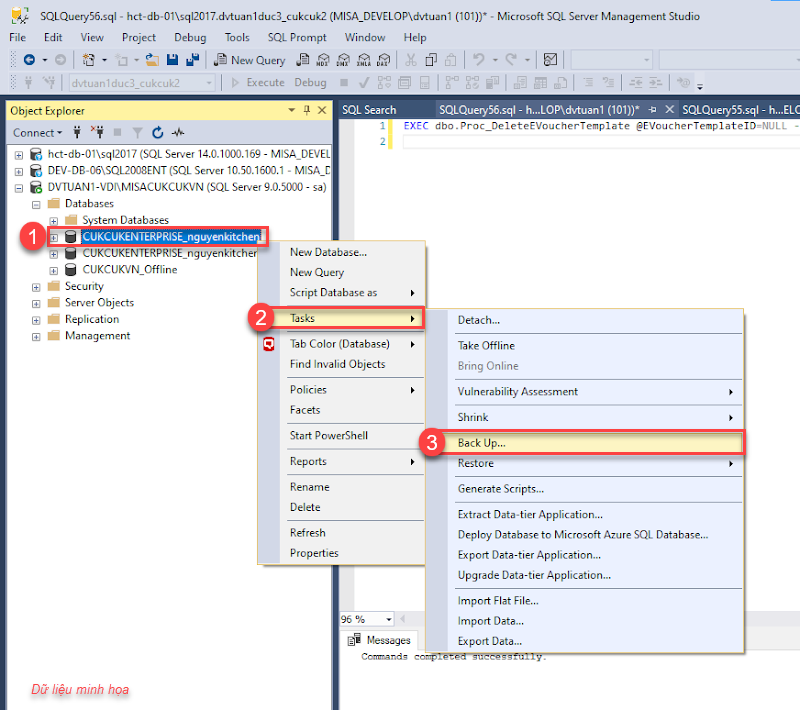
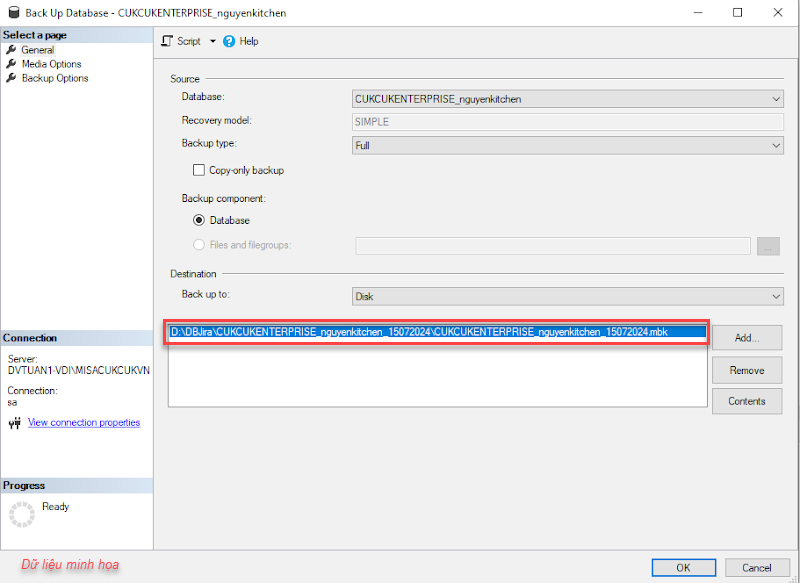
Before upgrading to SQL Server 2017 Express, the restaurant needs to back up existing data in SQL Server 2005. This backup data will be restored to SQL Server 2017. Open Microsoft SQL Server Management Studio. Right click on the restaurant to be backed up. Select Tasks and Back Up. Note: Browse a location to save the file (with the extension .mbk)
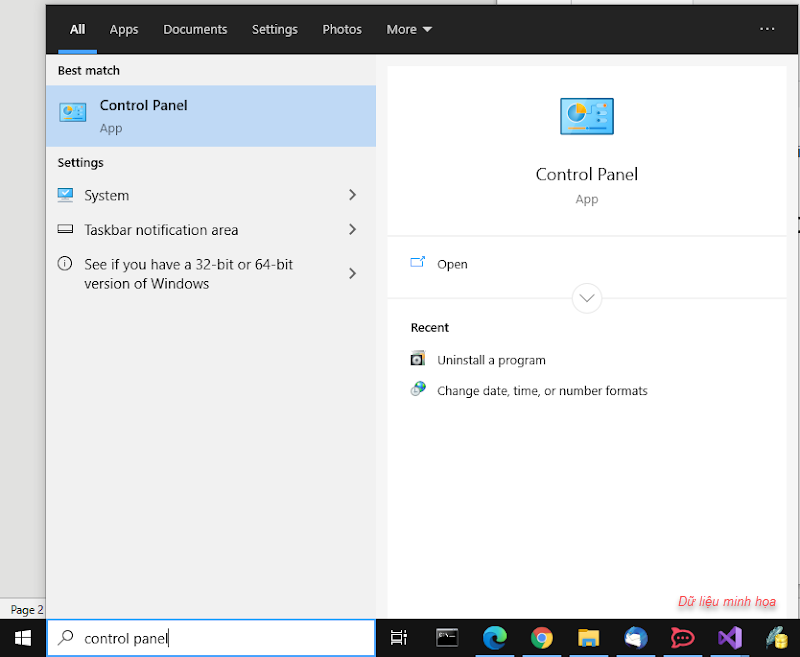
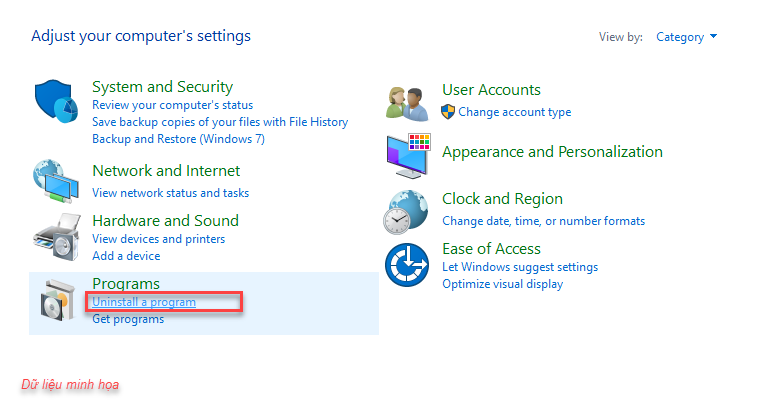
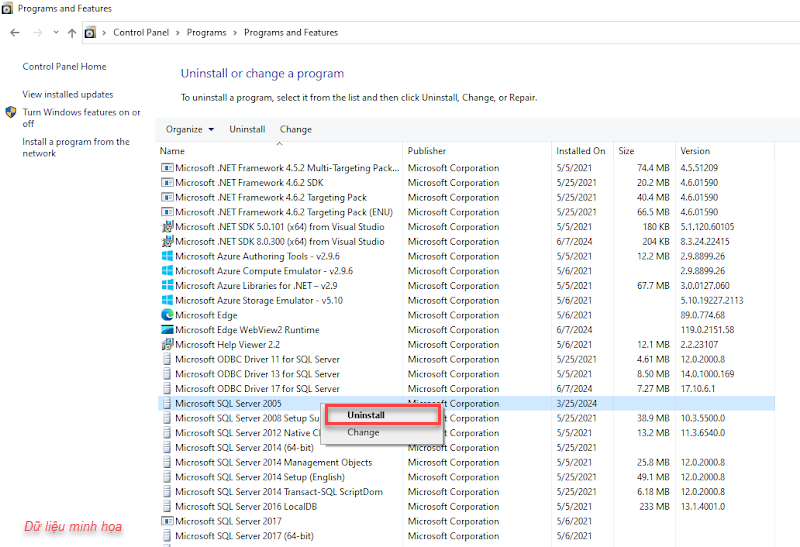
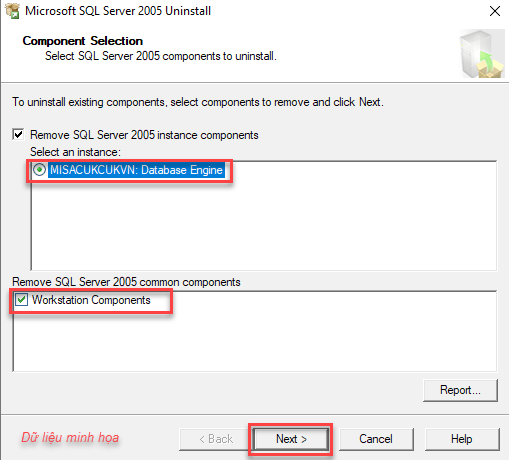
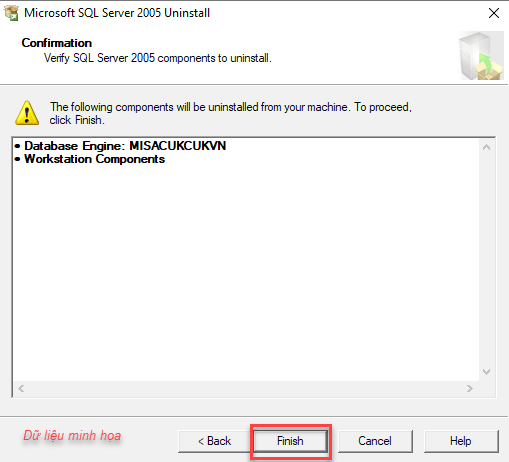
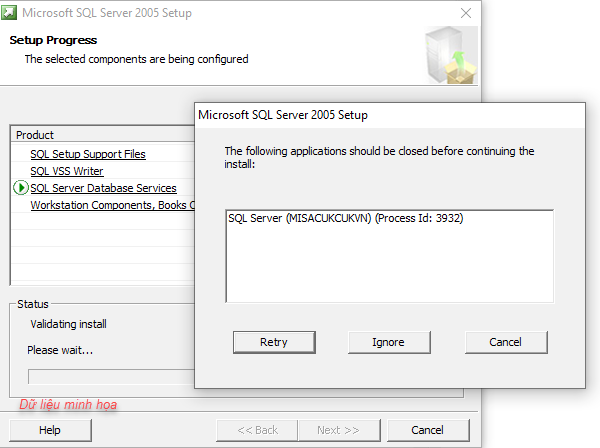
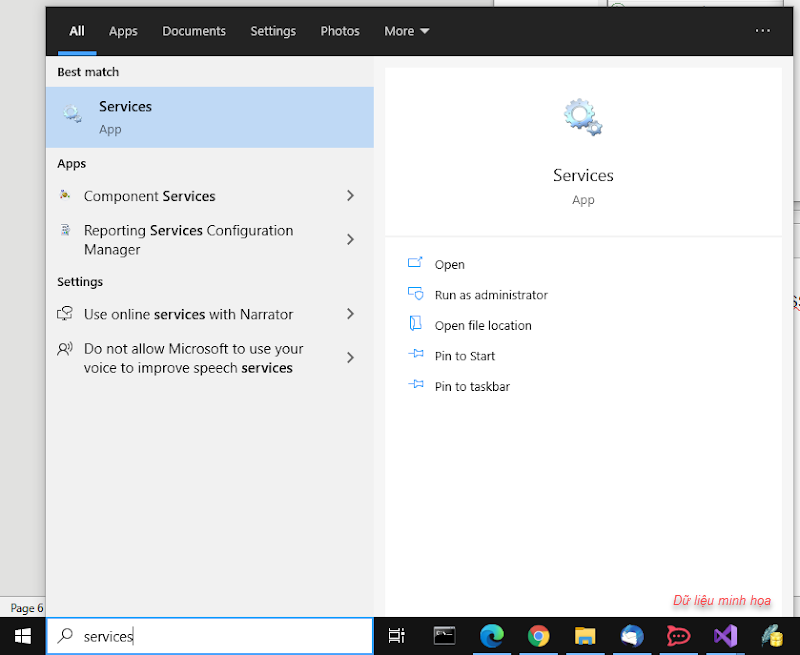
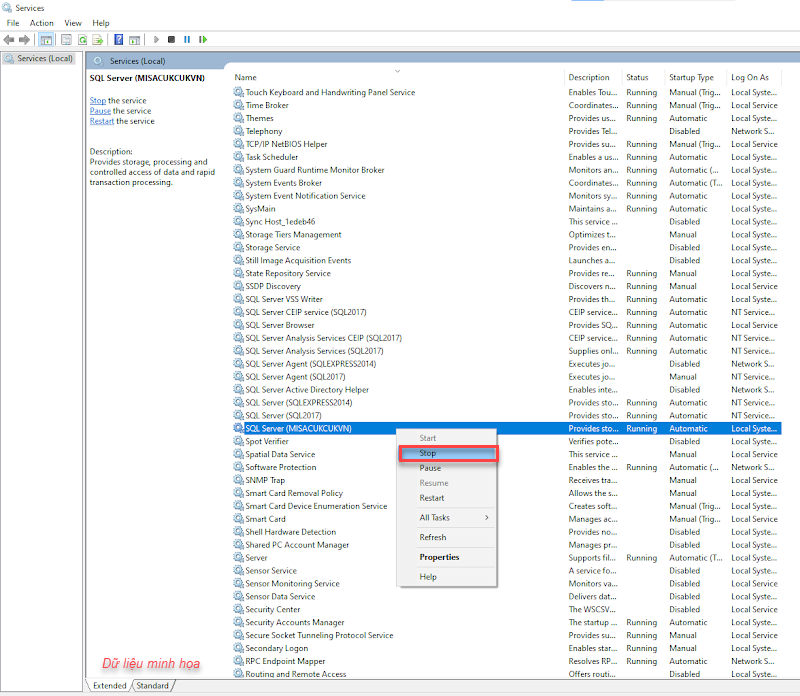
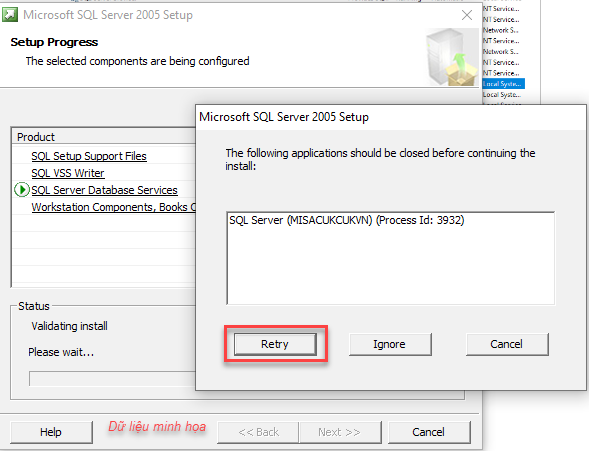
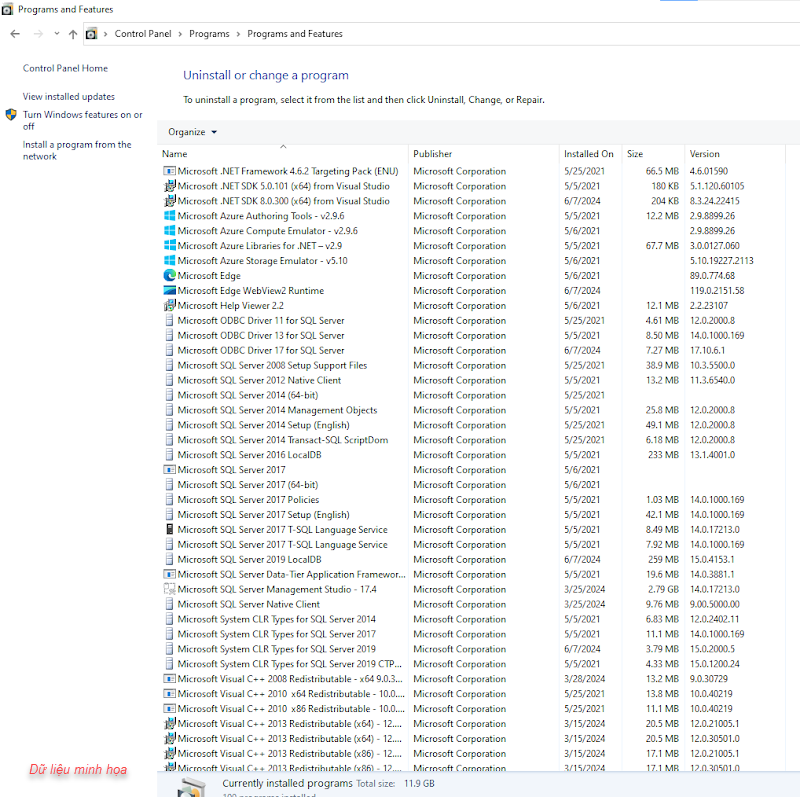
Open Control Panel. Select Uninstall a program. Search for Microsoft SQL Server 2005. Then, right click on the app and select Uninstall. Check MISACUKCUKVN: Database Engine and Workstation Components. Then, click Next. Click Finish to complete the removal of the app. Note: If the following message appears, it means Services SQL Server 2005 is running. Go to Services. Find SQL Server (MISACUKCUKVN), right click on it and press Stop. Next, go to the app-removing screen in the previous step and click Retry. Wait for Windows to finish uninstalling the software. Then, go back to Control Panel and check. If you don’t see Microsoft SQL Server 2005, it means it was successfully uninstalled.
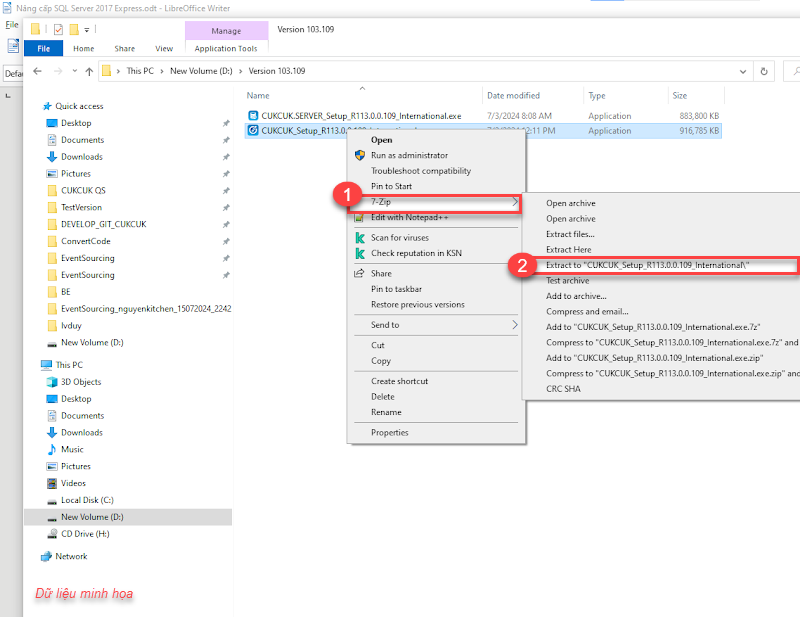
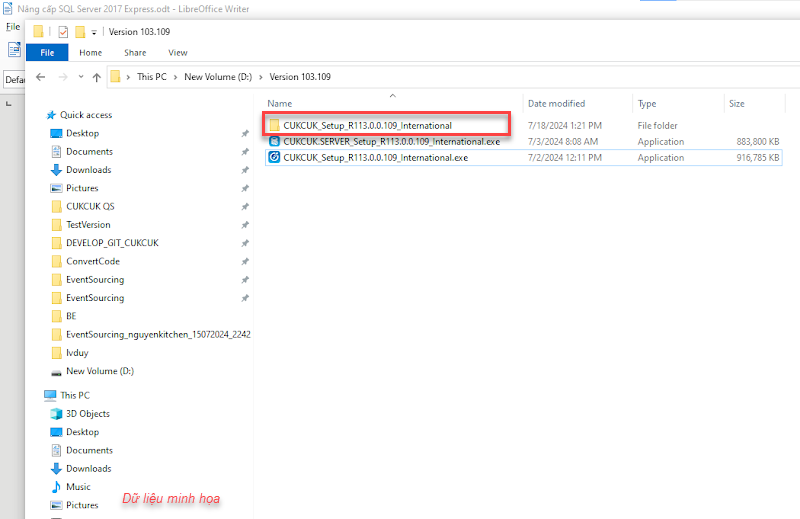
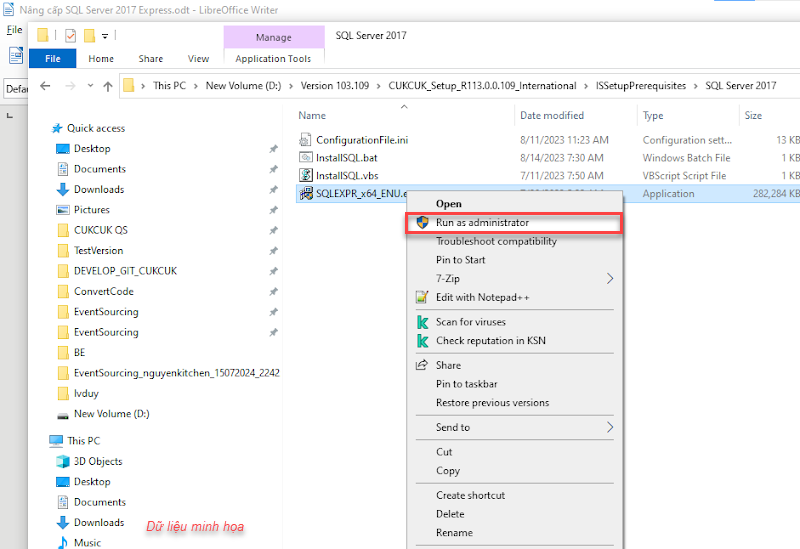
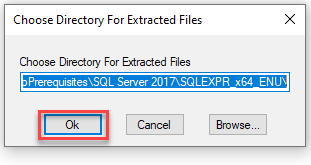
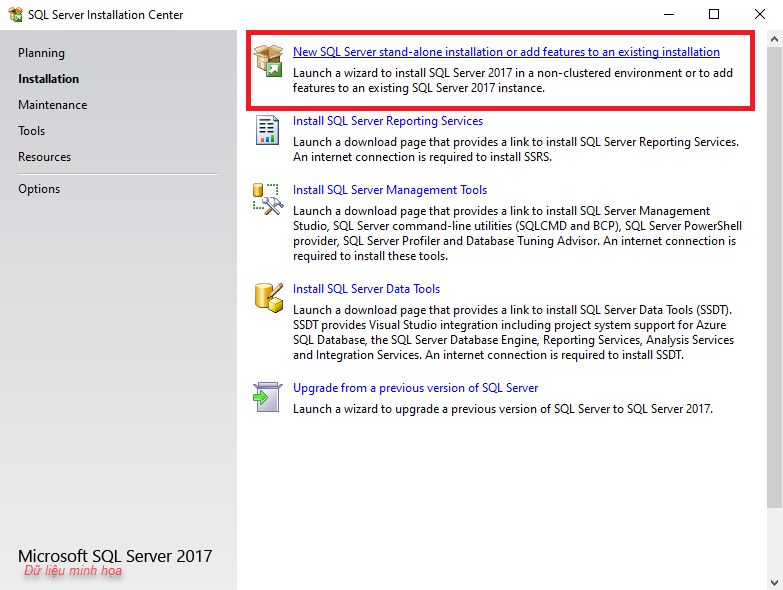
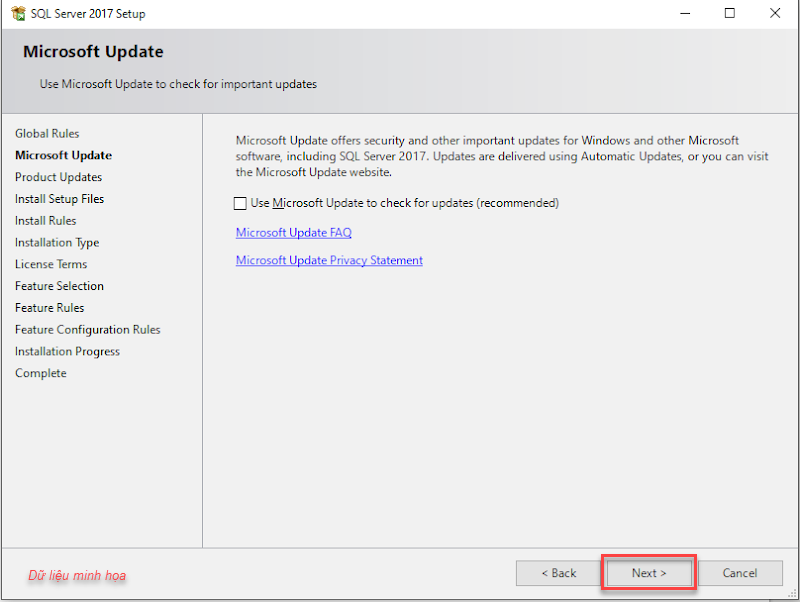
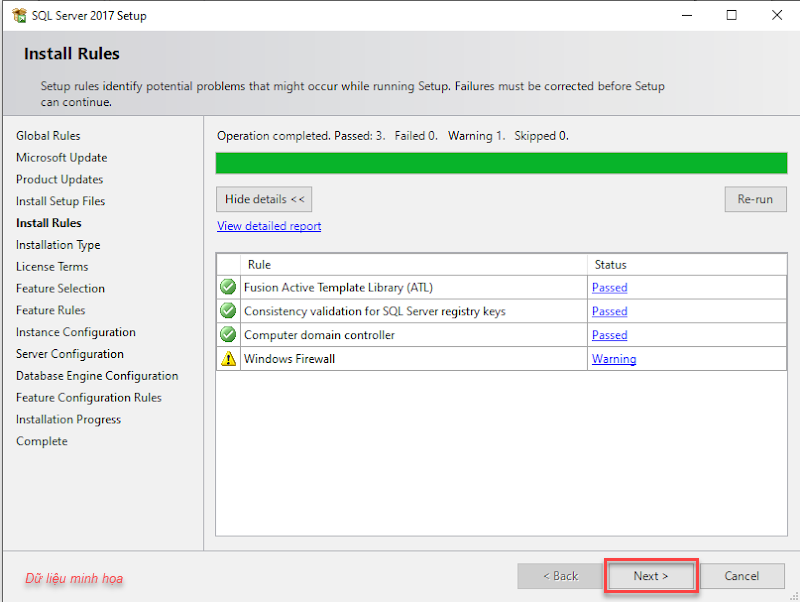
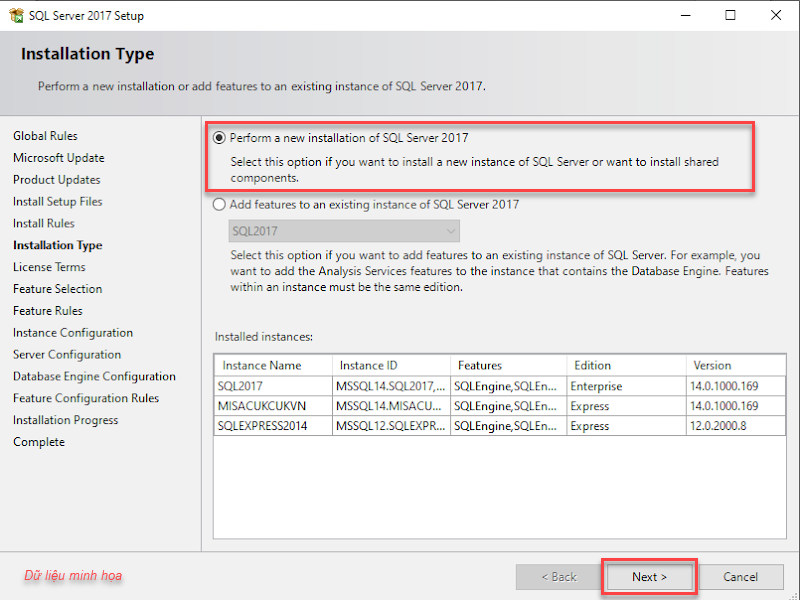
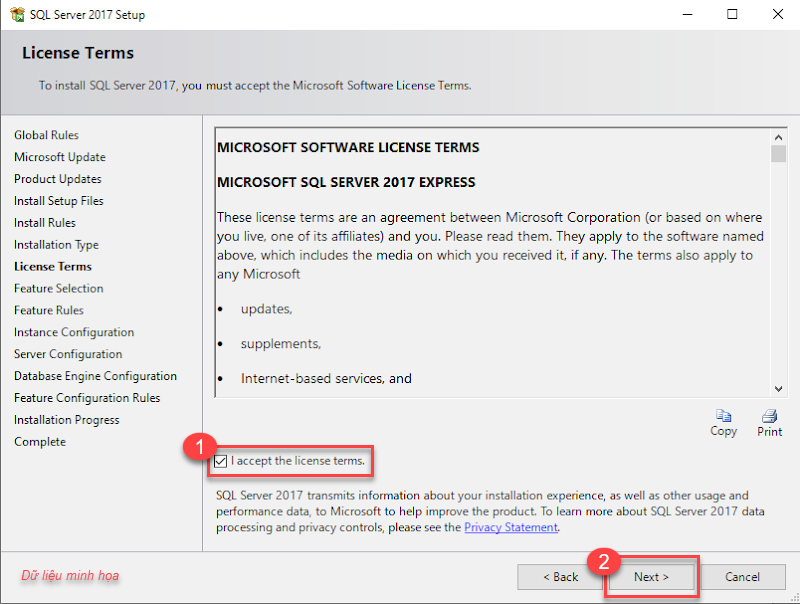
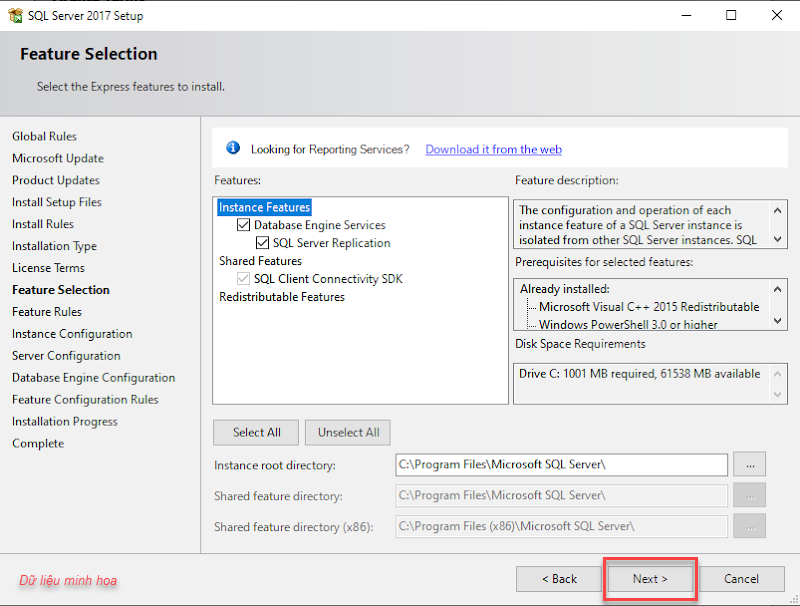
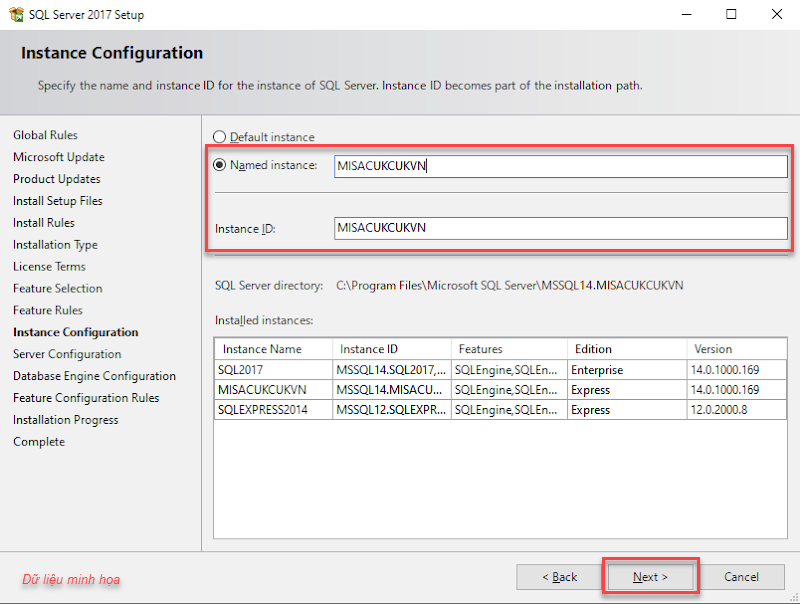
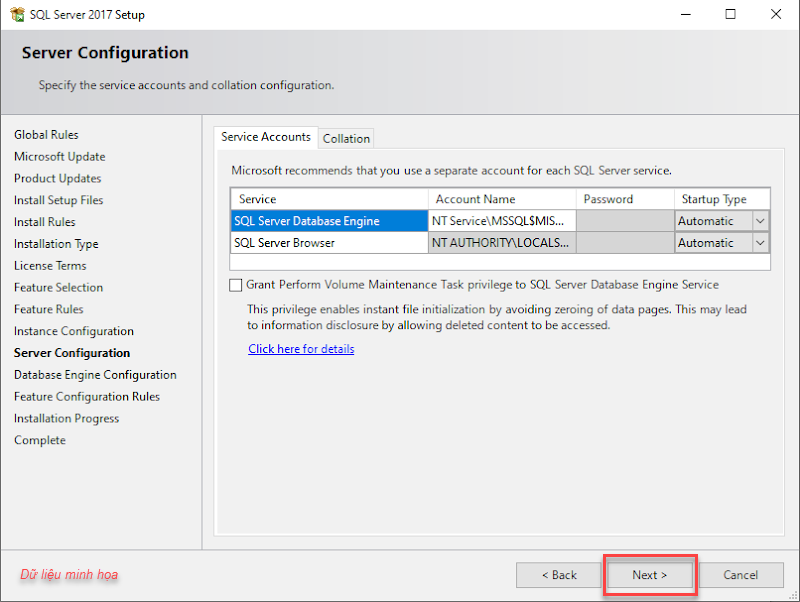
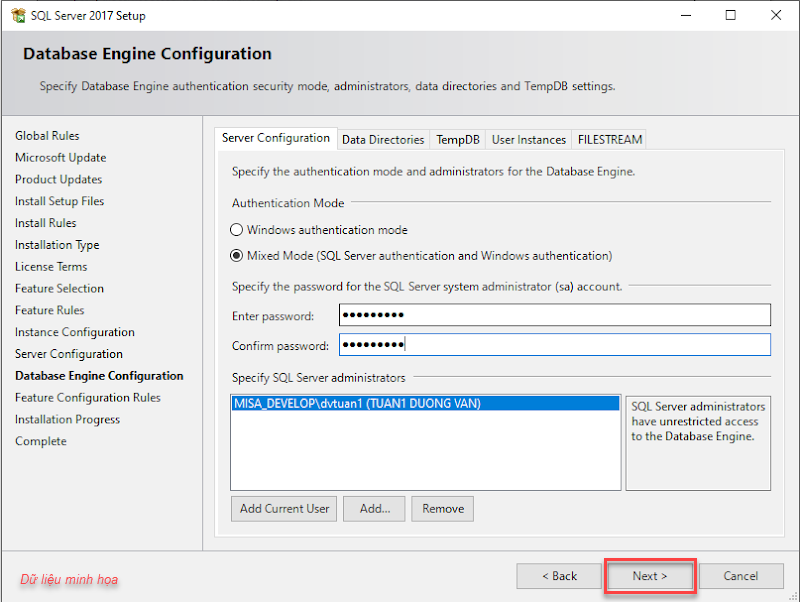
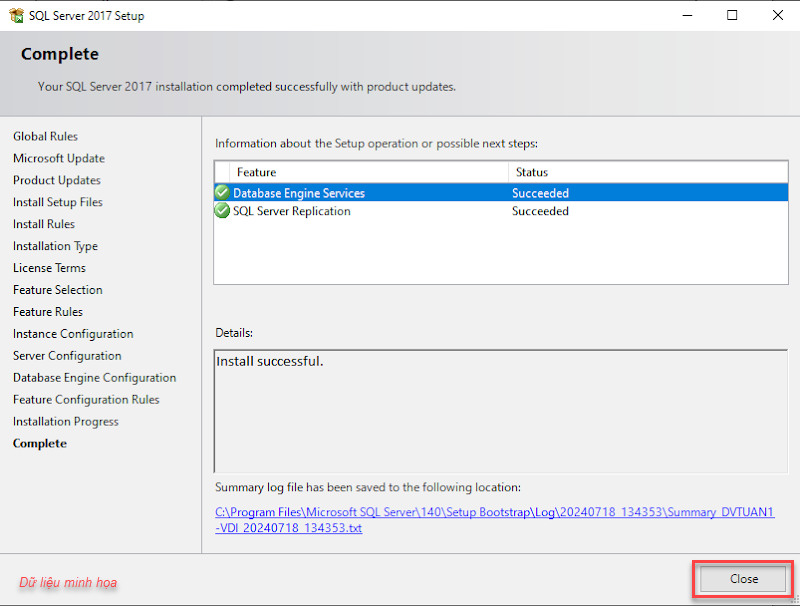
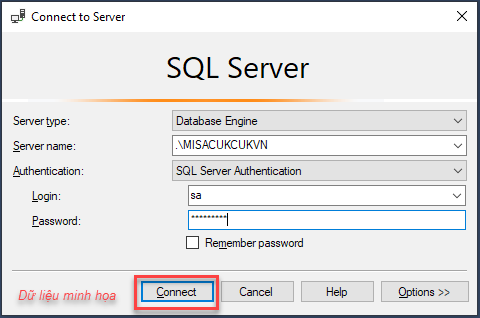
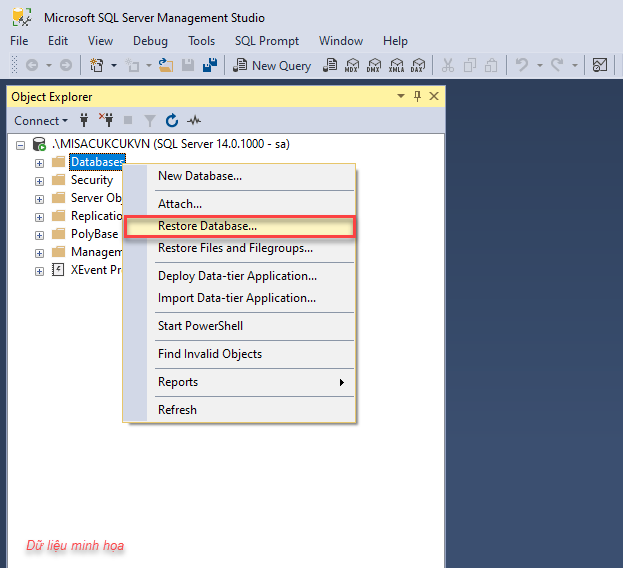
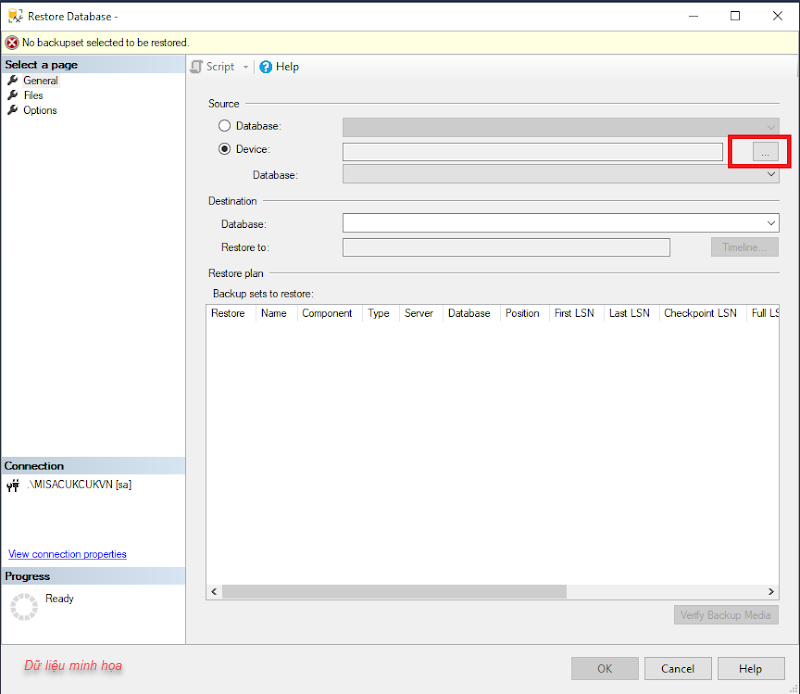
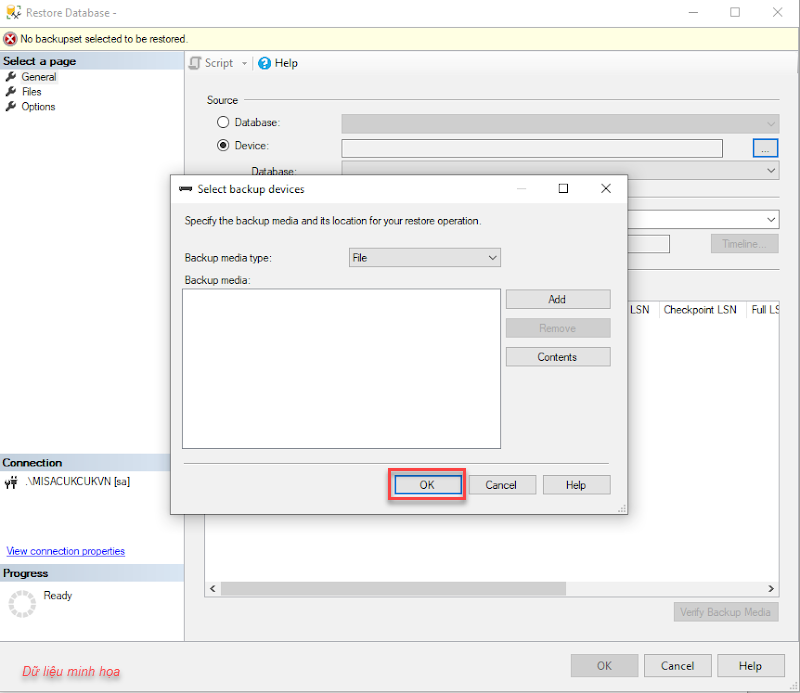
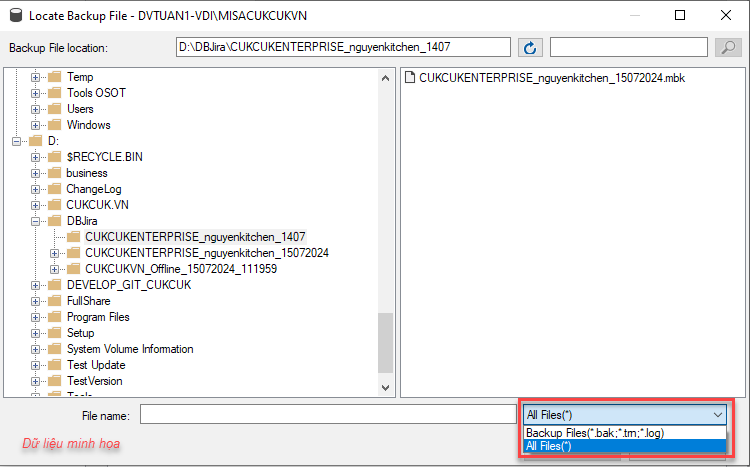
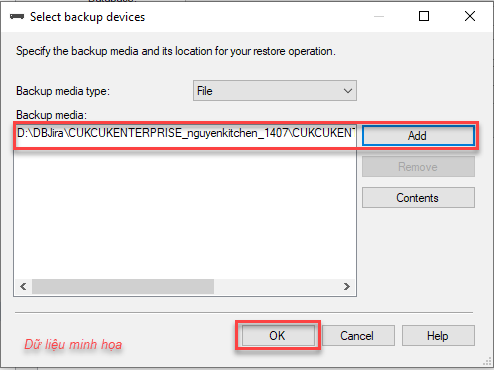
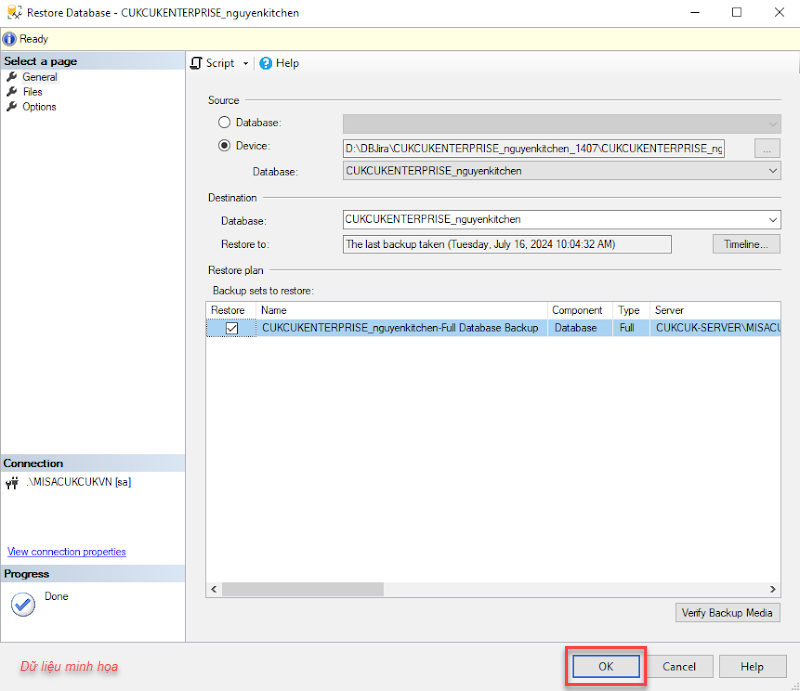
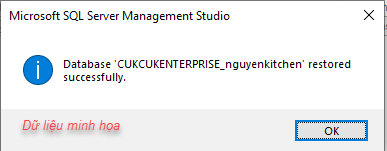
Note: As of the version R113.0.0.109, SQL Server 2017 is integrated in the installer. Download Server ENT, Sale version R113.0.0.109 or later In this step, there are 2 methods to install: Right click on the CUKCUK Setup file with the extension .exe (ENT or Sale). Select 7zip or any unzip software to unzip the file. After unzipping successfully, you can see the CUKCUK Setup folder. Next, open the folder: ISSetupPrerequisites/ SQL Server 2017. Then, you will see the file SQLEXPR_x63_ENU.exe. Right click and select Run as Administrator. Select Yes. The radio Choose Directory For Extracted Files appear. Click OK. In the radio SQL Server Installation Center, press New SQL Server stand-alone installation or add features to an existing installation. Wait a moment and you will see SQL Server 2017 Setup. Click Next. And then Next. Check Perform a new installation of SQL Server 2017. Press Next. Check I accept the license terms. Click Next. And then Next. Fill in the following information: Note: You must fill in the above information exactly, otherwise CukCuk cannot connect with SQL Server. Click Next. Click Next. Check Mixed Mode (SQL Server authentication and Windows authentication). Enter the following information: Click Next. Click Close to complete. SQL Server 2017 has been installed successfully. First, uninstall the old version of CukCuk. Then install the just-downloaded version of CukCuk. After installing it, do not log in but restore data.. Here are the steps to restore data: Open Microsoft SQL Server Studio Management. Enter the following information: Click Connect. On Database folder, right click and select Restore Database. On Device, click on the icon ... Select Add. Navigate to the path to save the .mbk backup file. Change the combo box selection to All Files (*) to see the backup file. Click OK. Click OK. Click OK. Wait for the run to finish and this message will appear. Click OK. As a result, the upgrade is successful.

Have a nice day!

