2. Add settings: Show Tip details by payment method
3. The manager can quickly set up initial menu
4. The manager can customize restaurant information
1. Improve Order at the table interface which is more attractive to refer promotion programs to guests
Purpose:
Currently, food and beverage service business models always have to face the problem of how to improve the restaurant interface to attract consumers with attractive promotions. Therefore, as of R100 version, CUKCUK has improved a number of utilities related to the Order at the table page, which helps the restaurant create professionalism, improve its image in the market, and contribute to business growth.
Instruction steps:
II. On Order at the table page
Details of change:
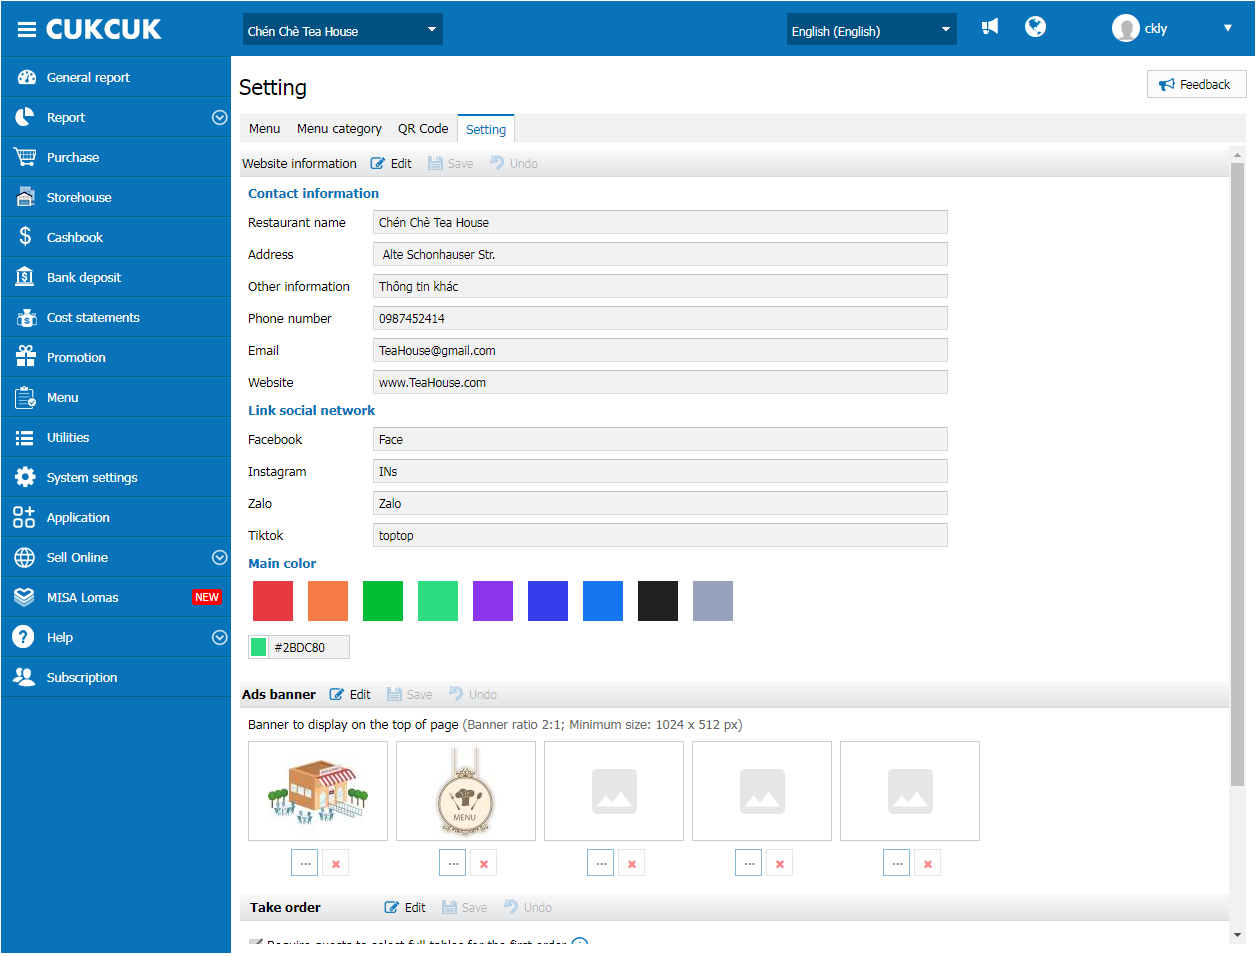
On the management page, go to Online sale/Order at the table/Settings: Improve contacts including:
1. Set up website info
– Address
– Other information
– Tel
– Email
– Website
2. Banner settings
Ratio: 2:1
Minimum size: 1024x512px
3. Main color
The manager can customize colors by entering the desired color code in the box below.
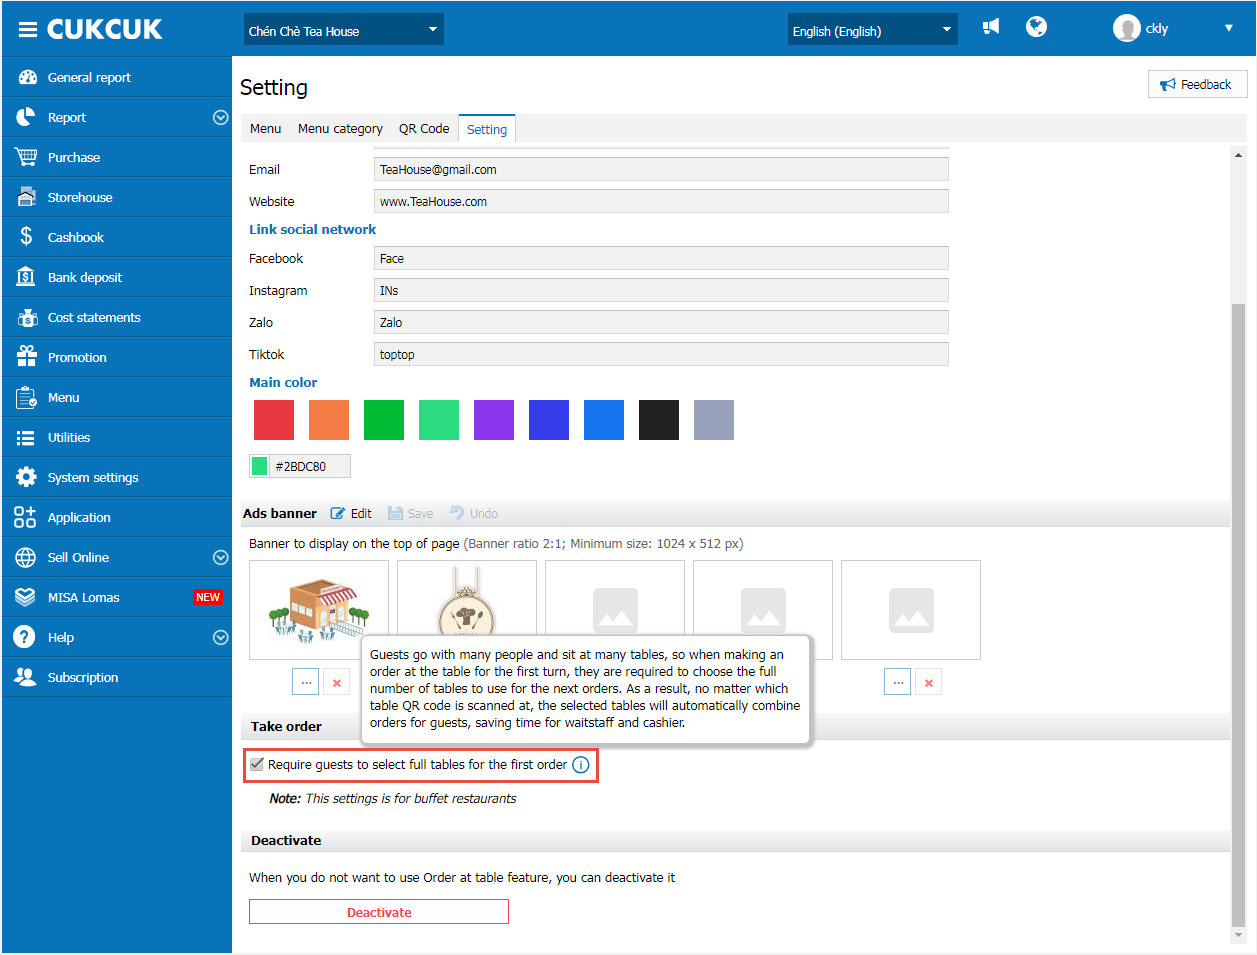
4. Take order
At Take order, check the box Require the guests to select table number for the first time of order so that the guests can add mutliple tables. When they scan QR Code, table numbers they select will be automatically merged.
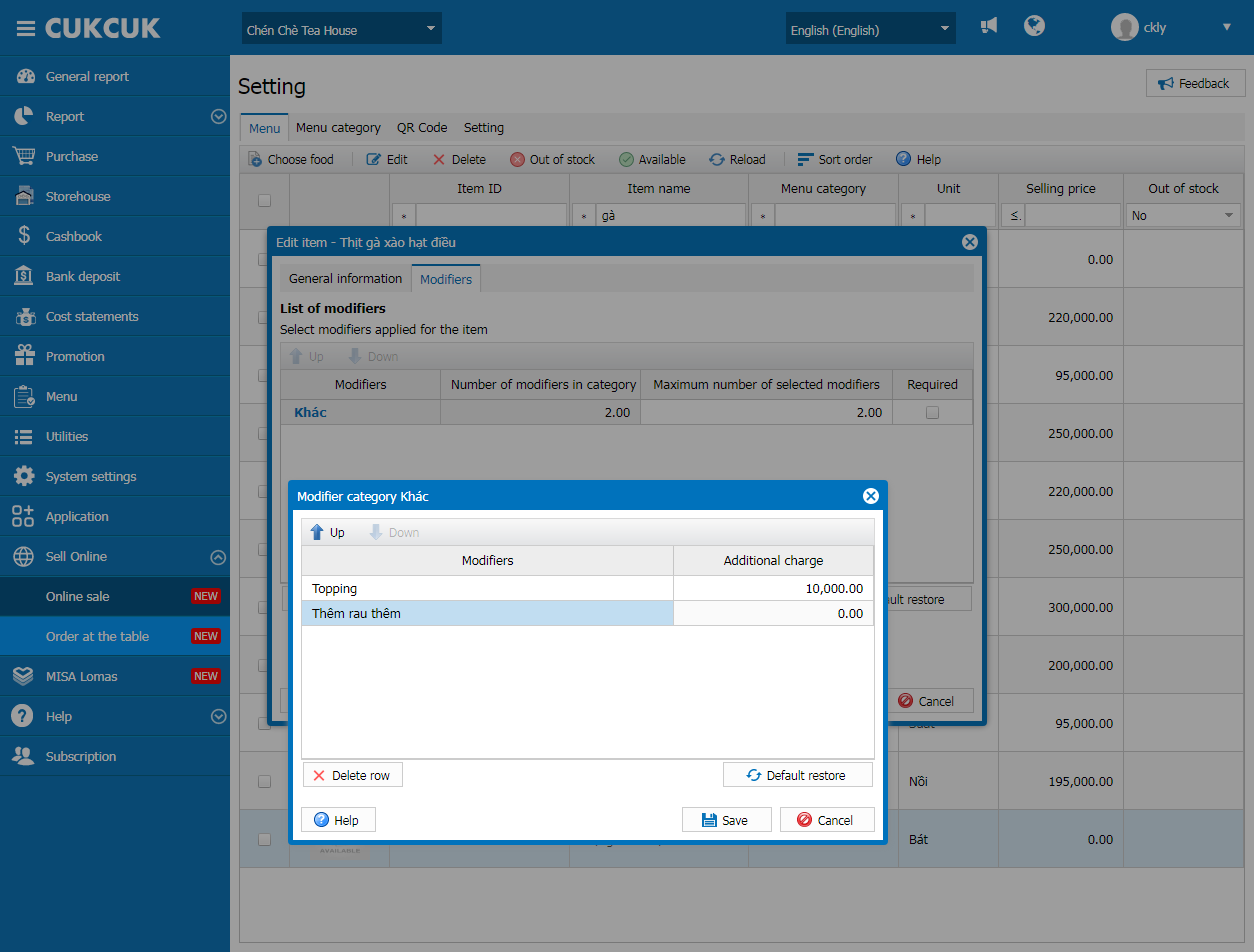
5. Modifier
Go to Online sale/Order at the table and select Menu/Edit/Modifier, the manager select the maximum selectable number of modifiers.
Then click Save.
II. On Order at the table page
Currently on the homepage and on the checkout screen, when the guest accesses the Order at the table page, the screen does not display the promotion details. Upon checking out, they do not know the promotions to apply. This will create a bad experience for the guests. Therefore, the software has made the following improvements:
– Show banner on Order screen
– Show table name and item details
– Show total amount of items in the cart
– Show order status
– Show contact screen
Here are details:
On Order screen:
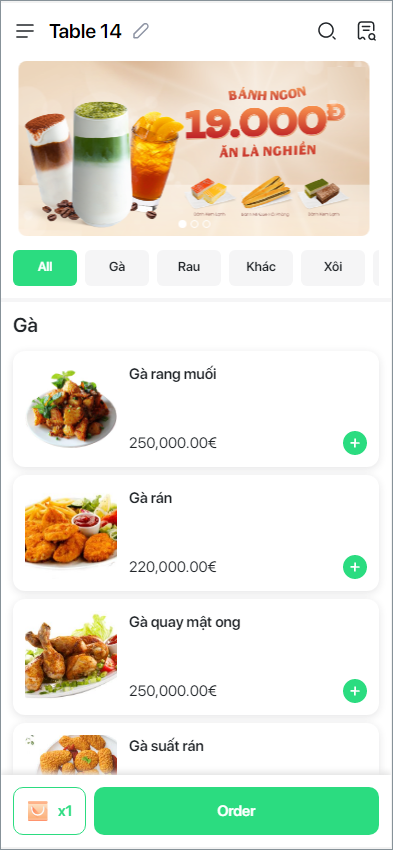
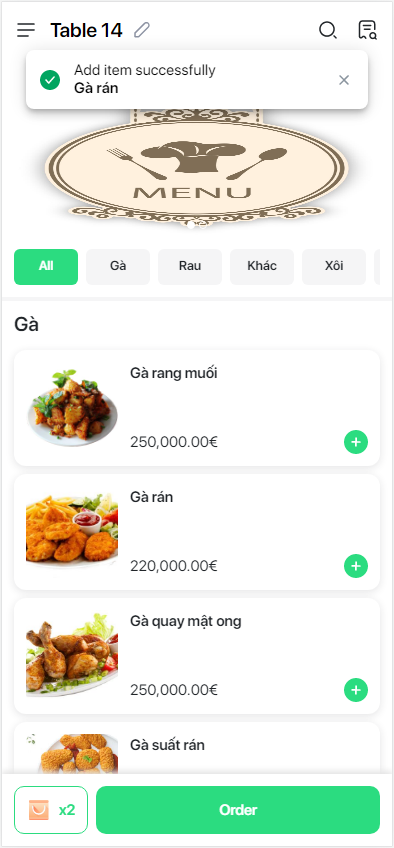
– Show banner on Order screen
- When the guest goes to the Order at the table page, promotion programs will be shown as below.
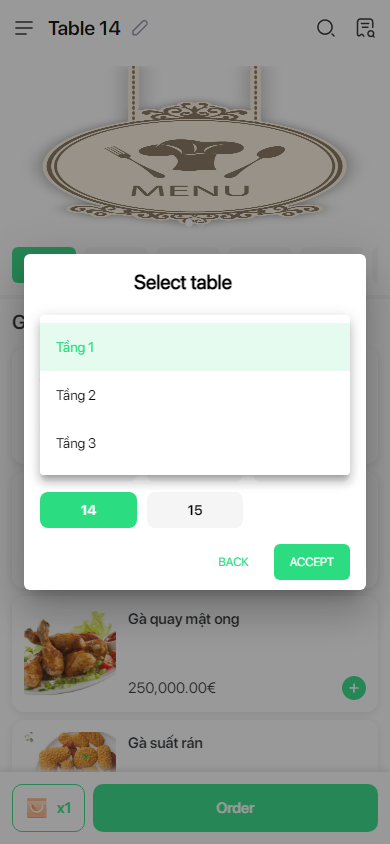
– Show table name and item details
- After placing order, the guest can change or add table and click OK to confirm.
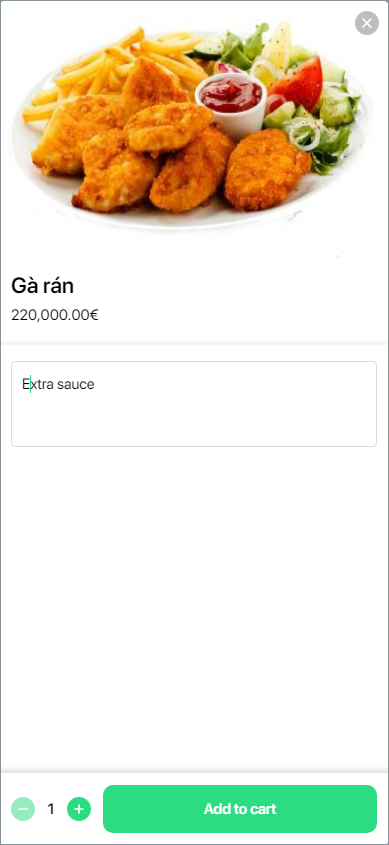
- On Item details screen, the guest selects modifiers, enters note and adds quantity.
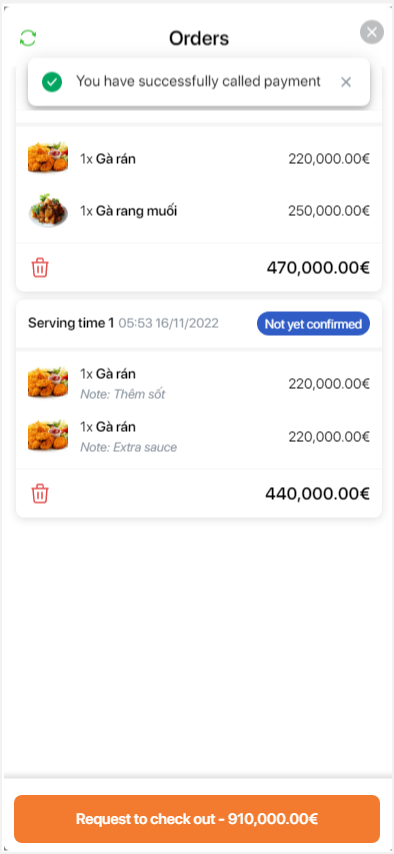
– Show total amount of items in the cart
- On Cart screen, show selected items and total amount as in the image below.
- By clicking on Order, order will be sent to the waitstaff’s device.

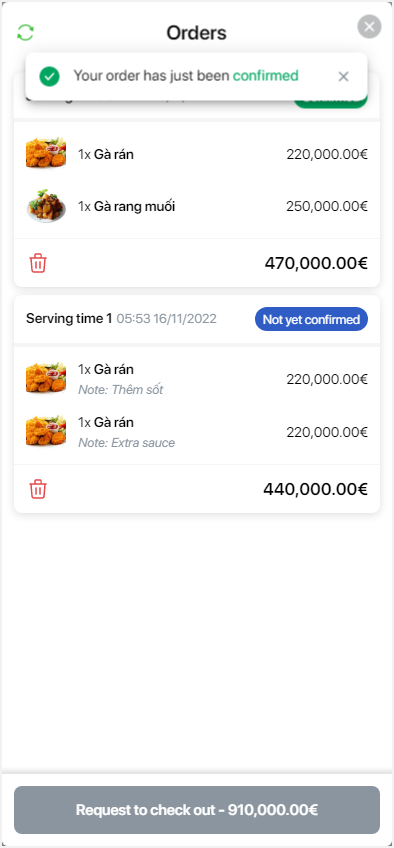
– Show order status:
- For Not yet confirmed status:
After placing order and the cashier has not confirmed, order will be in Not yet confirmed status.
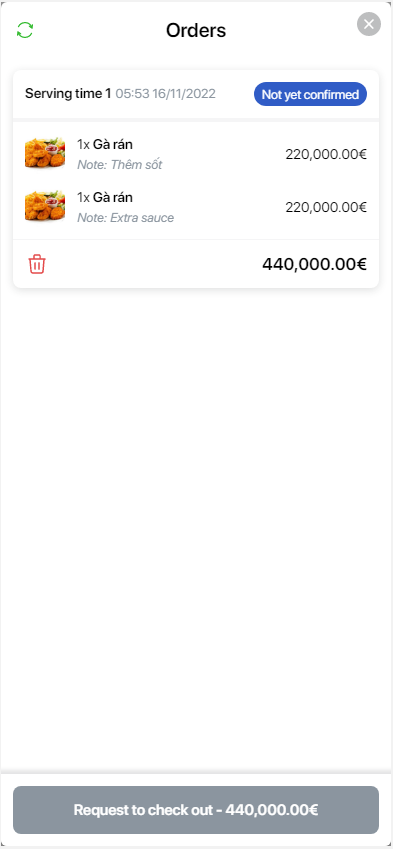
Note: If any item in the order is canceled, it will be removed from Order screen.
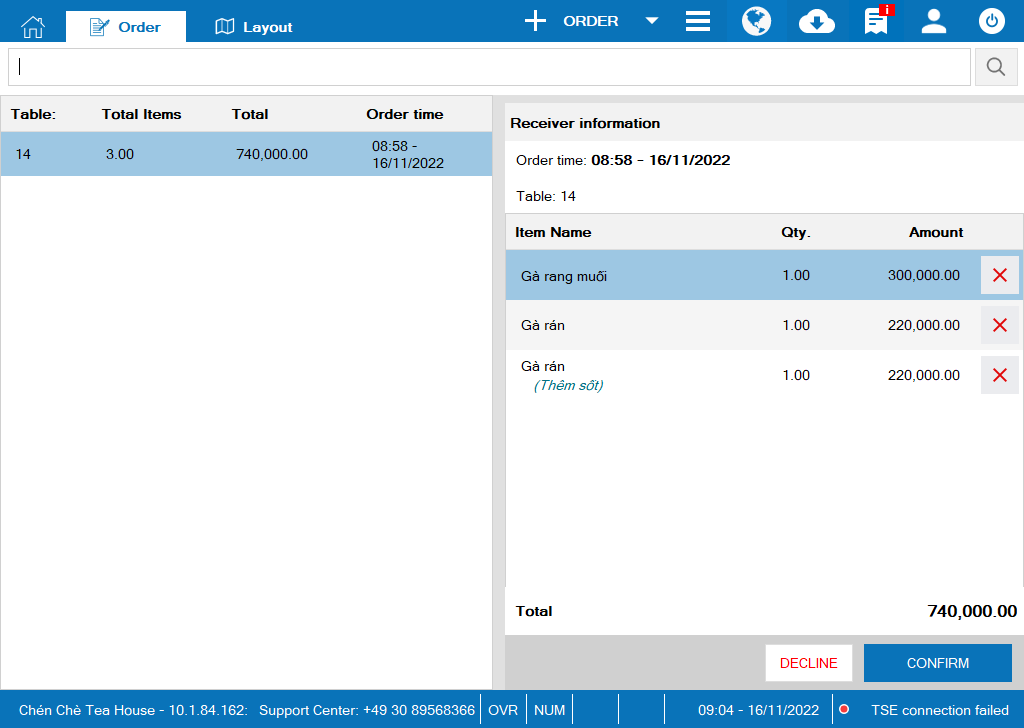
- For Confirmed status:
After the cashier has confirmed order, order status will be Confirmed.
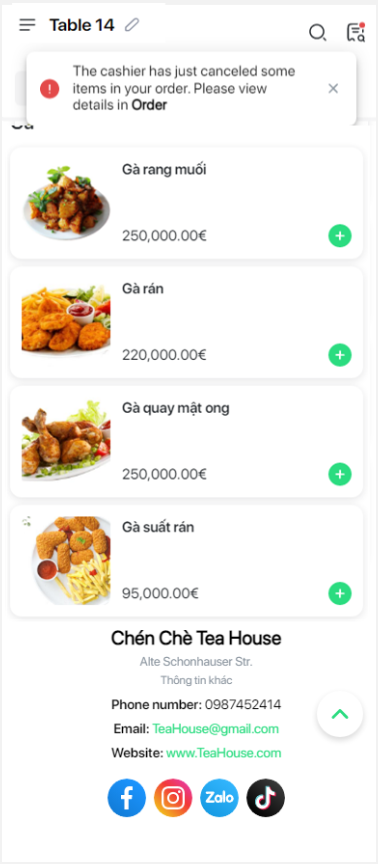
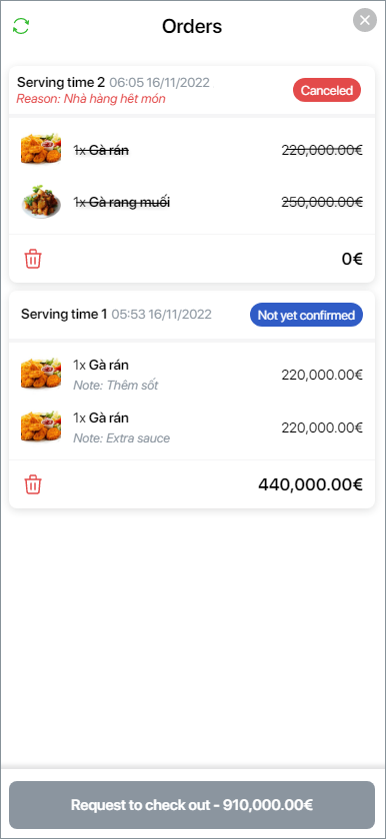
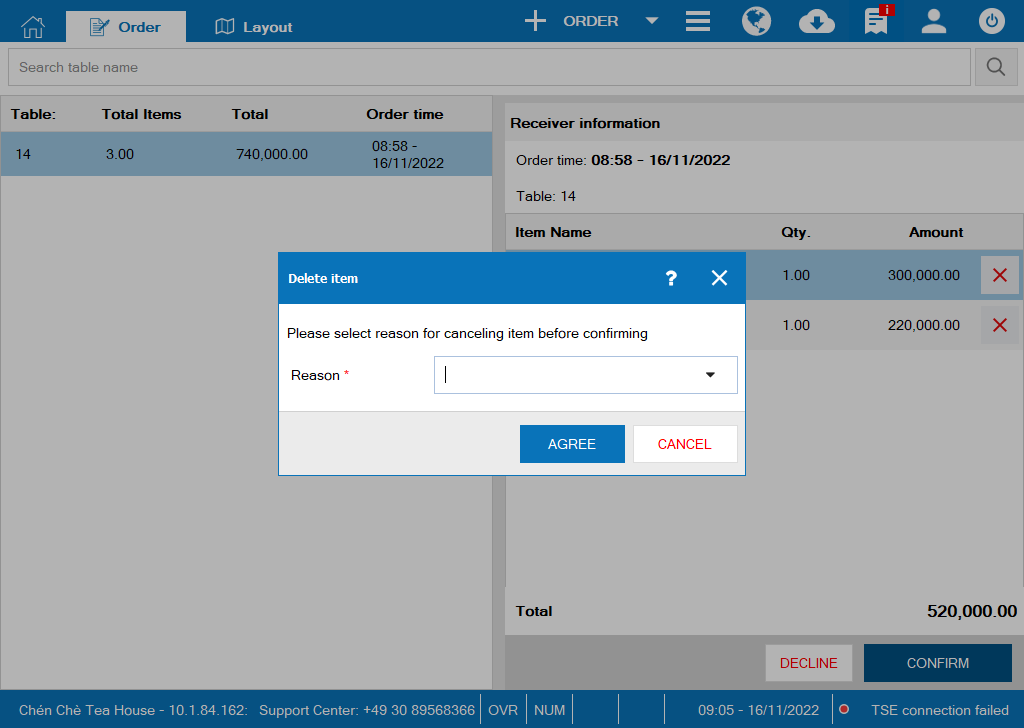
- For Canceled status
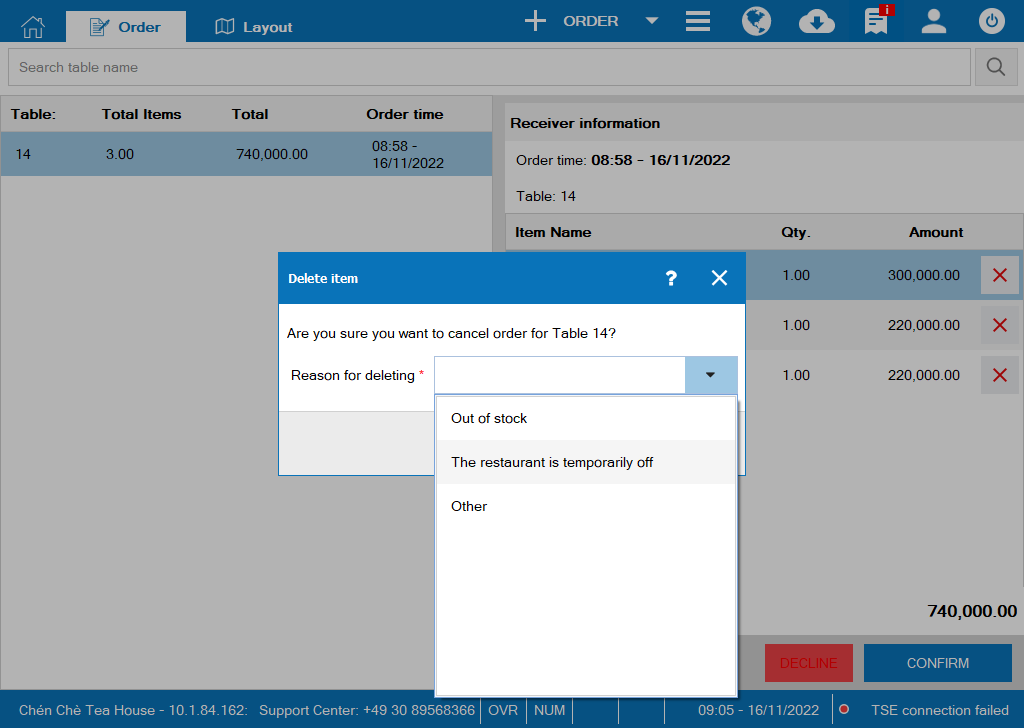
If the item ordered is out of stock, the cashier cancels it. On Order screen, these items will be in Canceled status. The program will show reason as in the image.
– Show contact screen
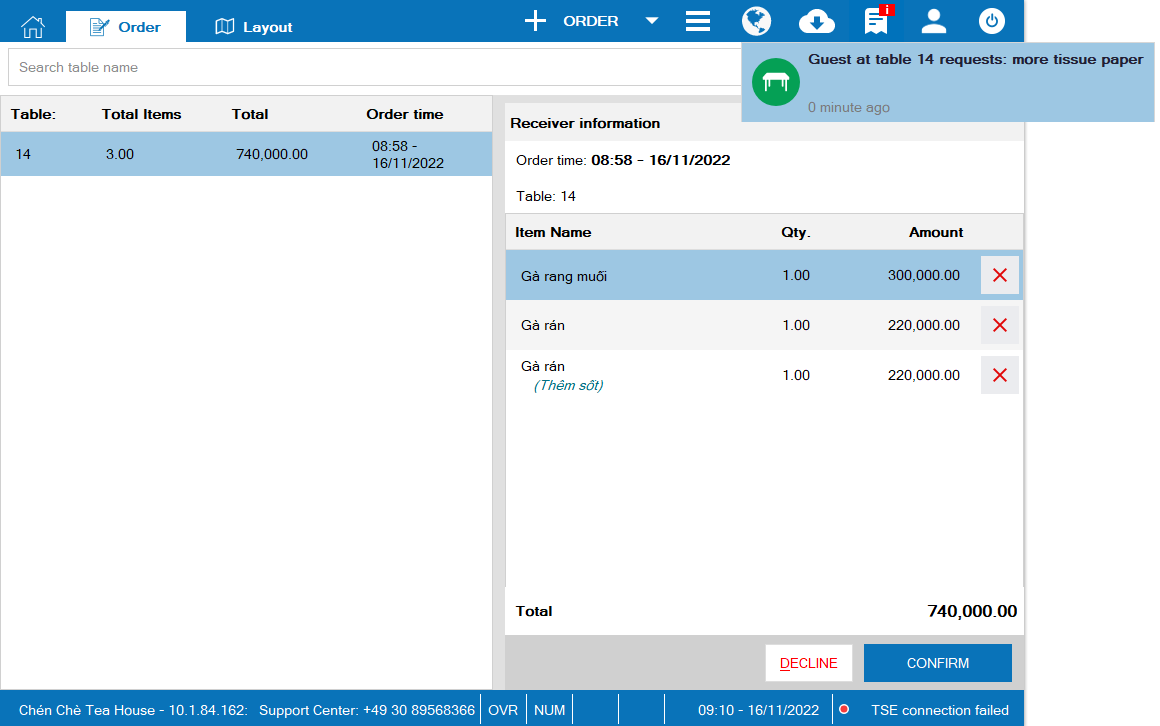
If the guest wants to get help from the staff, click on Request staff and enter their requests to send to cashier.
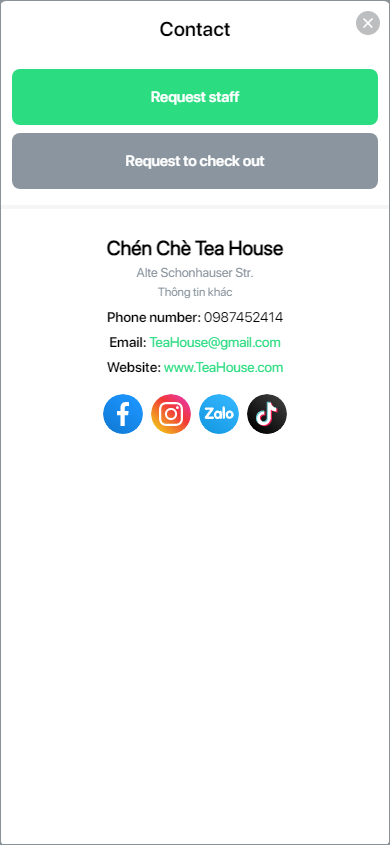
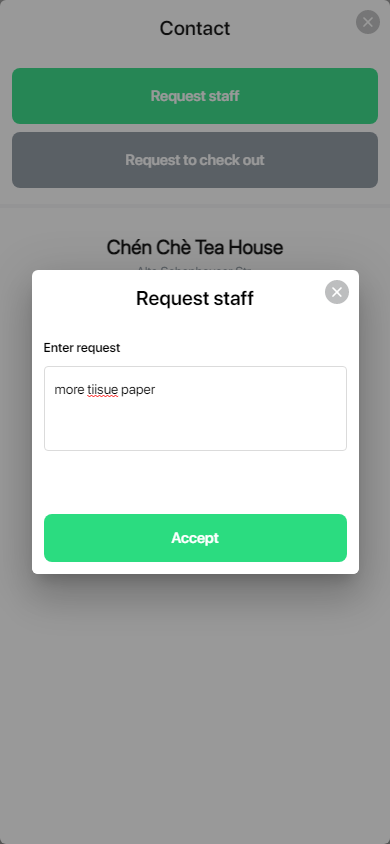
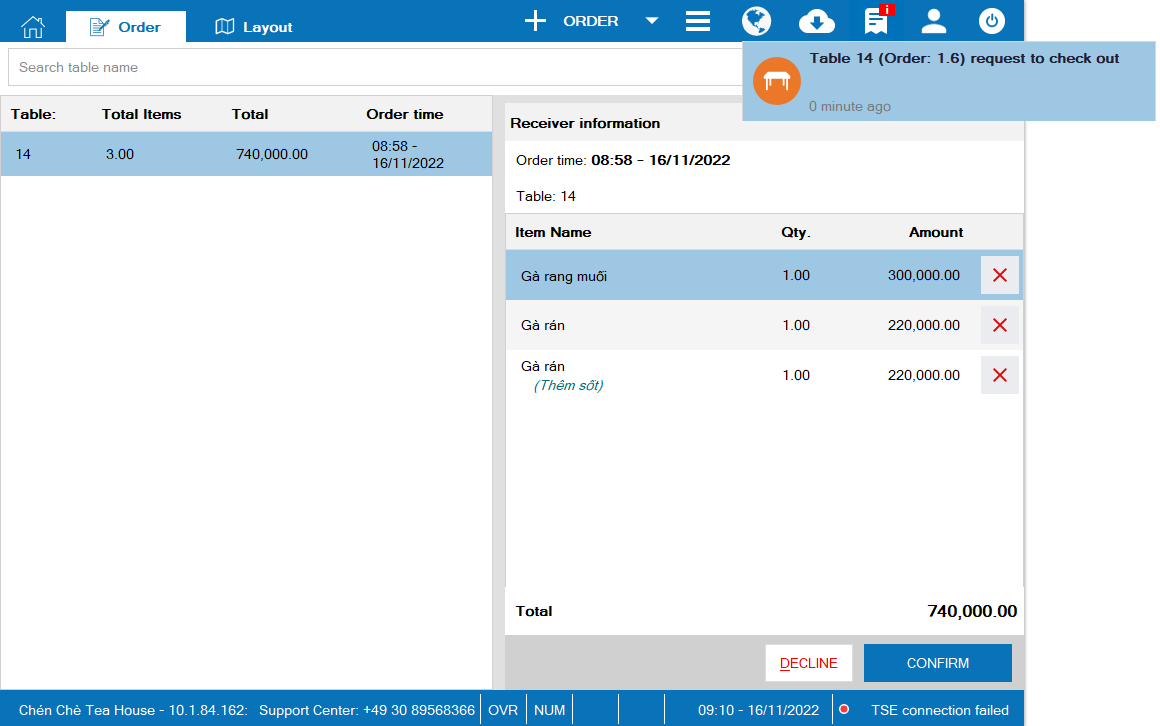
After the meal, click on Request to check out to make payment.
Previously, if a guest canceled order, to accept this cancellation the cashier had to seek the manager’s confirmation, which took time and slowed down their service. Therefore, the software has been improved to allow the cashier to enter the reason for the guest’s cancellation and accept it.
Moreover, when the guest requests help from staff, this request will be shown as in the image below.
If the guest requests to check out, this request will be shown as in the image below.
2. Add settings: Show Tip details by payment method
Purpose:
The manager can check tip details by payment method to compare with printed receipts and bank statement (transfer, Paypal)
Instruction steps:
2.1 On PC
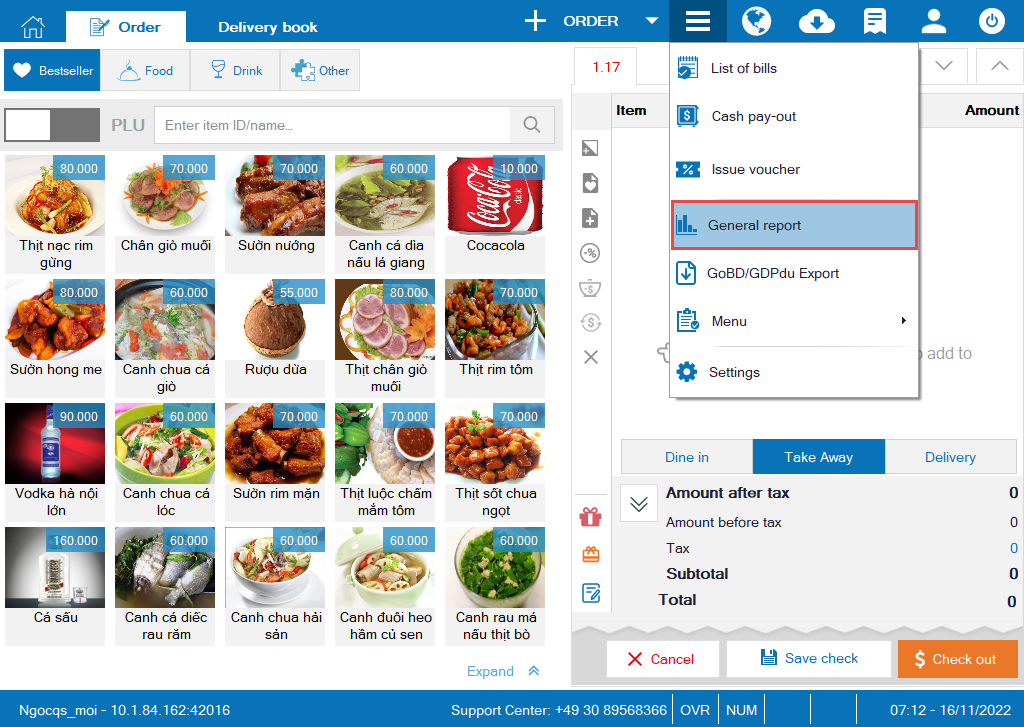
On PC/POS, click on the icon![]() and select General report
and select General report
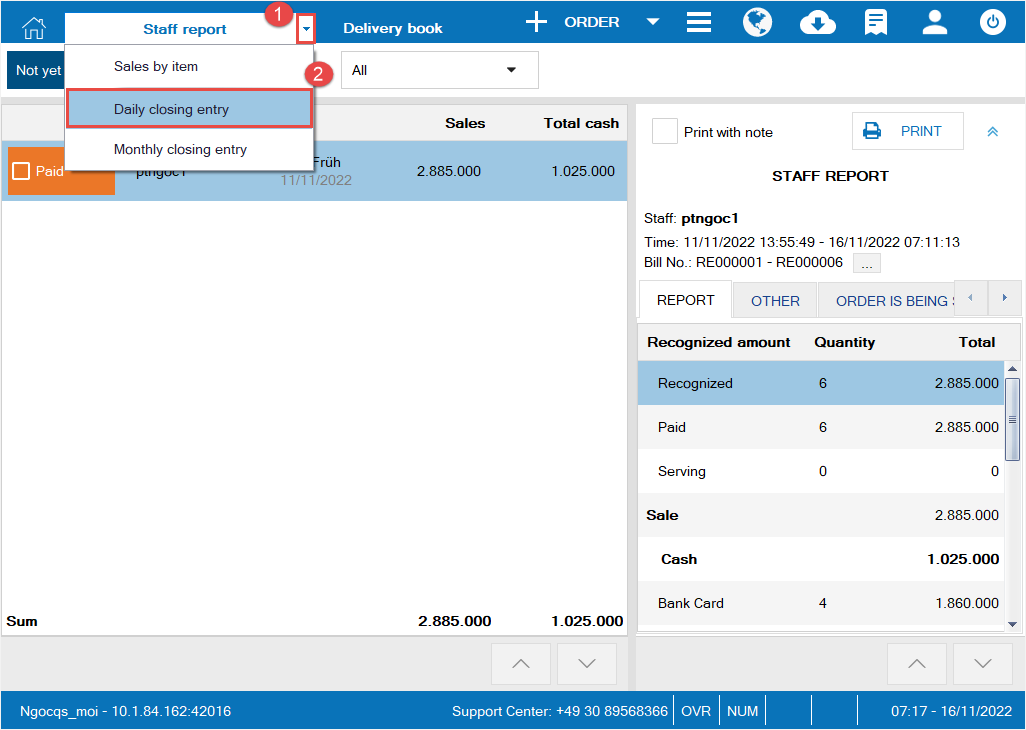
On Staff report tab, click on the icon![]() and select Daily closing entry
and select Daily closing entry
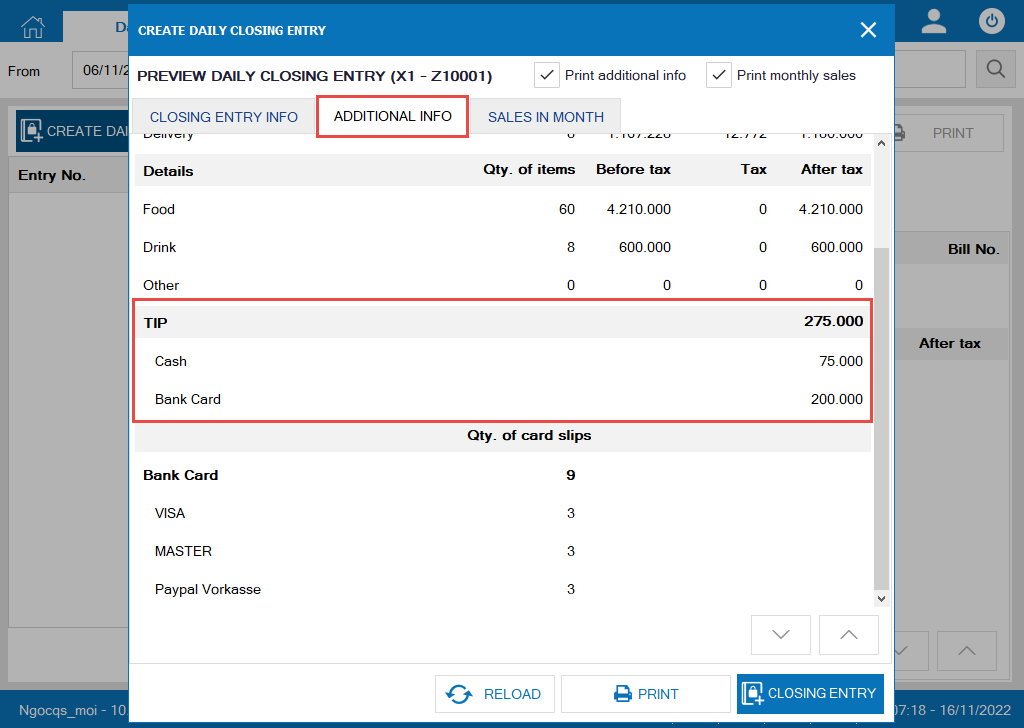
Next select Create daily closing entry/Additional info, the screen shows tip details by payment method as below.
2.2 On Quick service version (QS)
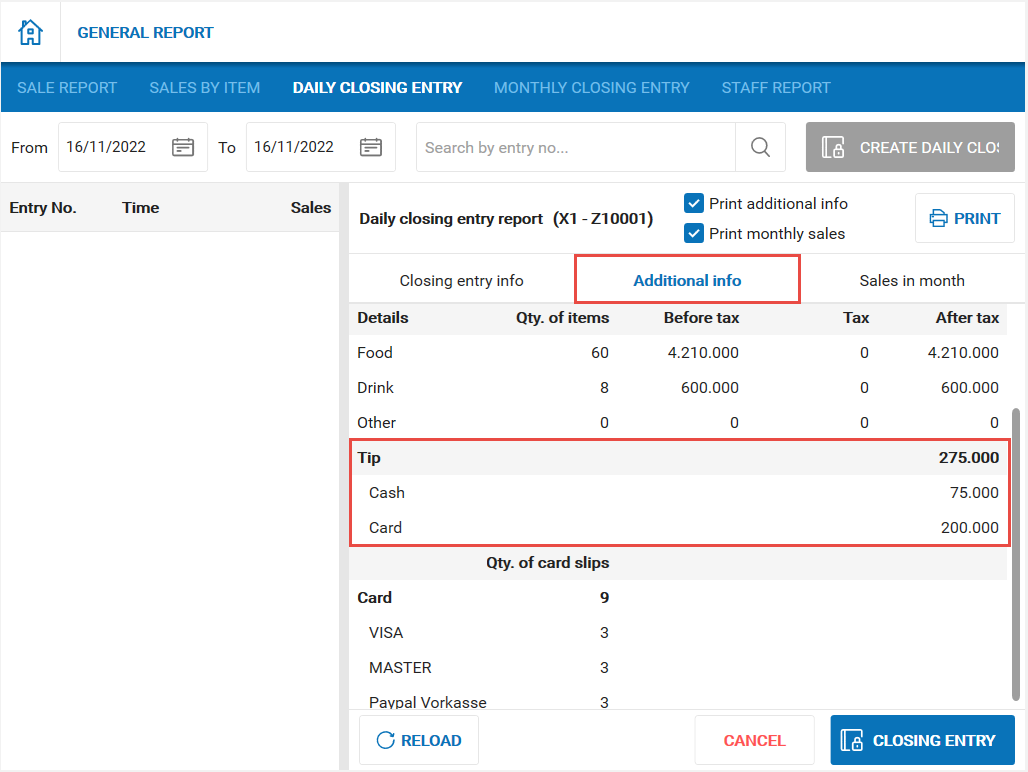
On Quick service version, the cashier selects General report/Closing entry
Next select Create daily closing entry/Additional info, the screen show tip details by payment method as in the image below.
3. The manager can quickly set up initial menu
Purpose: The manager can quickly set up initial menu
Instruction steps:
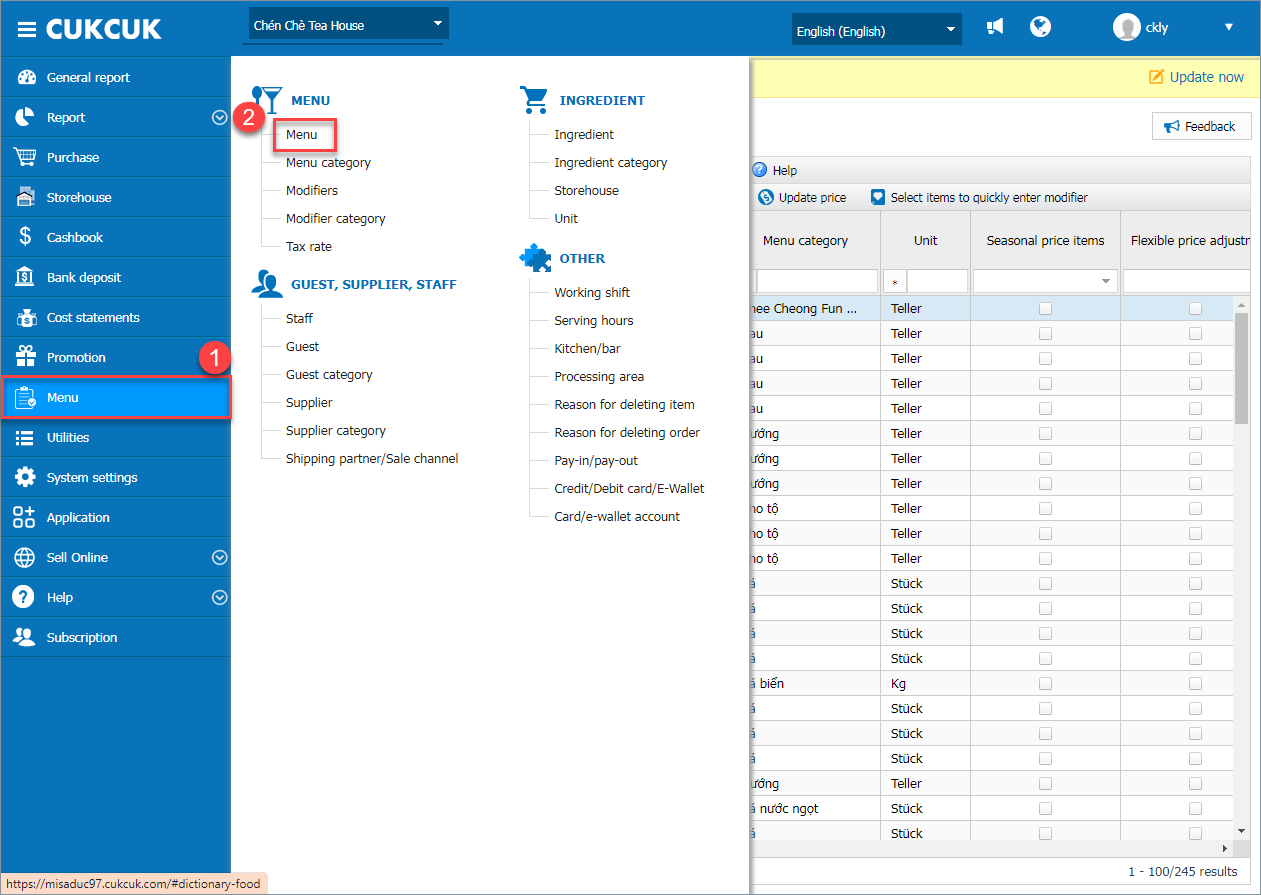
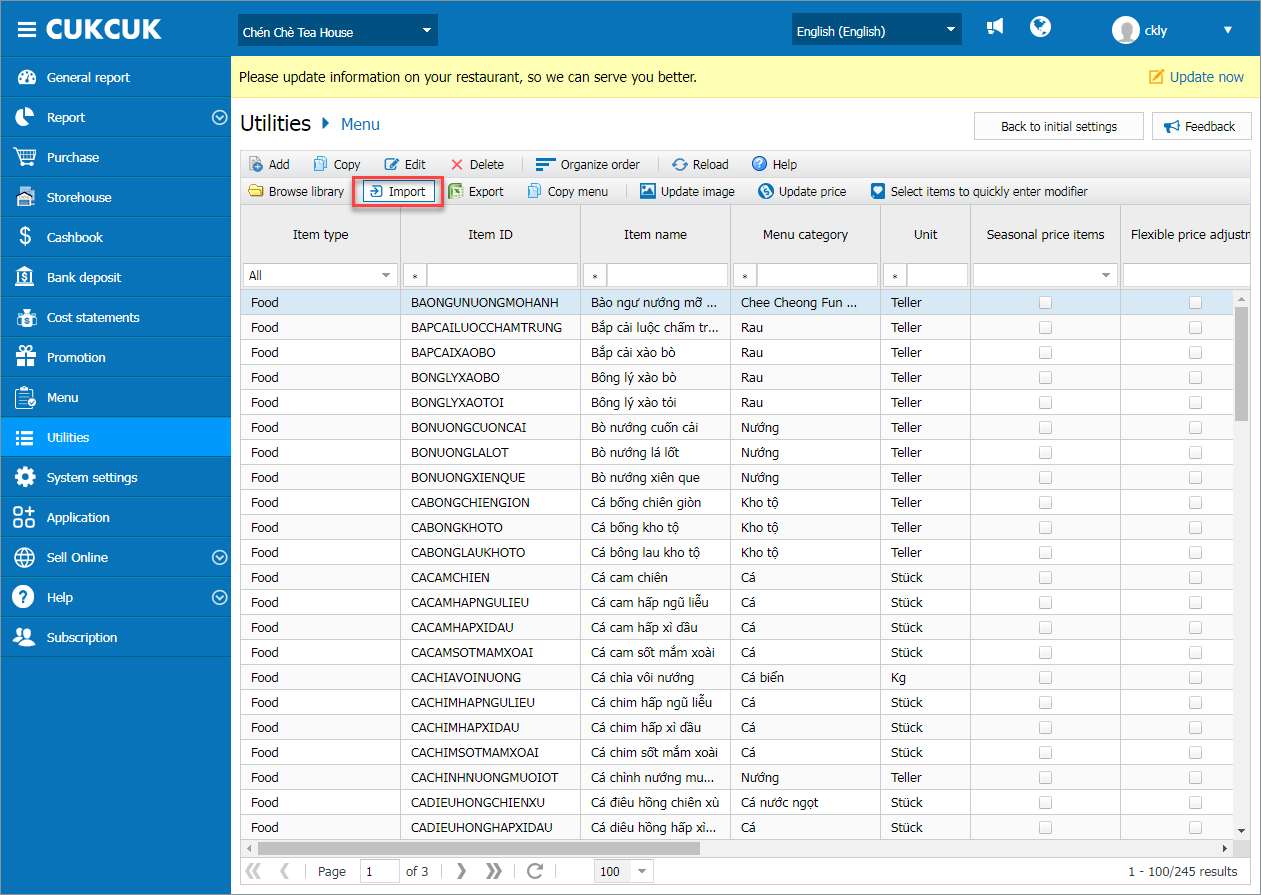
On the management page, go to Utilities/Menu select Import.
On Import tab, the manager clicks on Here to download the template.
Then select the fields to be updated in the import file and click on Download import file.
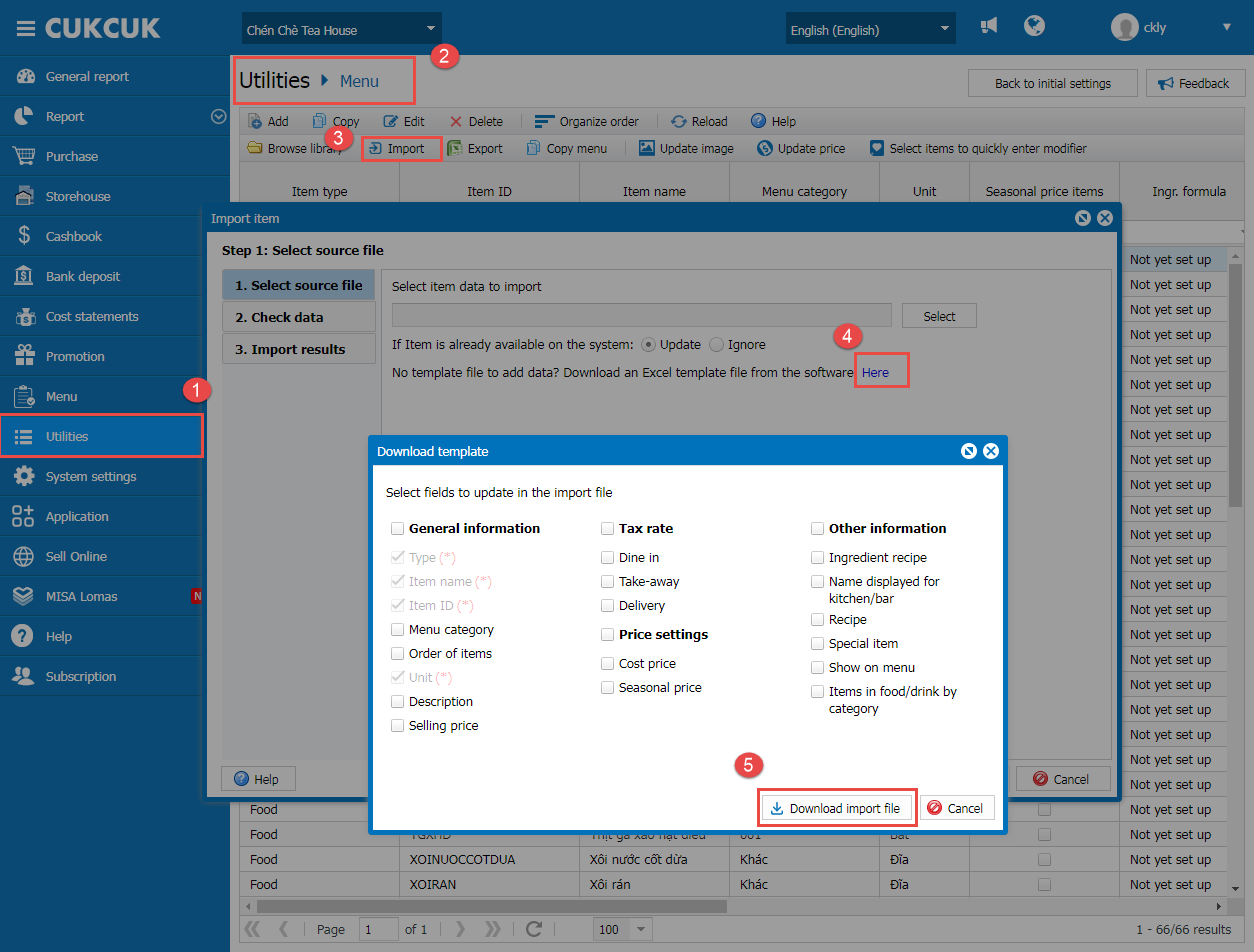
Note: The manager needs to fill in all information correctly
Next, import this file to the software as below:
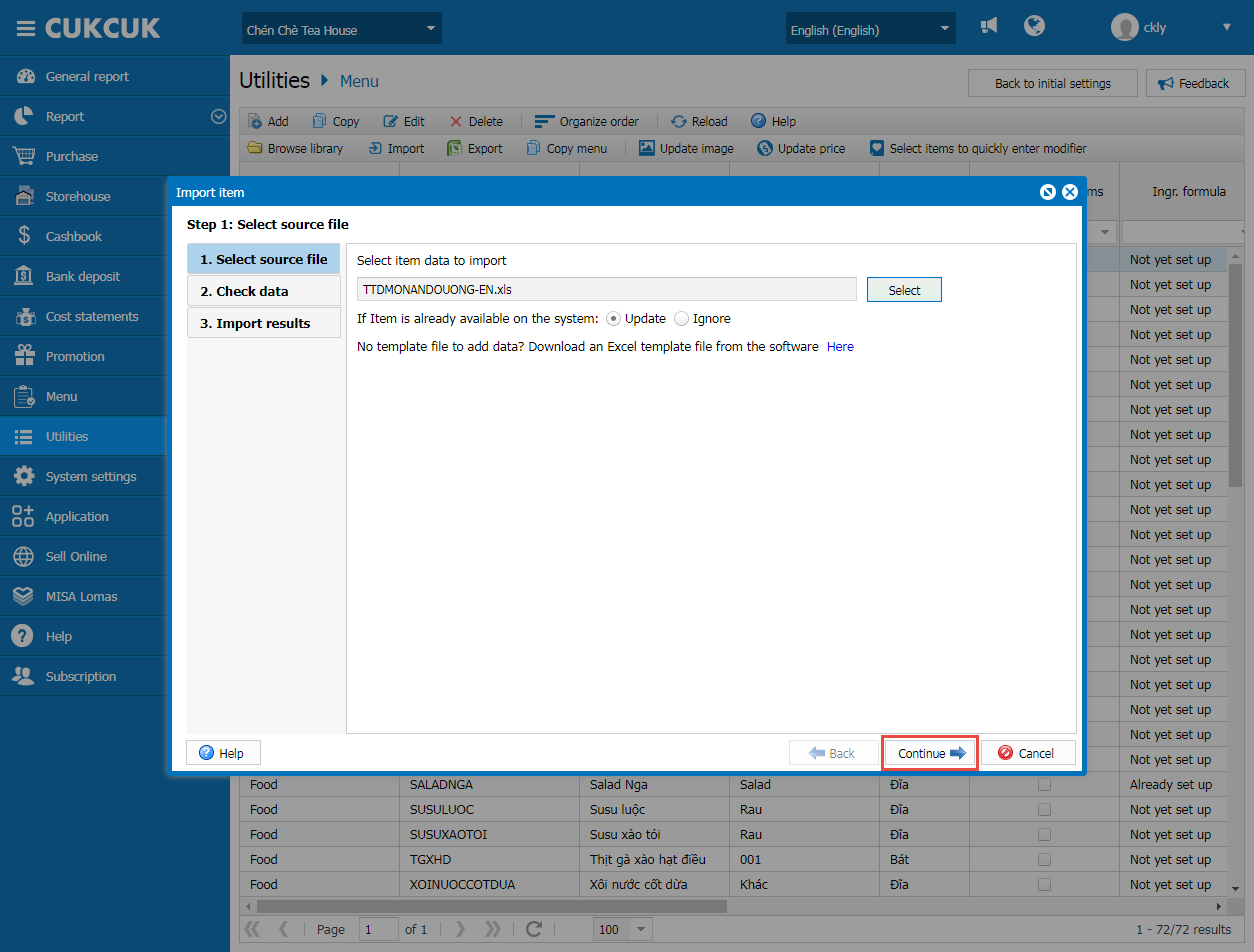
Step 1: Select source file
Click Select to import file to the software and then click Continue
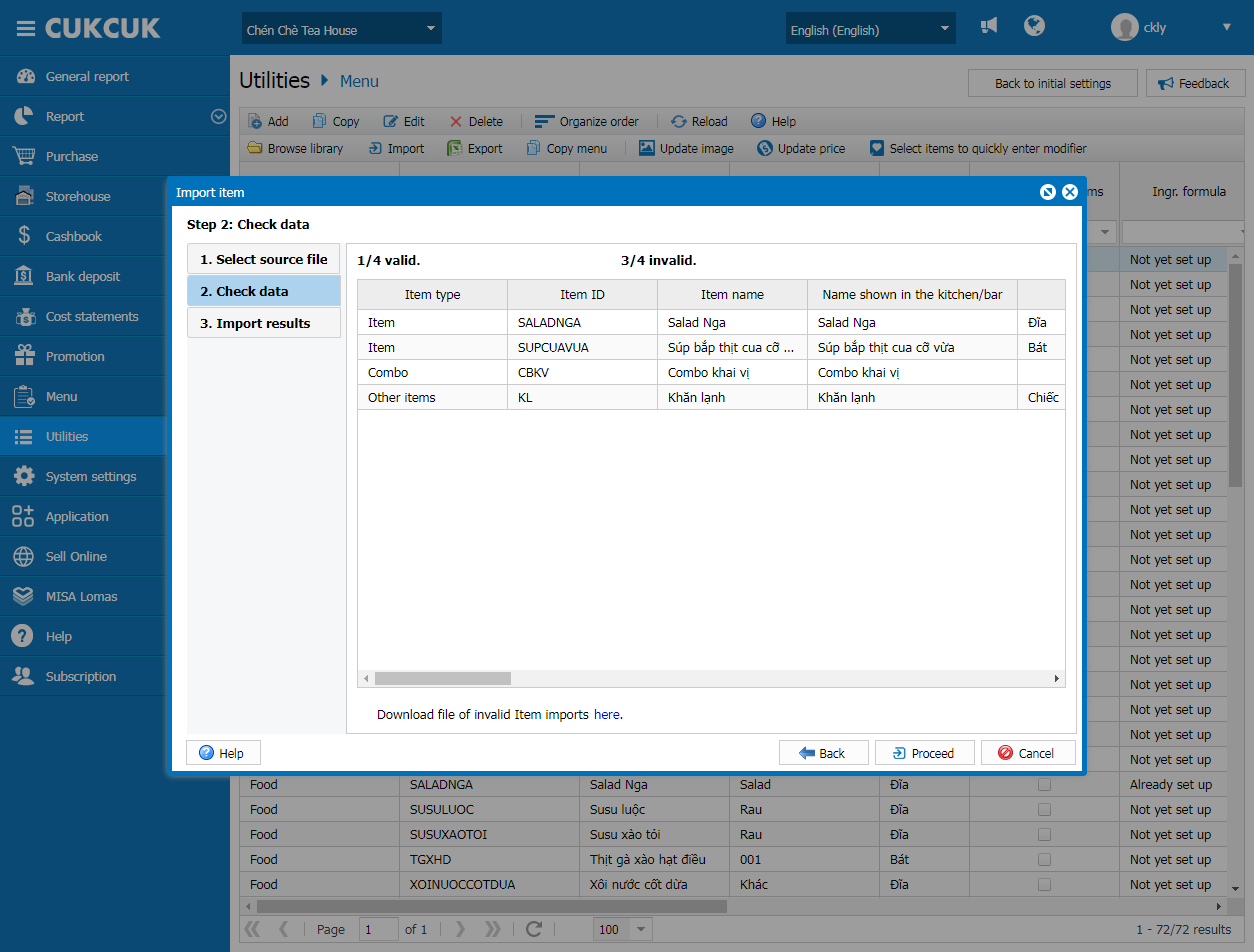
Step 2: Check data
After importing file to the software, the program will check the validity.
Click Proceed to continue.
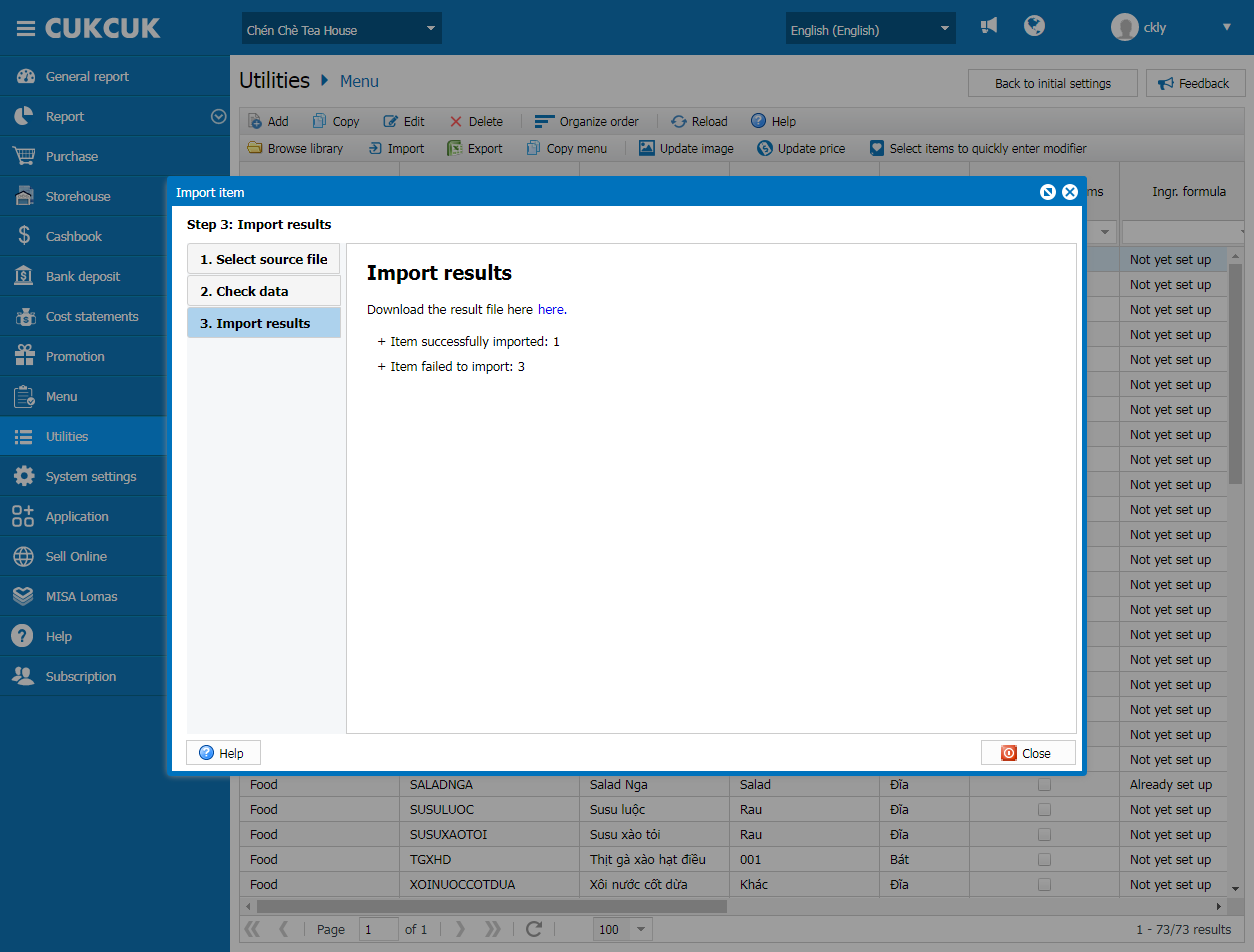
Step 3: Check import results
The software shows valid and invalid items as in the image below.
Click Close to complete the import.
4. The manager can customize restaurant information
Purpose:
The manager can customize restaurant information such as state, city/area
Instruction steps:
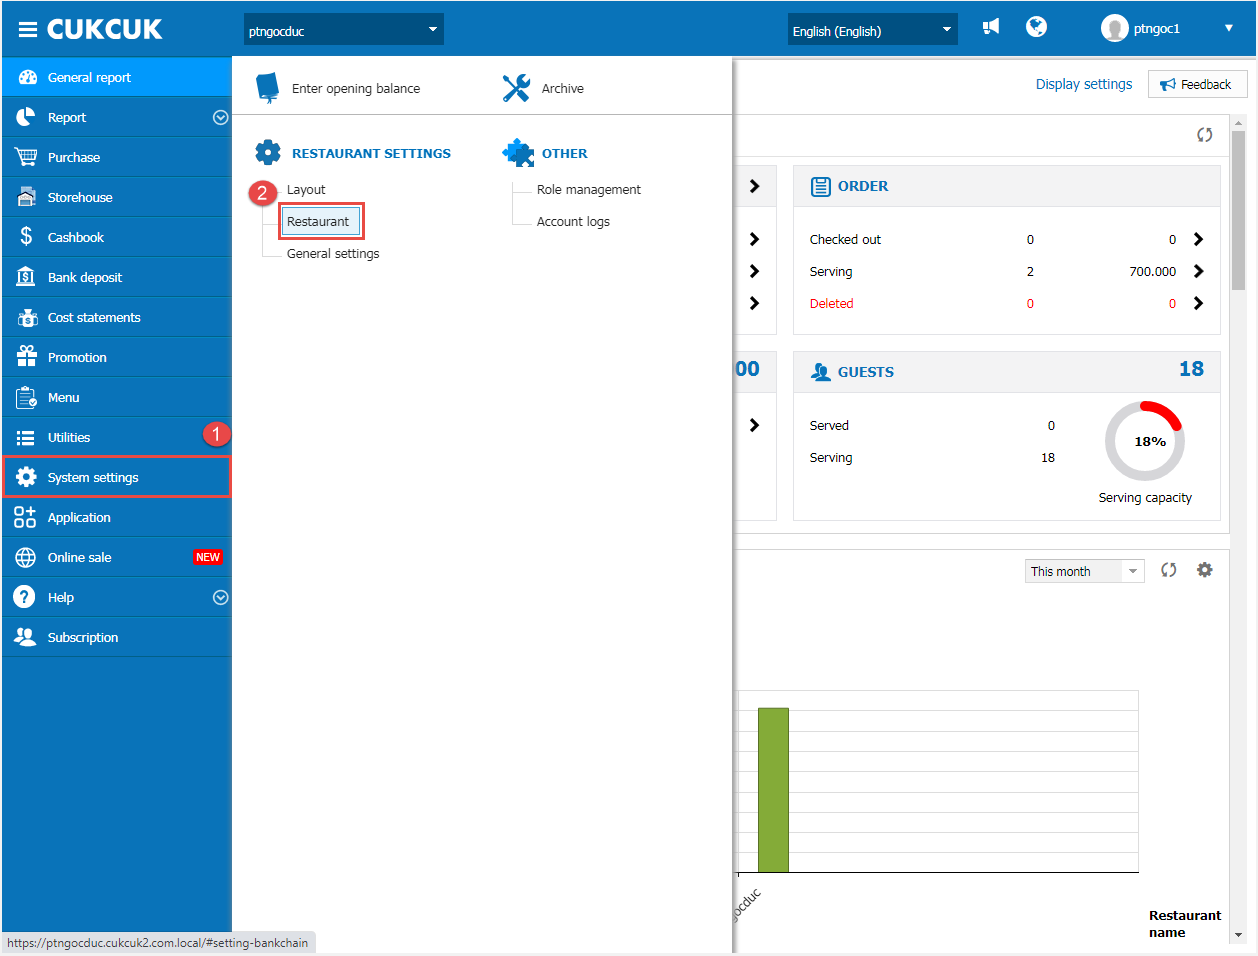
On the management page, select System settings/Restaurant and click Add or Edit.
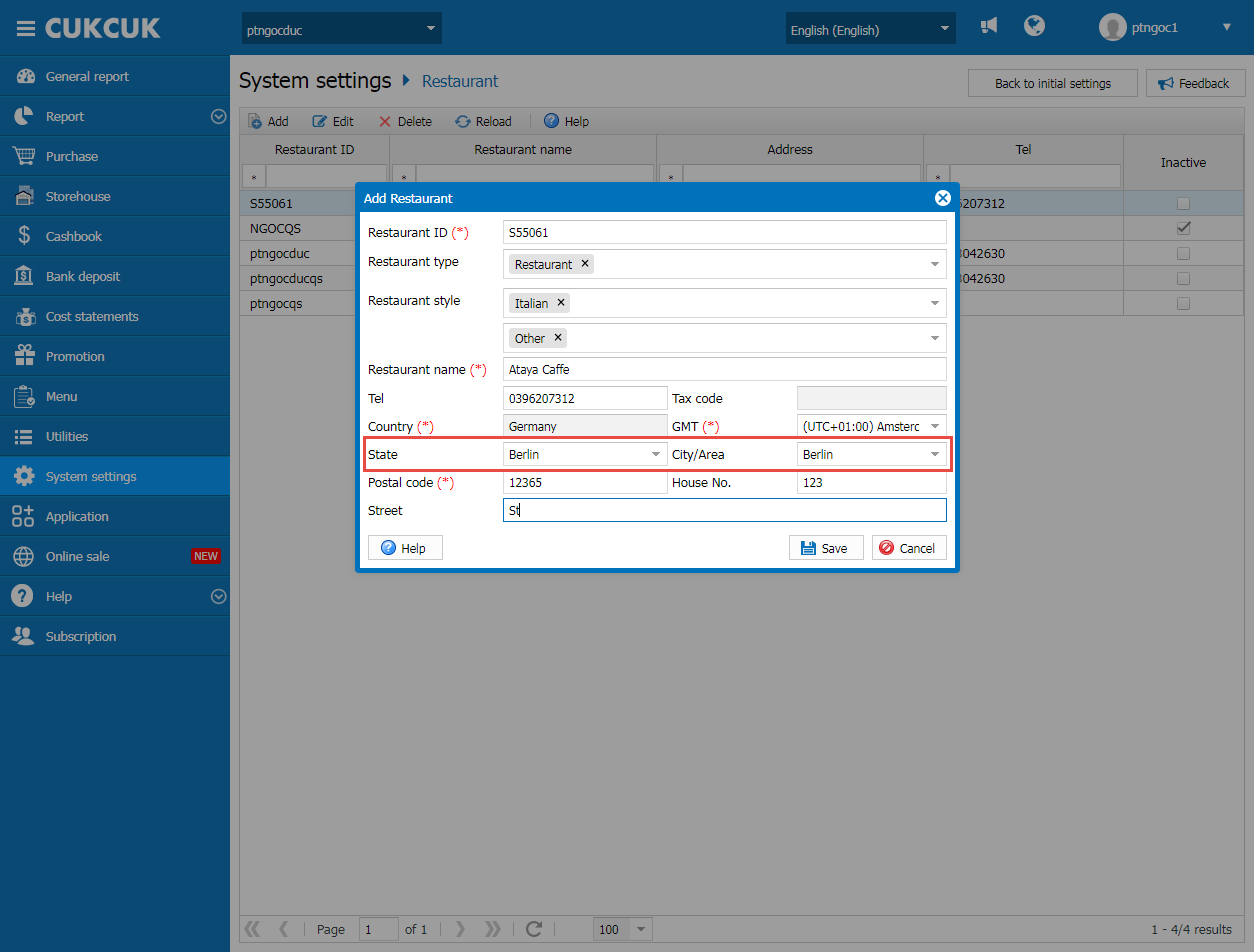
Fill in the fields as in the image below.
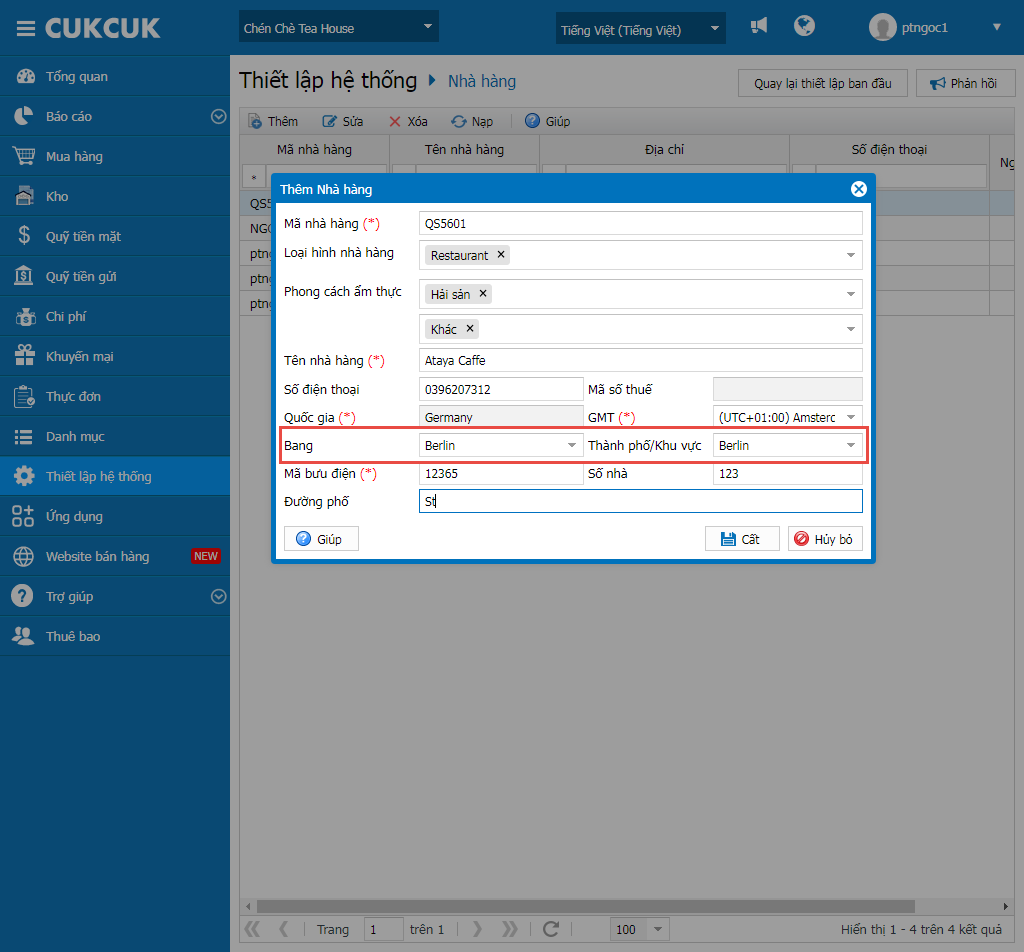
Note: You can manually enter information on State, Area/City or leave it blank.
Enjoy your day!
